
More painting with Ragnarok, posted by me because teaching a painter how to sign into a blog and post his own article is proving to be a challenge!! – NB
Saturday the 25th of May, a not so local (but still very awesome) hobby shop, The Hobby Kingdom, ran their annual Most Extreme Annihilation Challenge event (which is loads of fun!). This event awards style points for many things like amazing army themes (including the option to come in costume to match your themed army), or extra points for an epic way of slaying an opponent’s Warbeast/Warjack. The style points I was most interested in were the painting points! Nothing like the anticipation of a fun event to get one out of a 6 month painting funk, like most hobbyists I go through painting phases. And I usually need a push to get out of a funk phase. Thanks to the MEAC2013 I was inspired to paint a Warlock I have wanted to get to for a long time! Kaya the Moonhunter and her trusted companion Laris. This blog will take us on a journey of how I got the pair of beautiful models painted.
Just a quick disclaimer before we get going. I have not yet updated my paint collection to the new GW colours so all the paint “names” I will be using in this blog will all be the old and outdated names. Please refer to this page for the GW paint name conversion chart:
So let’s get started ….
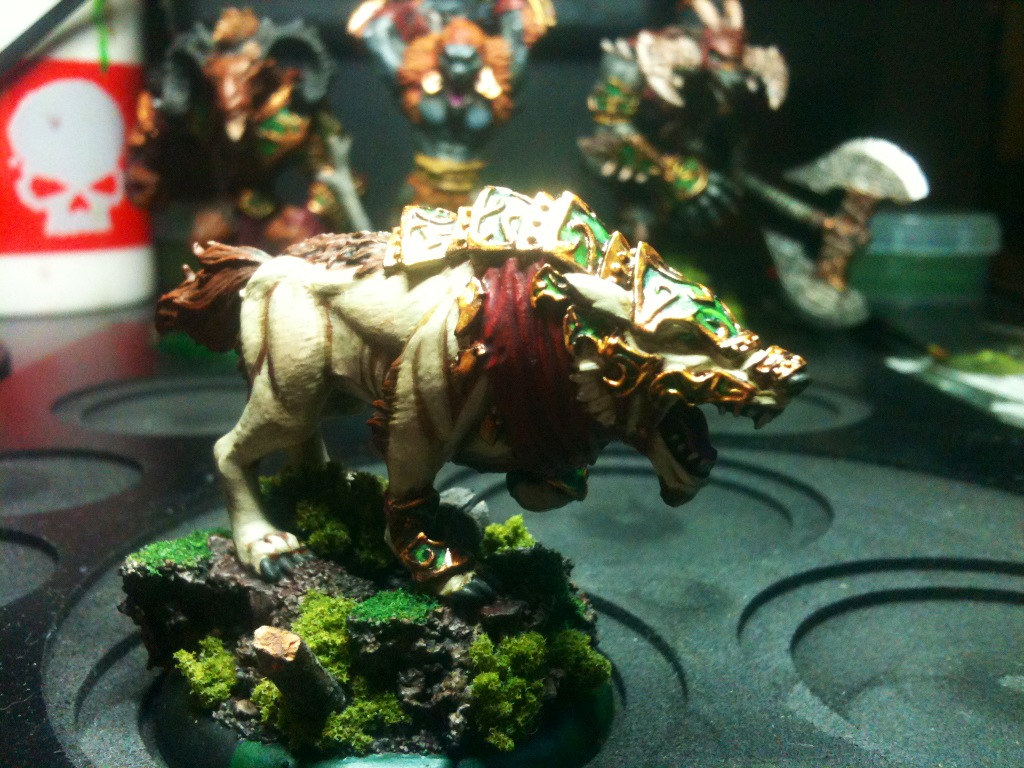
With Laris:
After cleaning and assembling Laris I primed him using GW Chaos Black Primer.
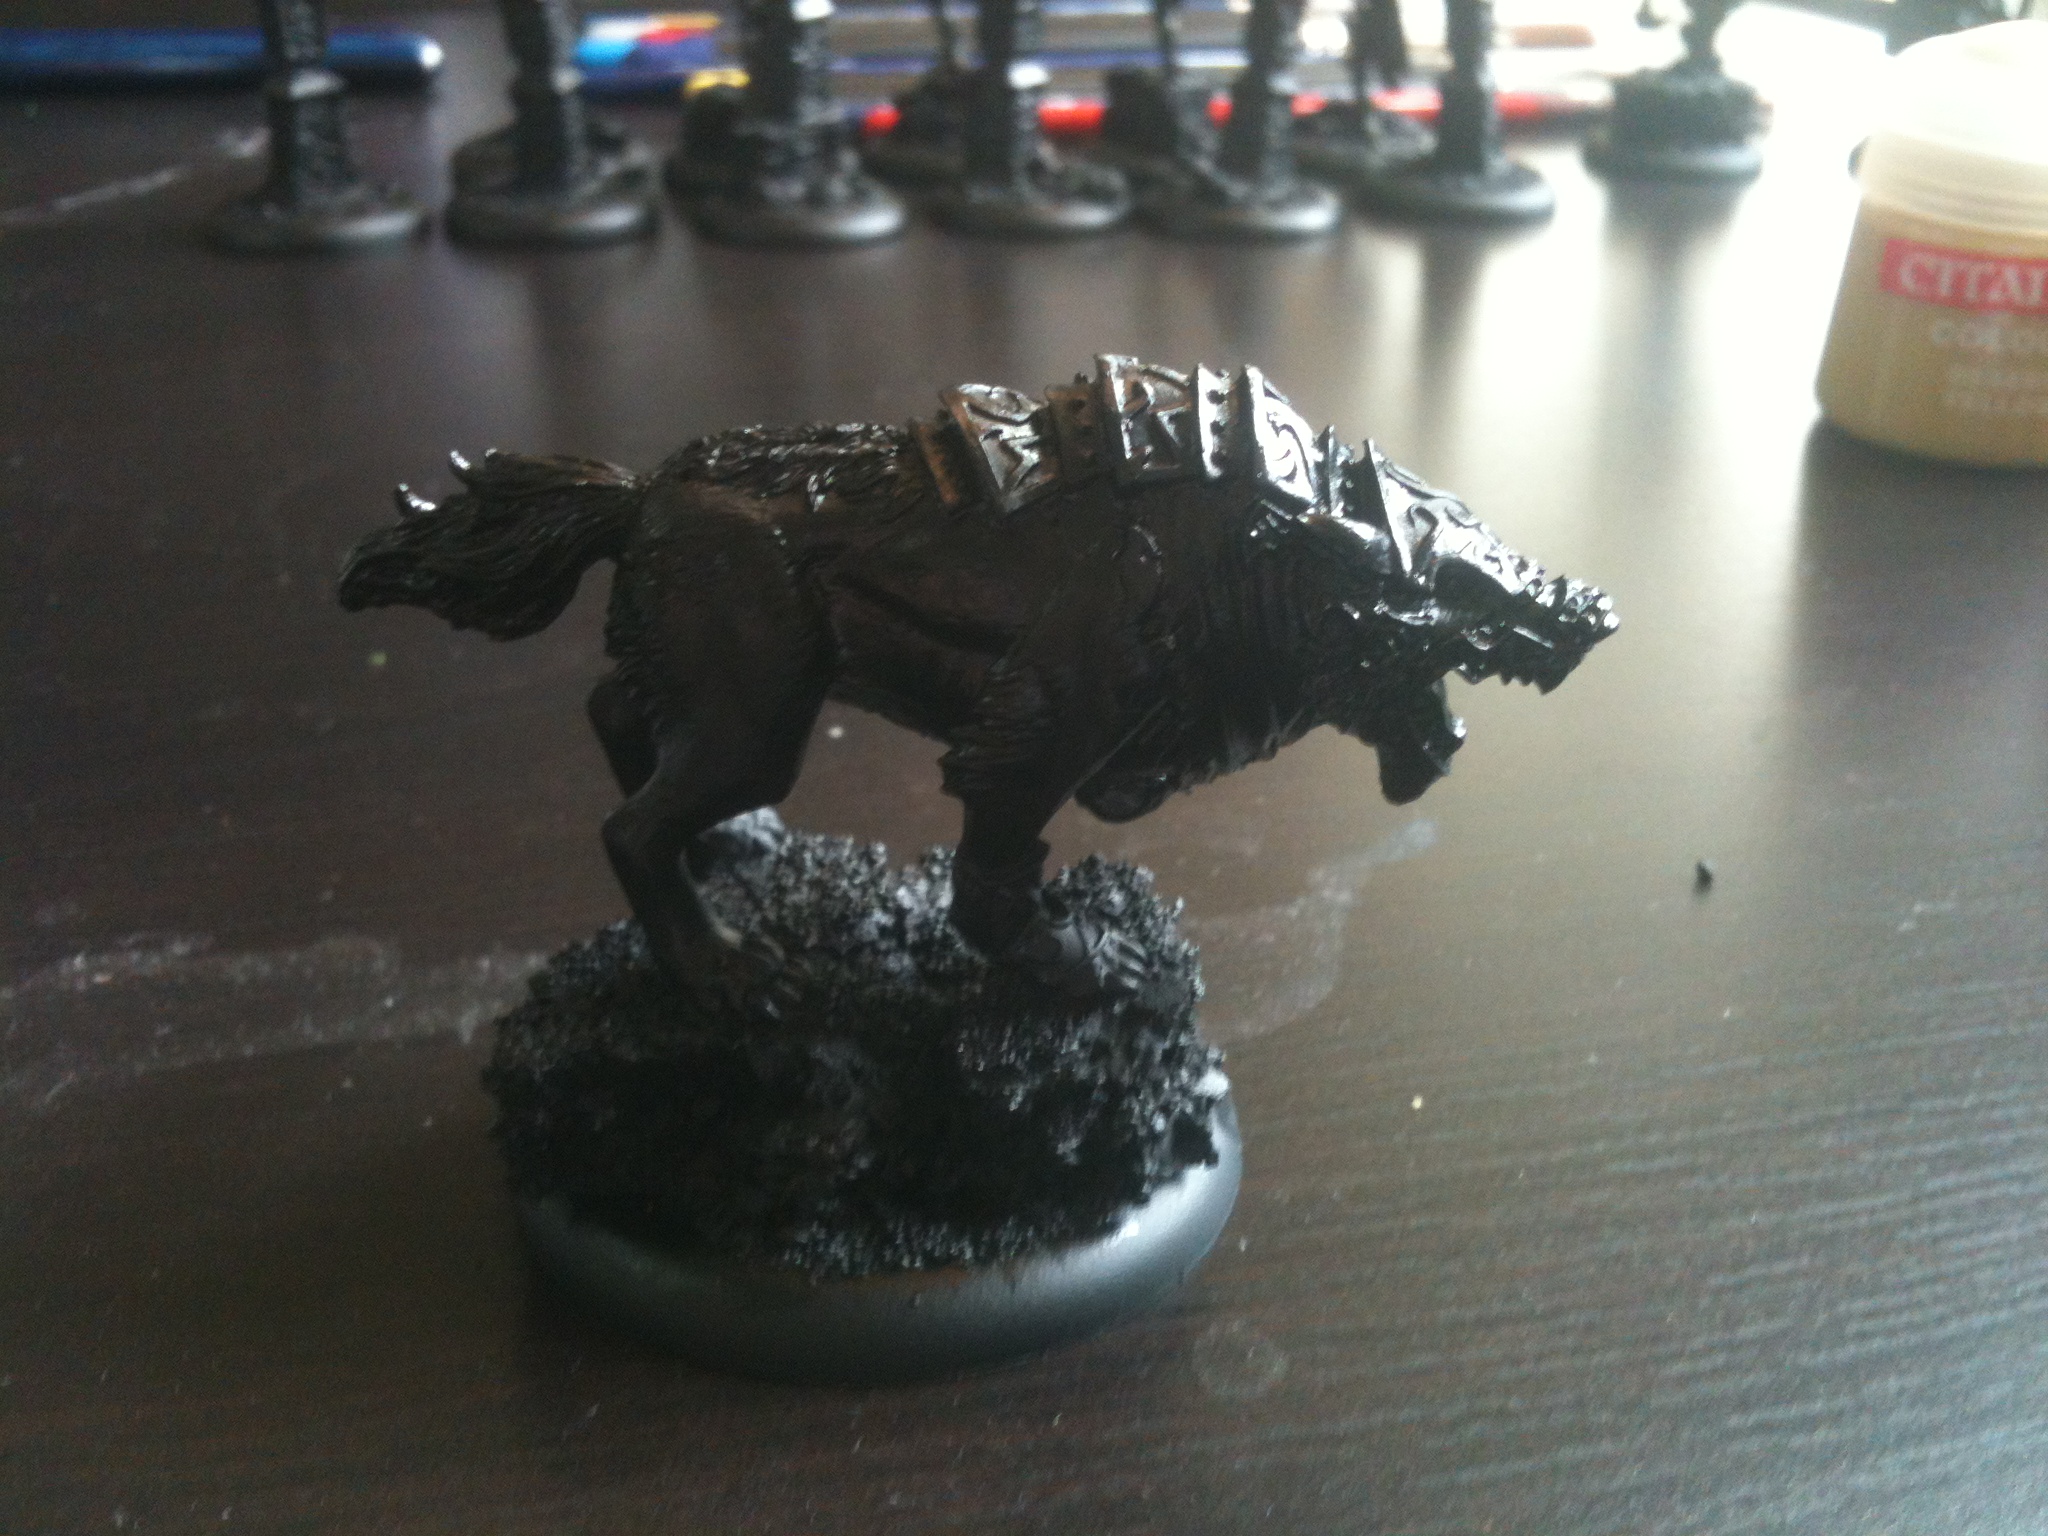
After the primer dries I start with Laris’ skin. First layer is a base coat of Desert Yellow. I use many layers (in this case I used about 4) of watered down Desert Yellow till I get a solid base coat. When I water down I take the paint to a consistency resembling melted ice cream. I find that though it takes a bit longer to cover the surfaces, the watery consistency lends more to a smooth transition between shades and layers and also helps avoid filling fine details on the model.
Next I give a heavy wash of Ogryn Flesh. Make sure to saturate the valleys in the musculature.
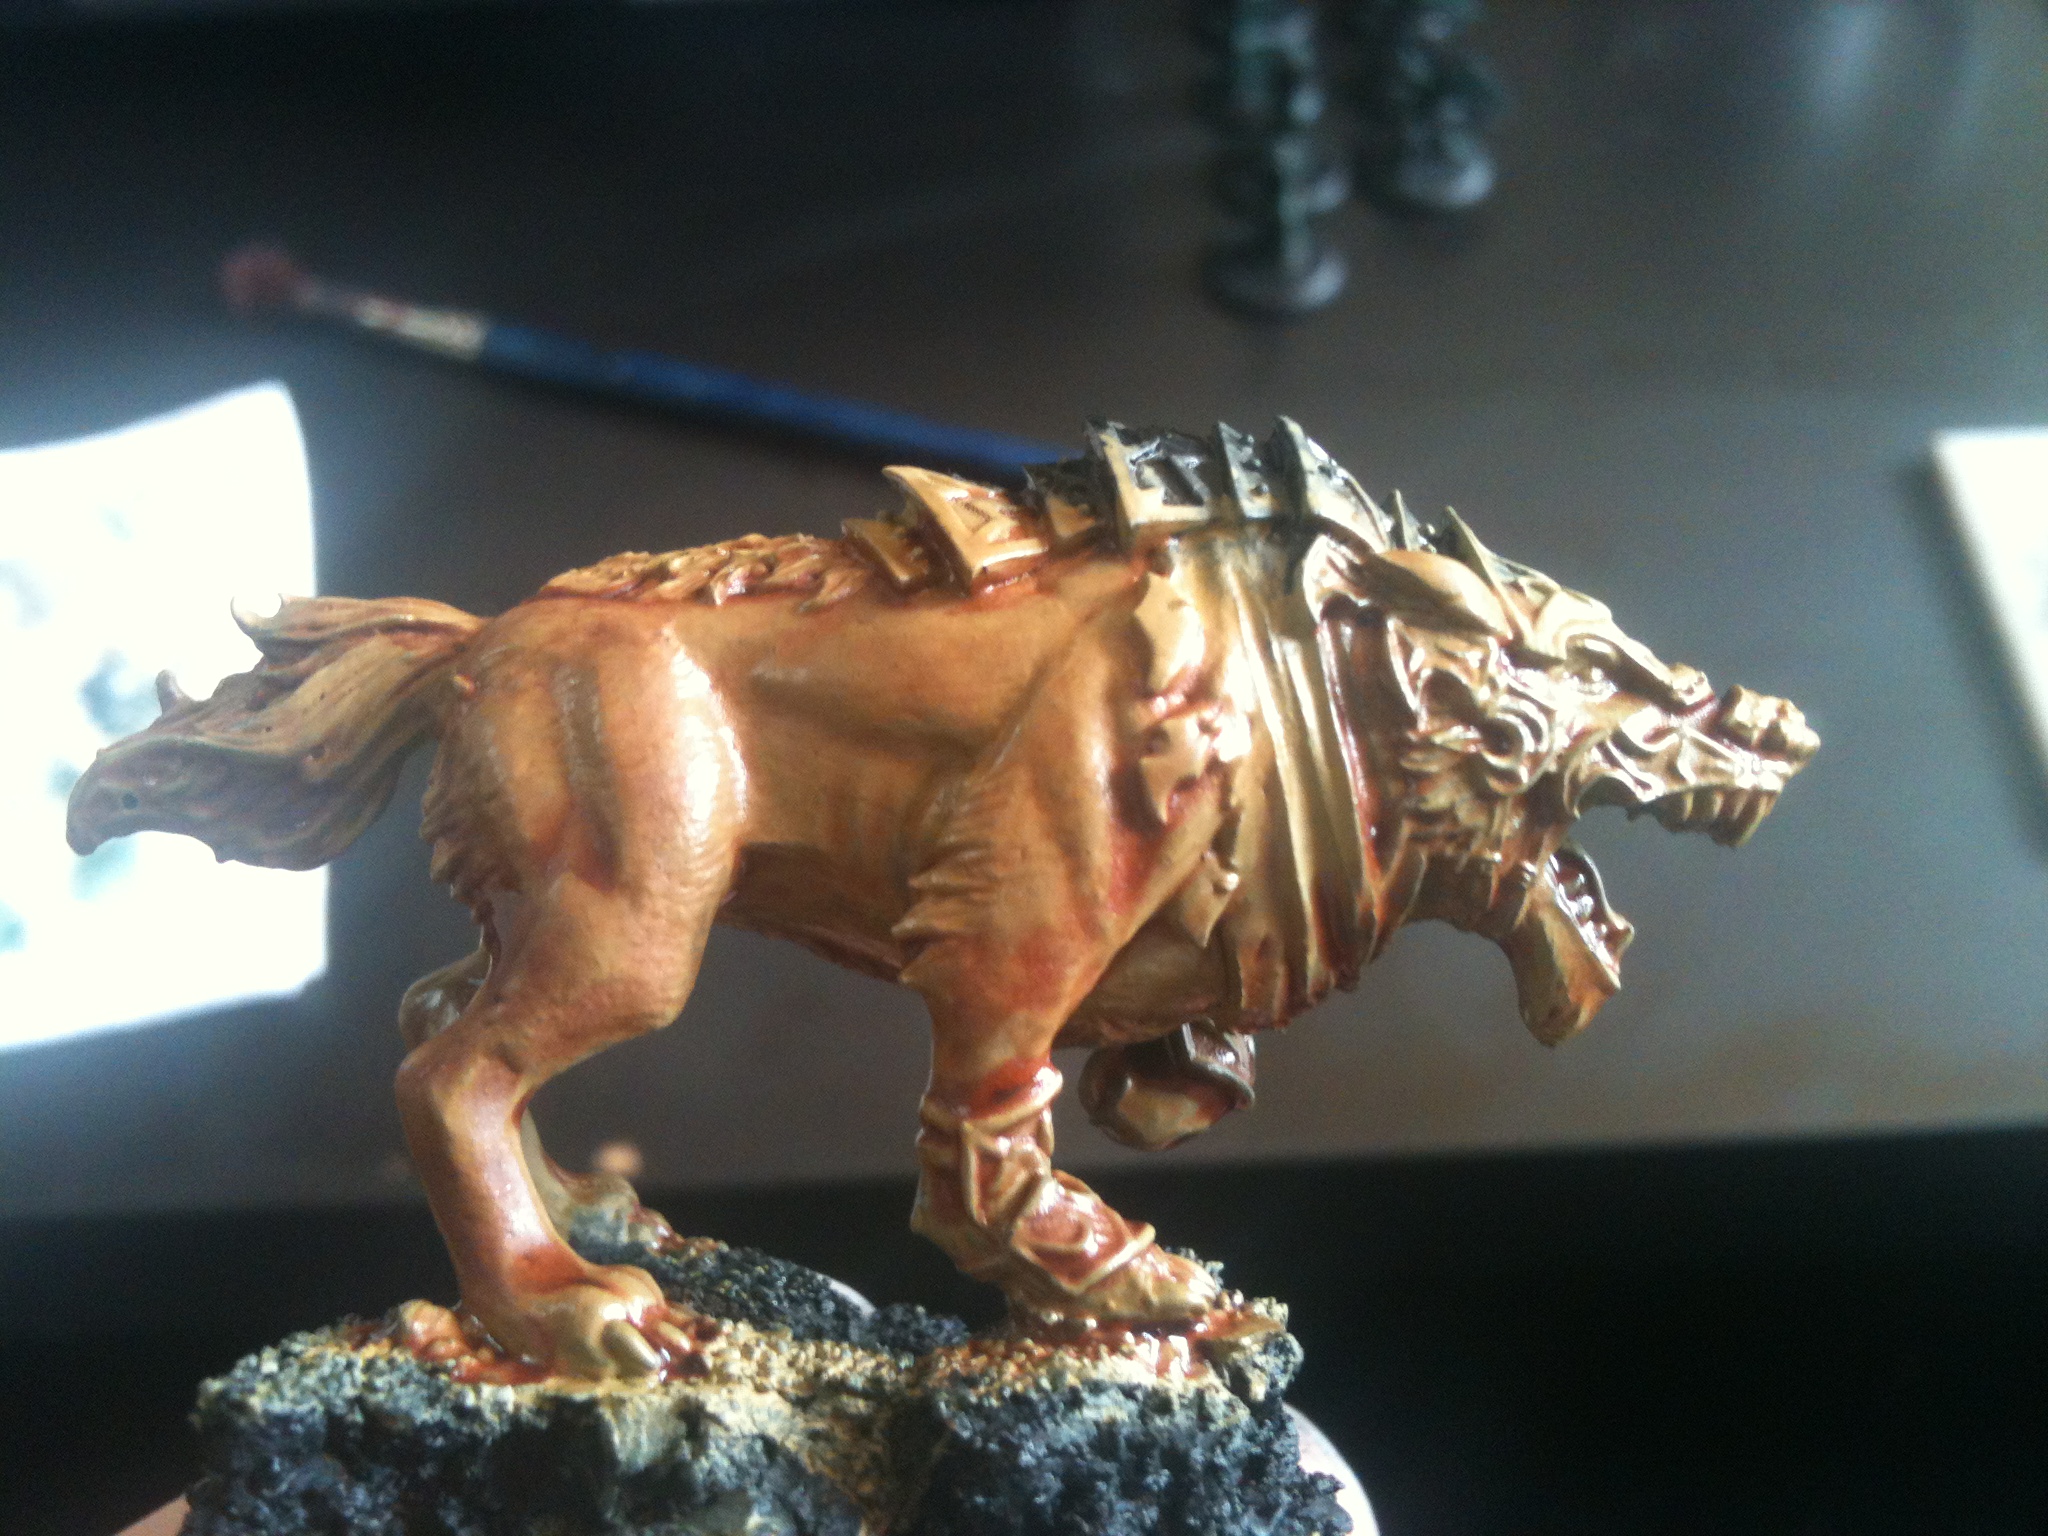
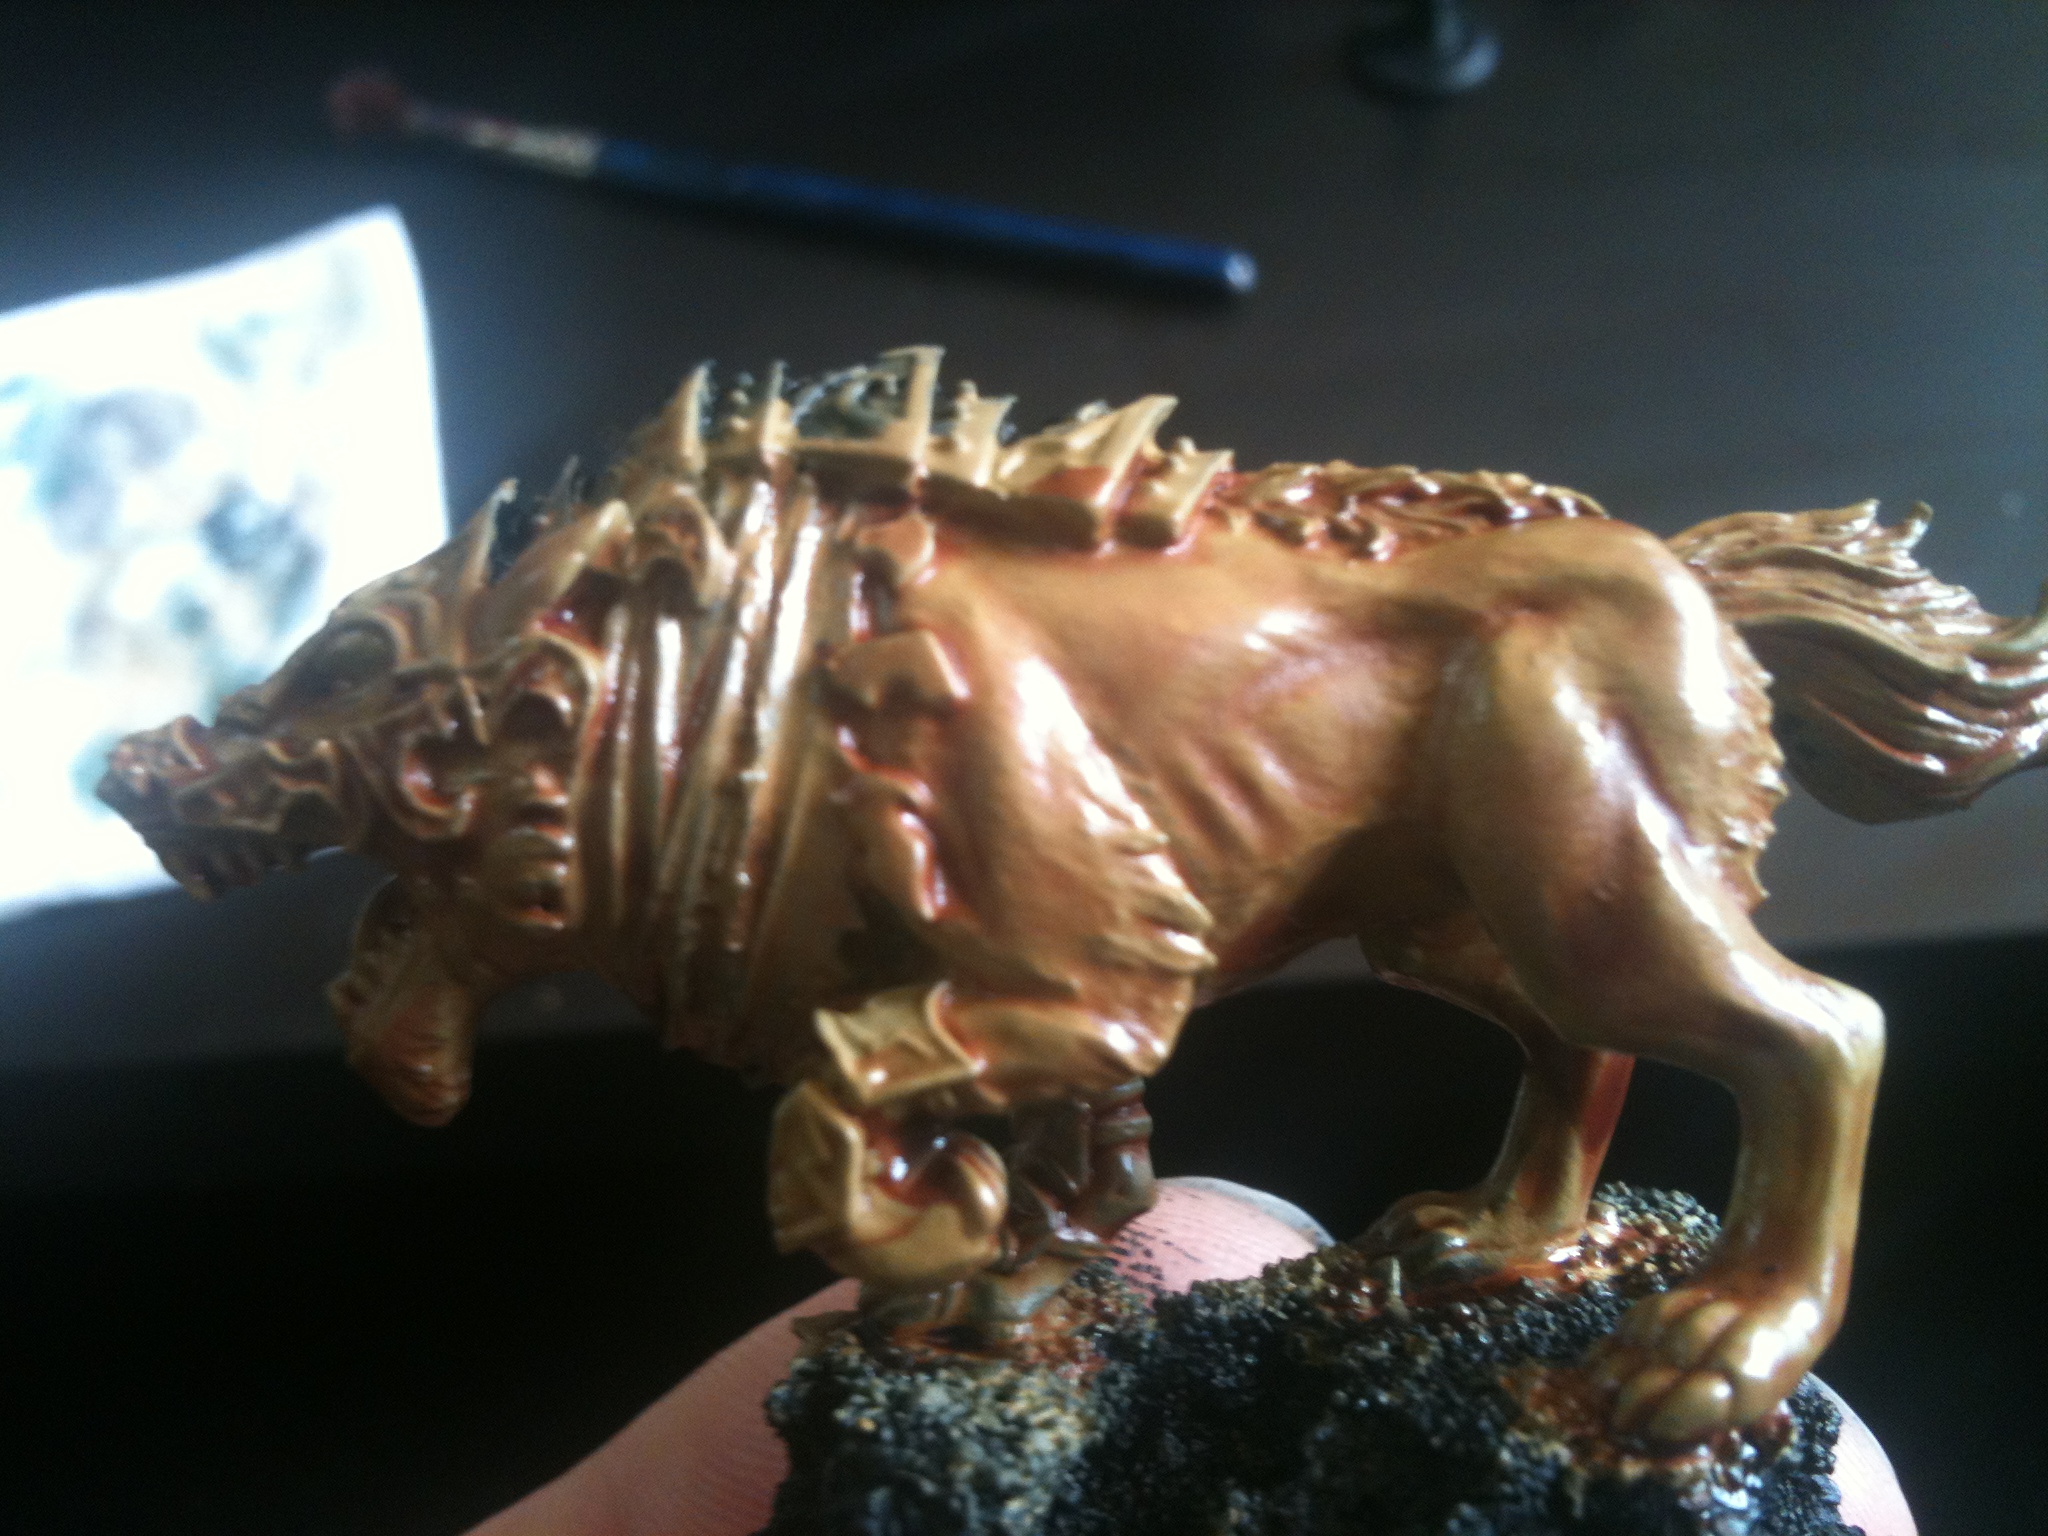
I then re-apply a layer of Dessert Yellow leaving the deepest recesses untouched.

For the second highlight I apply a mixture of Dessert Yellow and Bleached Bone in a 3:1 ratio. Keep this mixture well hydrated and make a lot of it. We are going to be using it for the next few highlight stages. What I mean by this is that after I finish one highlight I add a bit more Bleached Bone to the mixture and keep adding to it until after every highlight I do. Once the Mixture looks like it is pure Bleached Bone then you are done with this mix. This takes some practice to get used to and it helps to use very watered down layers one after the other. There is no real science to this, it is pure colour mixing and playing with colour combinations to find the colour you wish to have.
The last highlight stage is a 2:1 mix of Bleached Bone and Skull White. Apply this sparingly and in quick and fine strokes. Remember to have it watered down so that it goes on semi translucent. This highlight it to create a furry illusion so try to keep you streaks in a uniform direction.
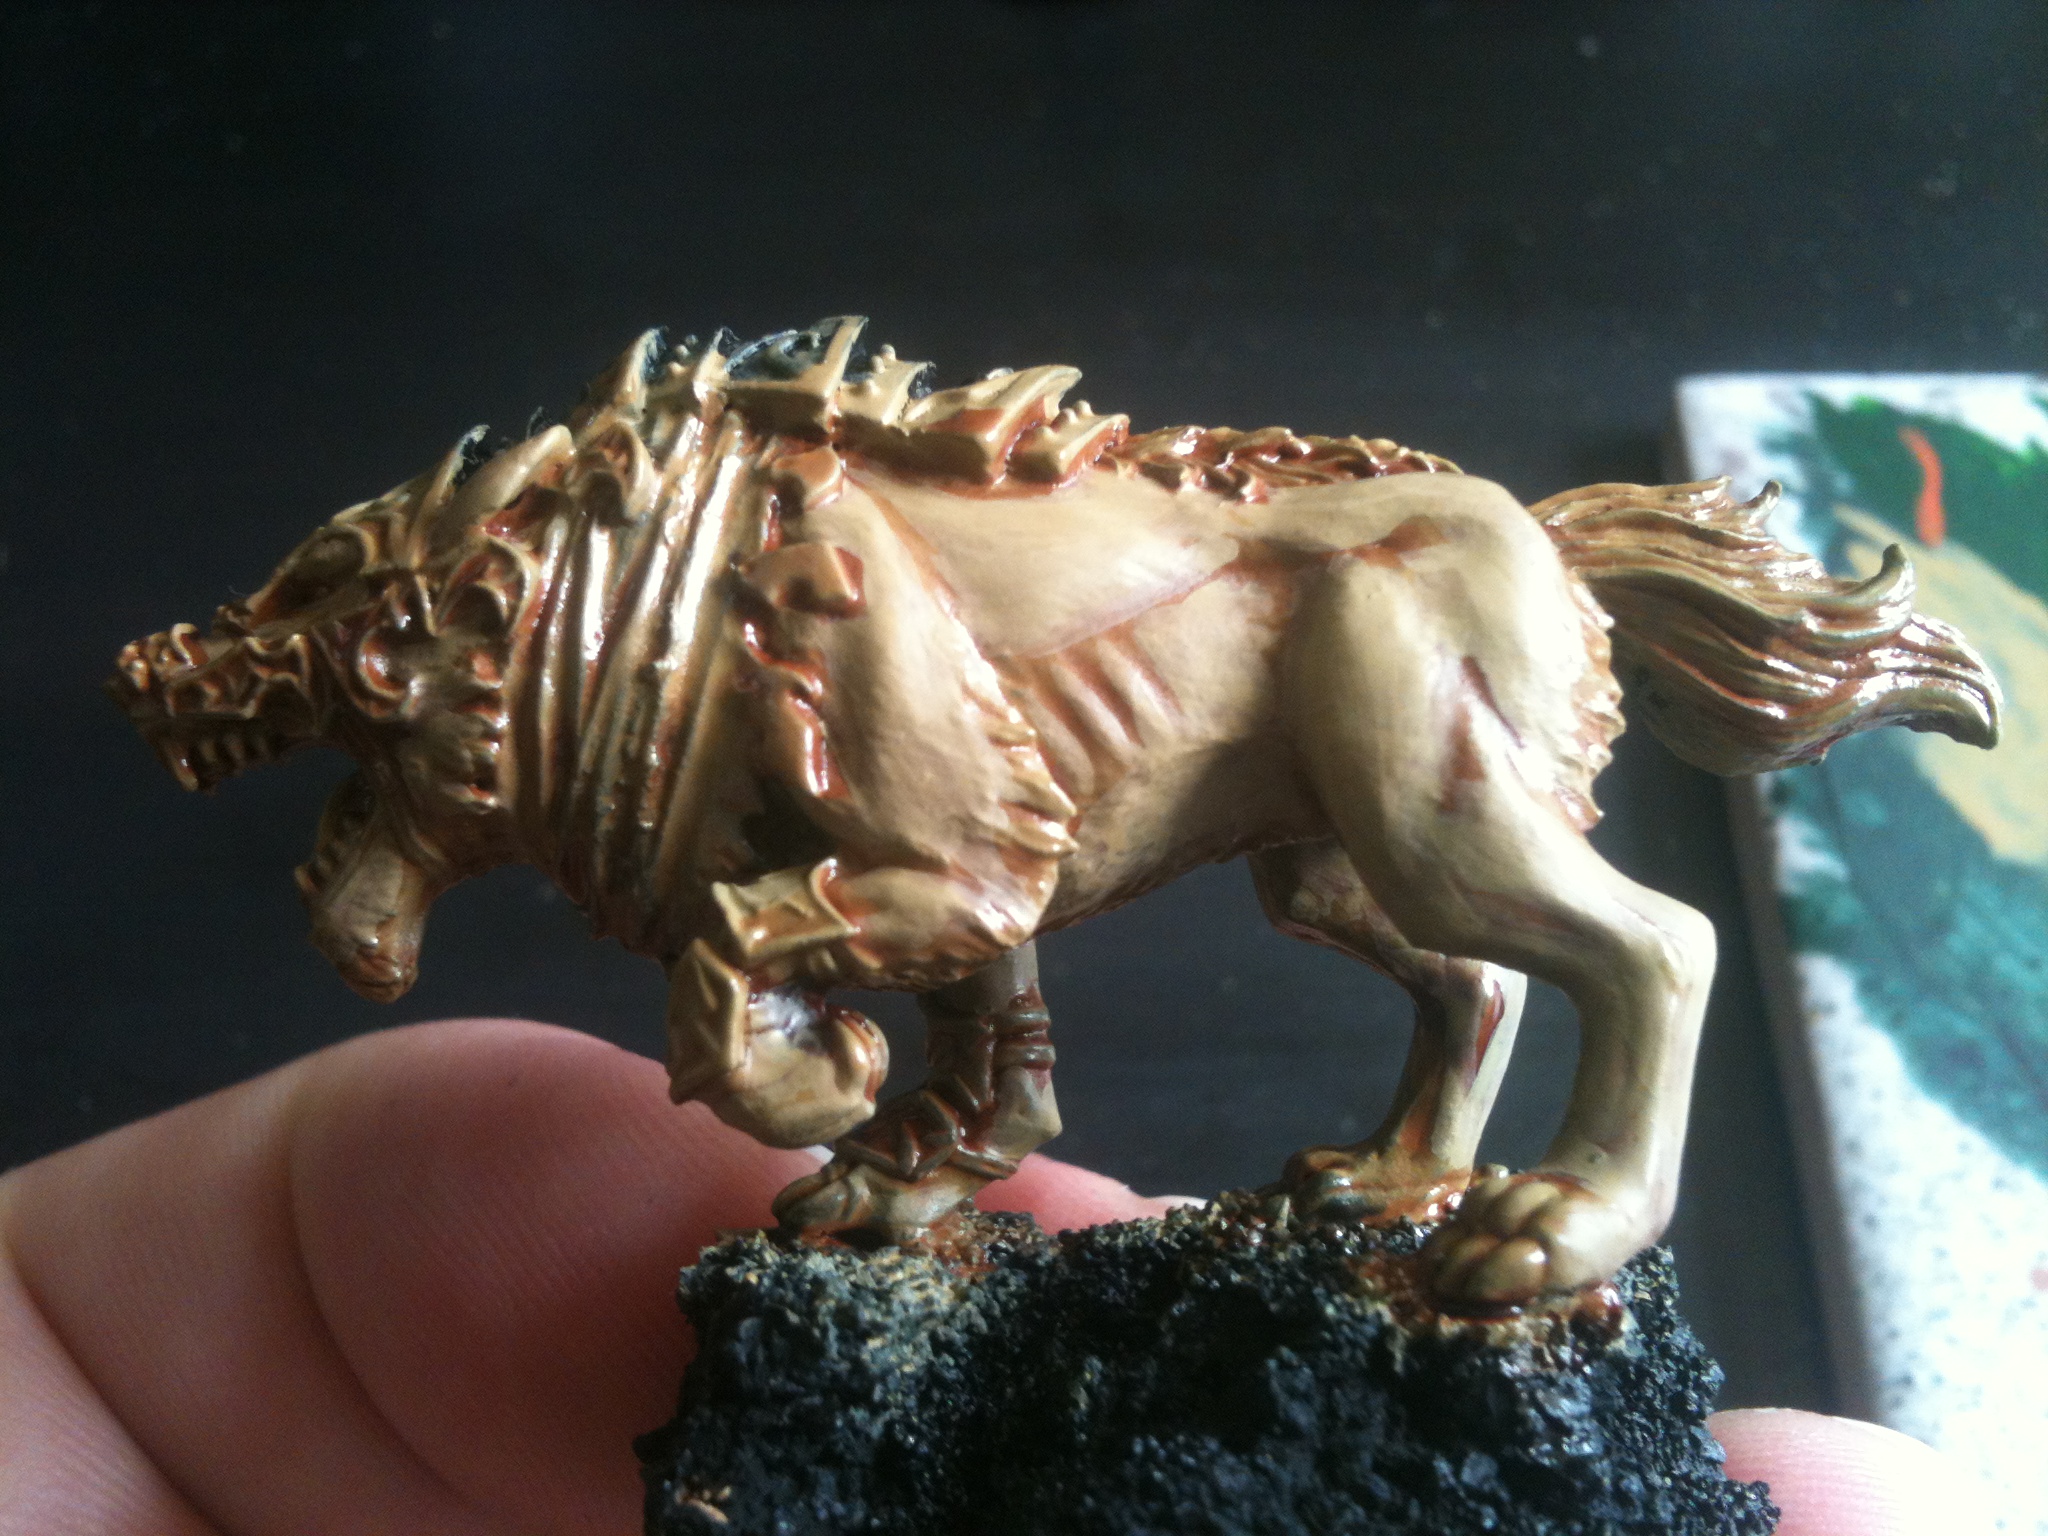
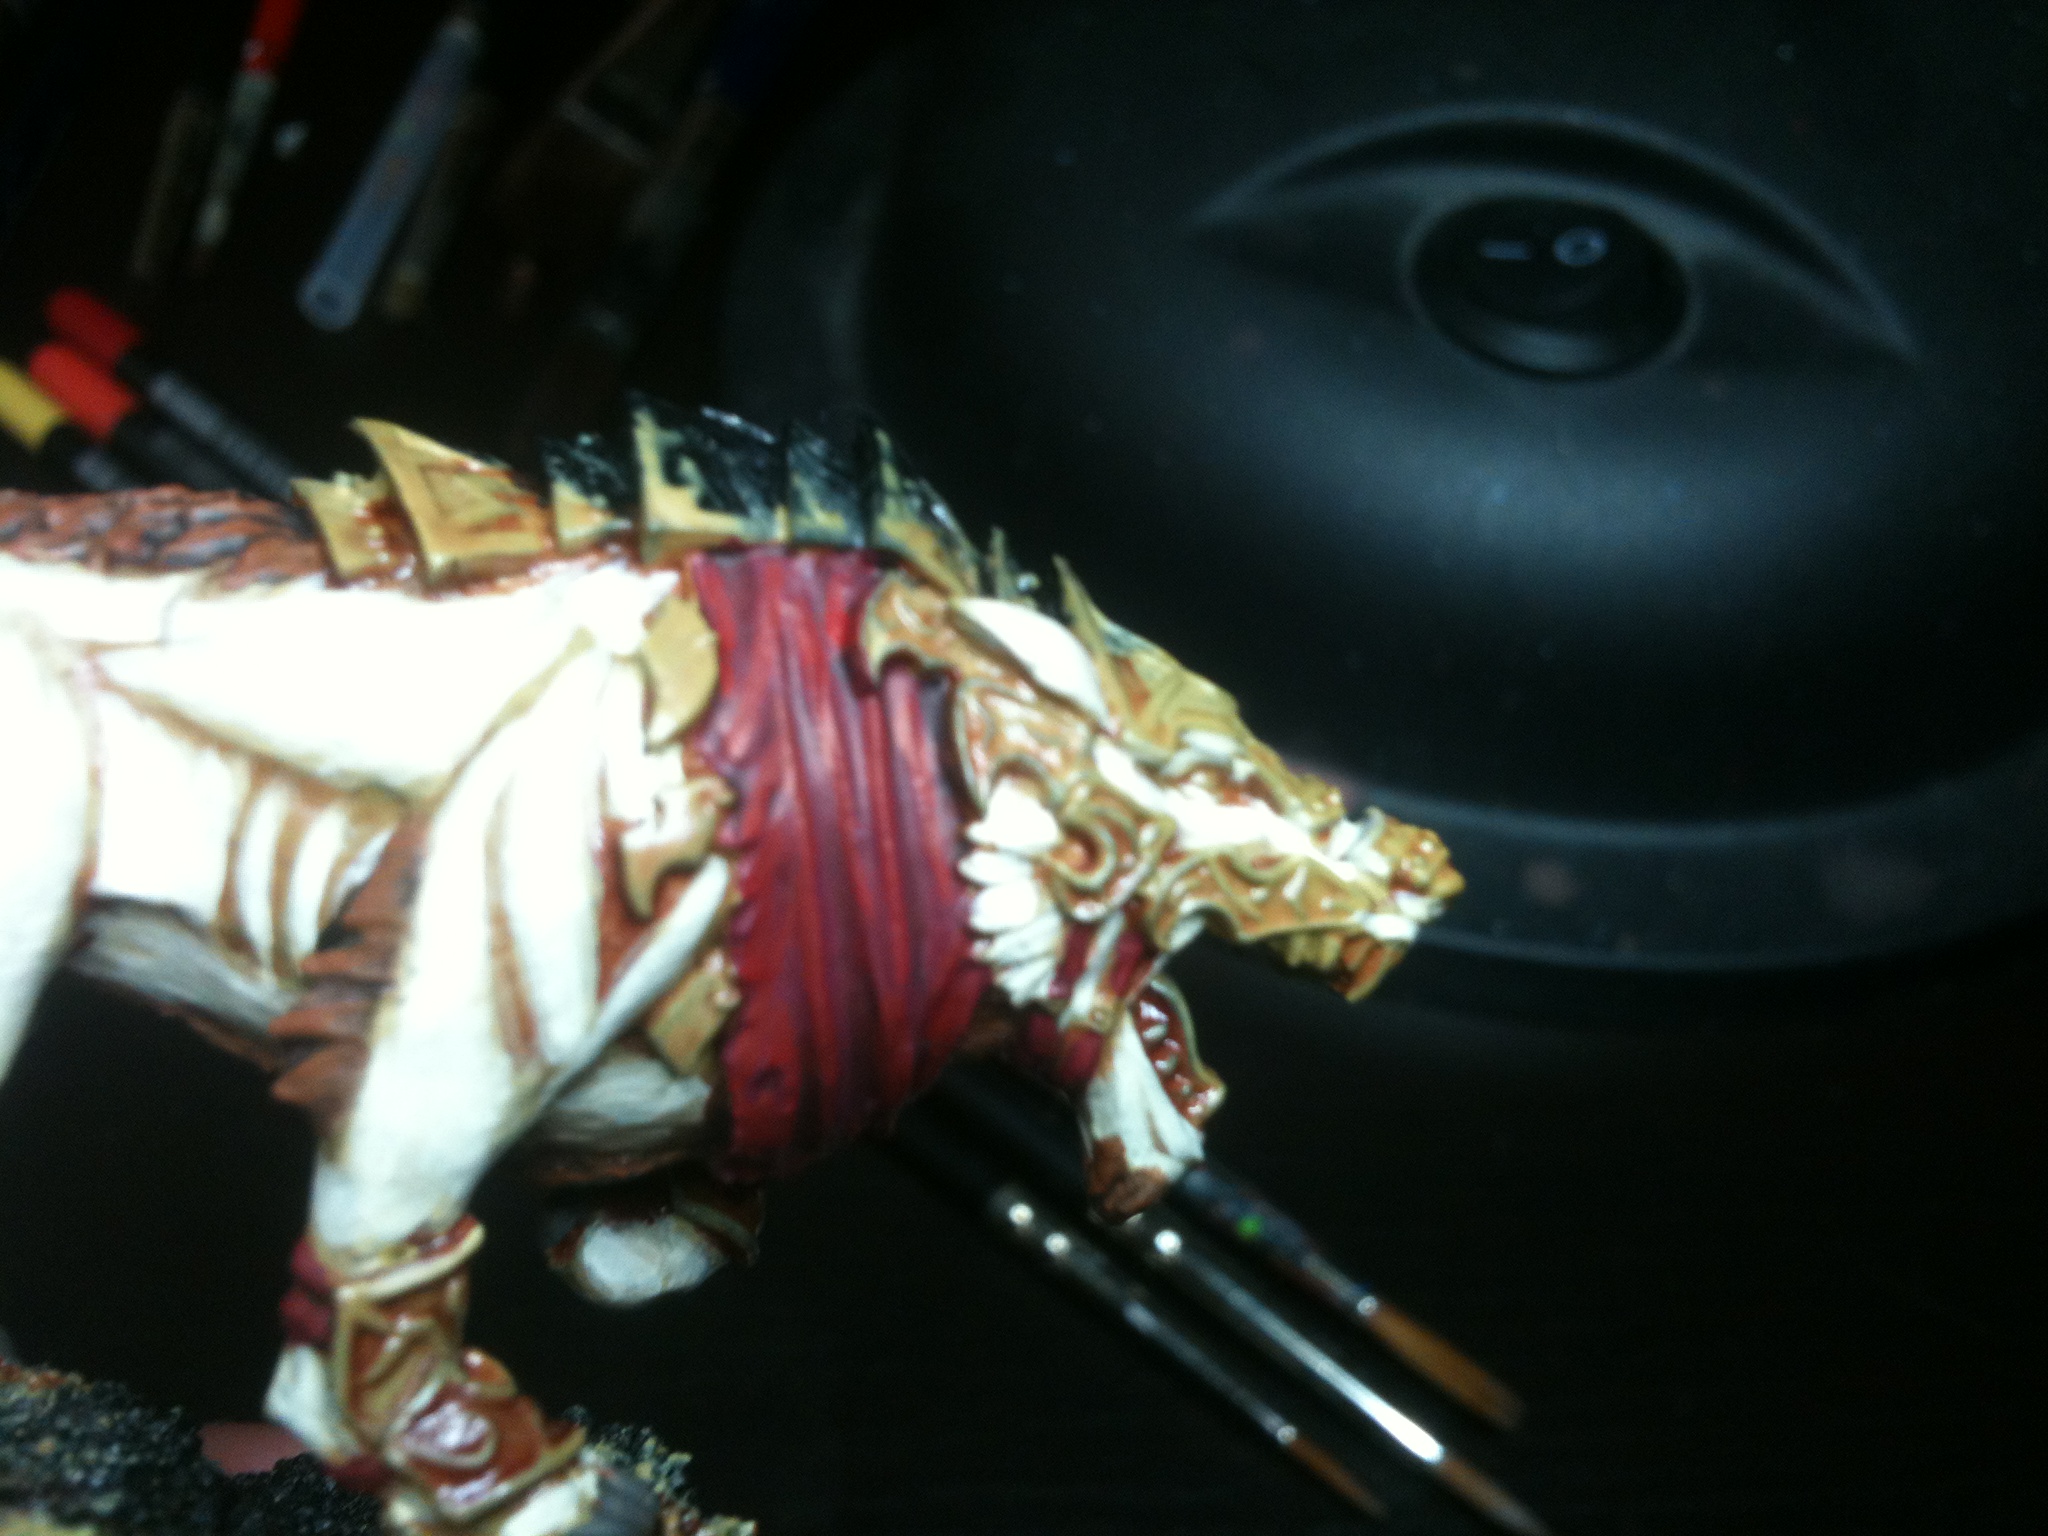
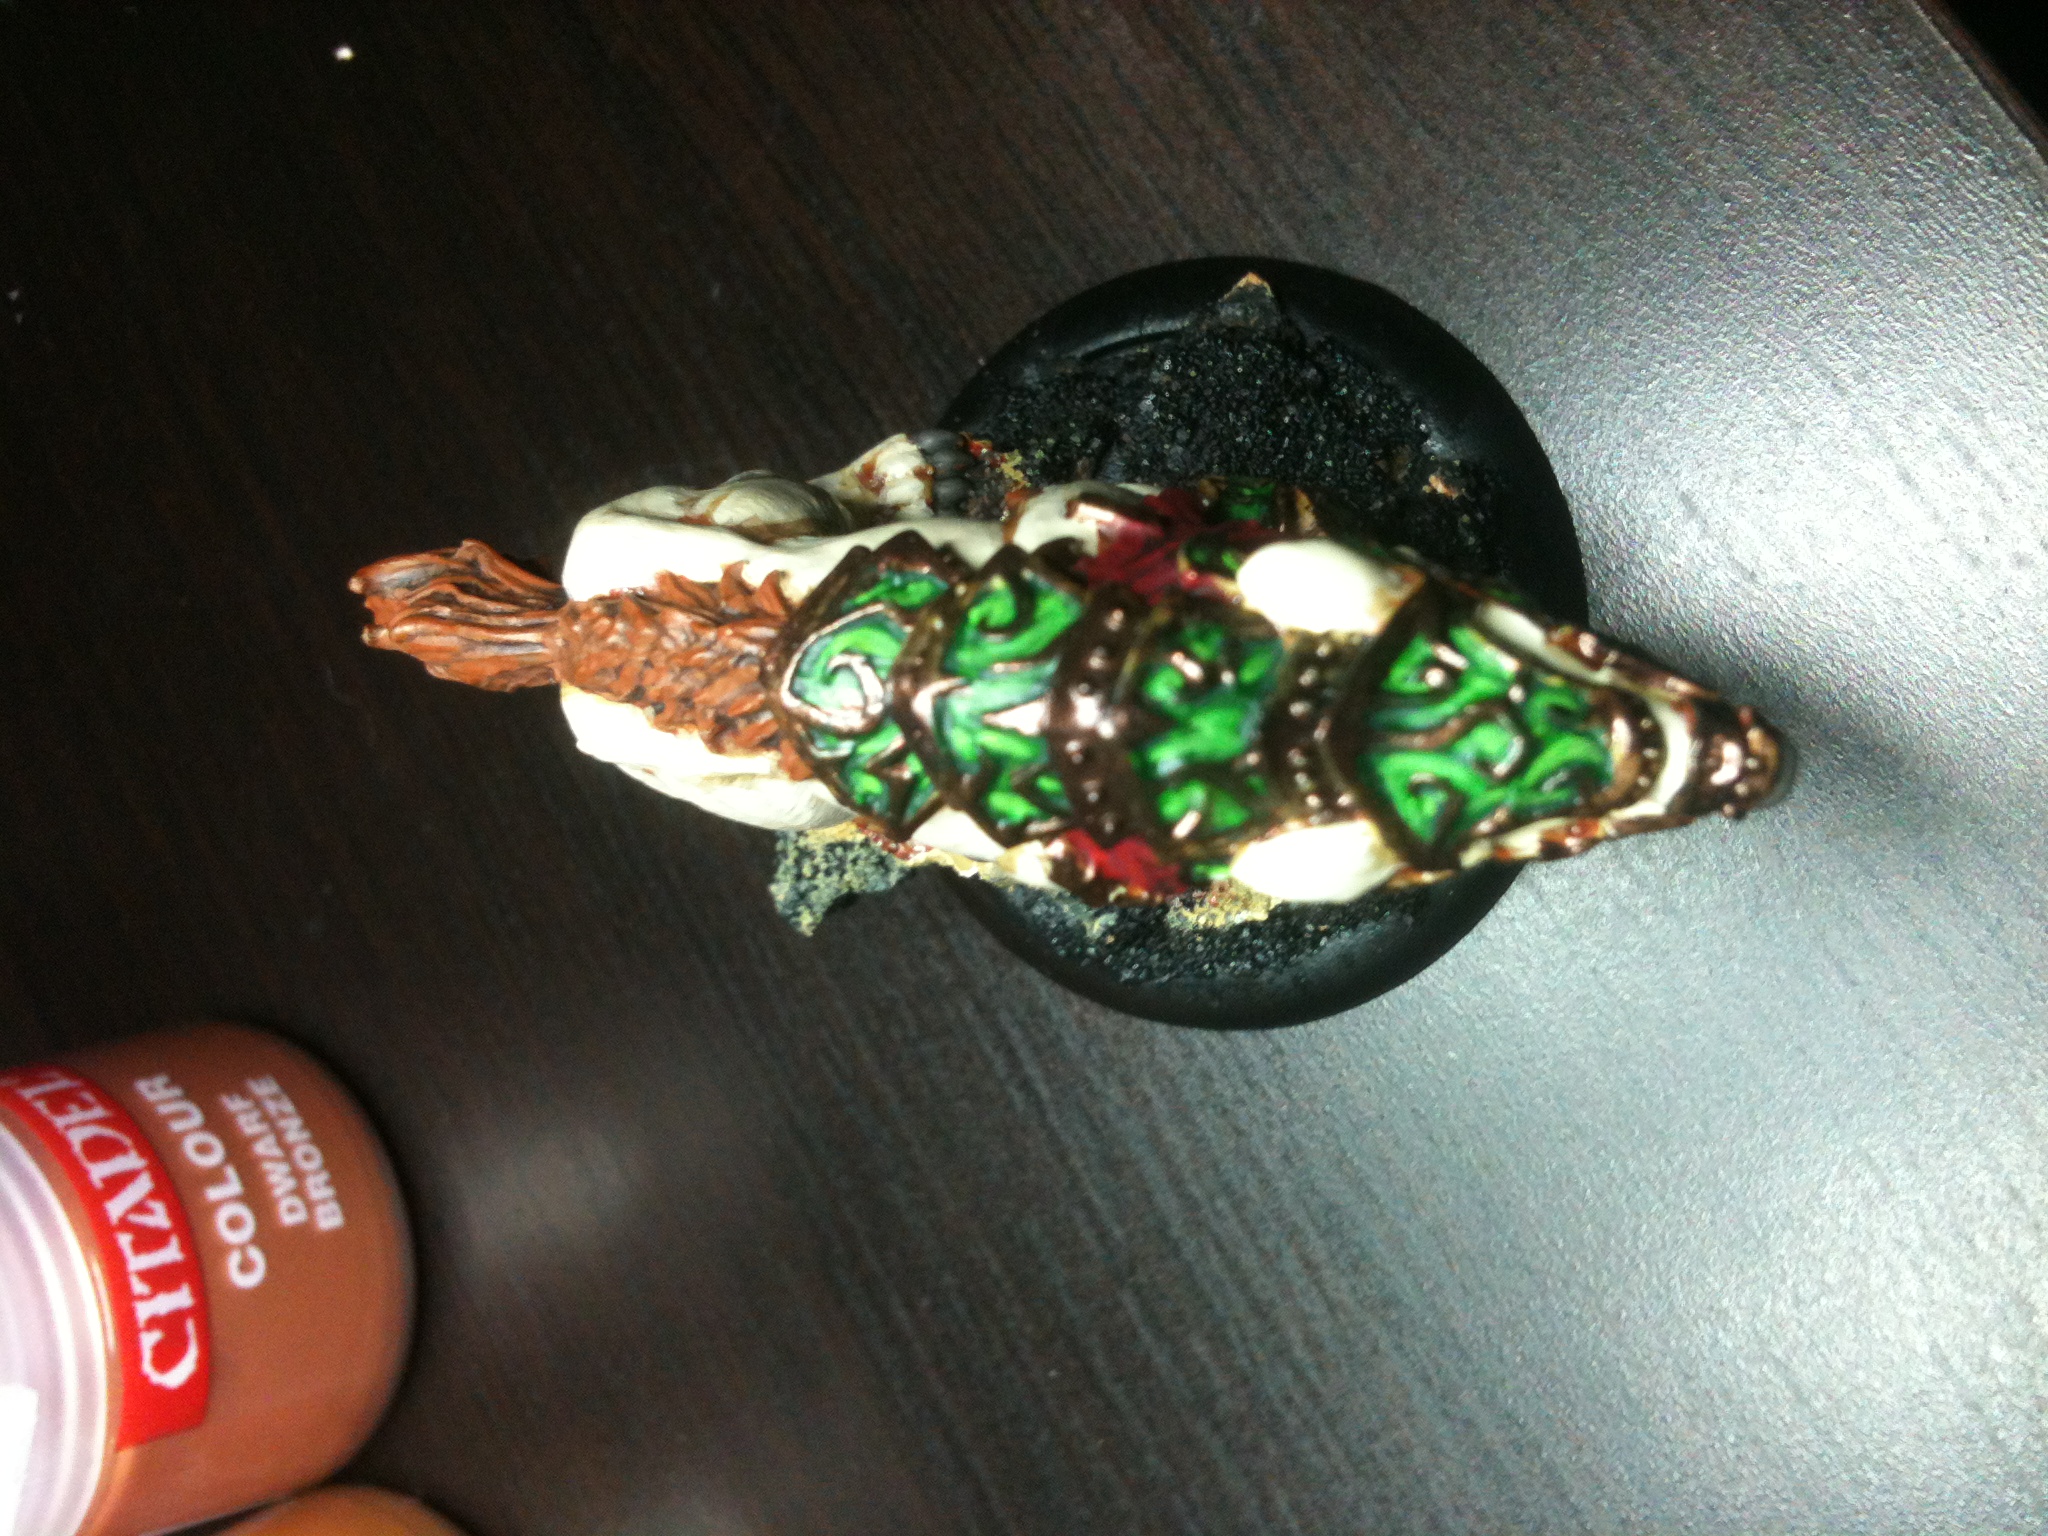
Now we are moving on to the hair/long fur.
Start by base coating the fur with Calathan Brown. Followed by a Devlan Mud wash.
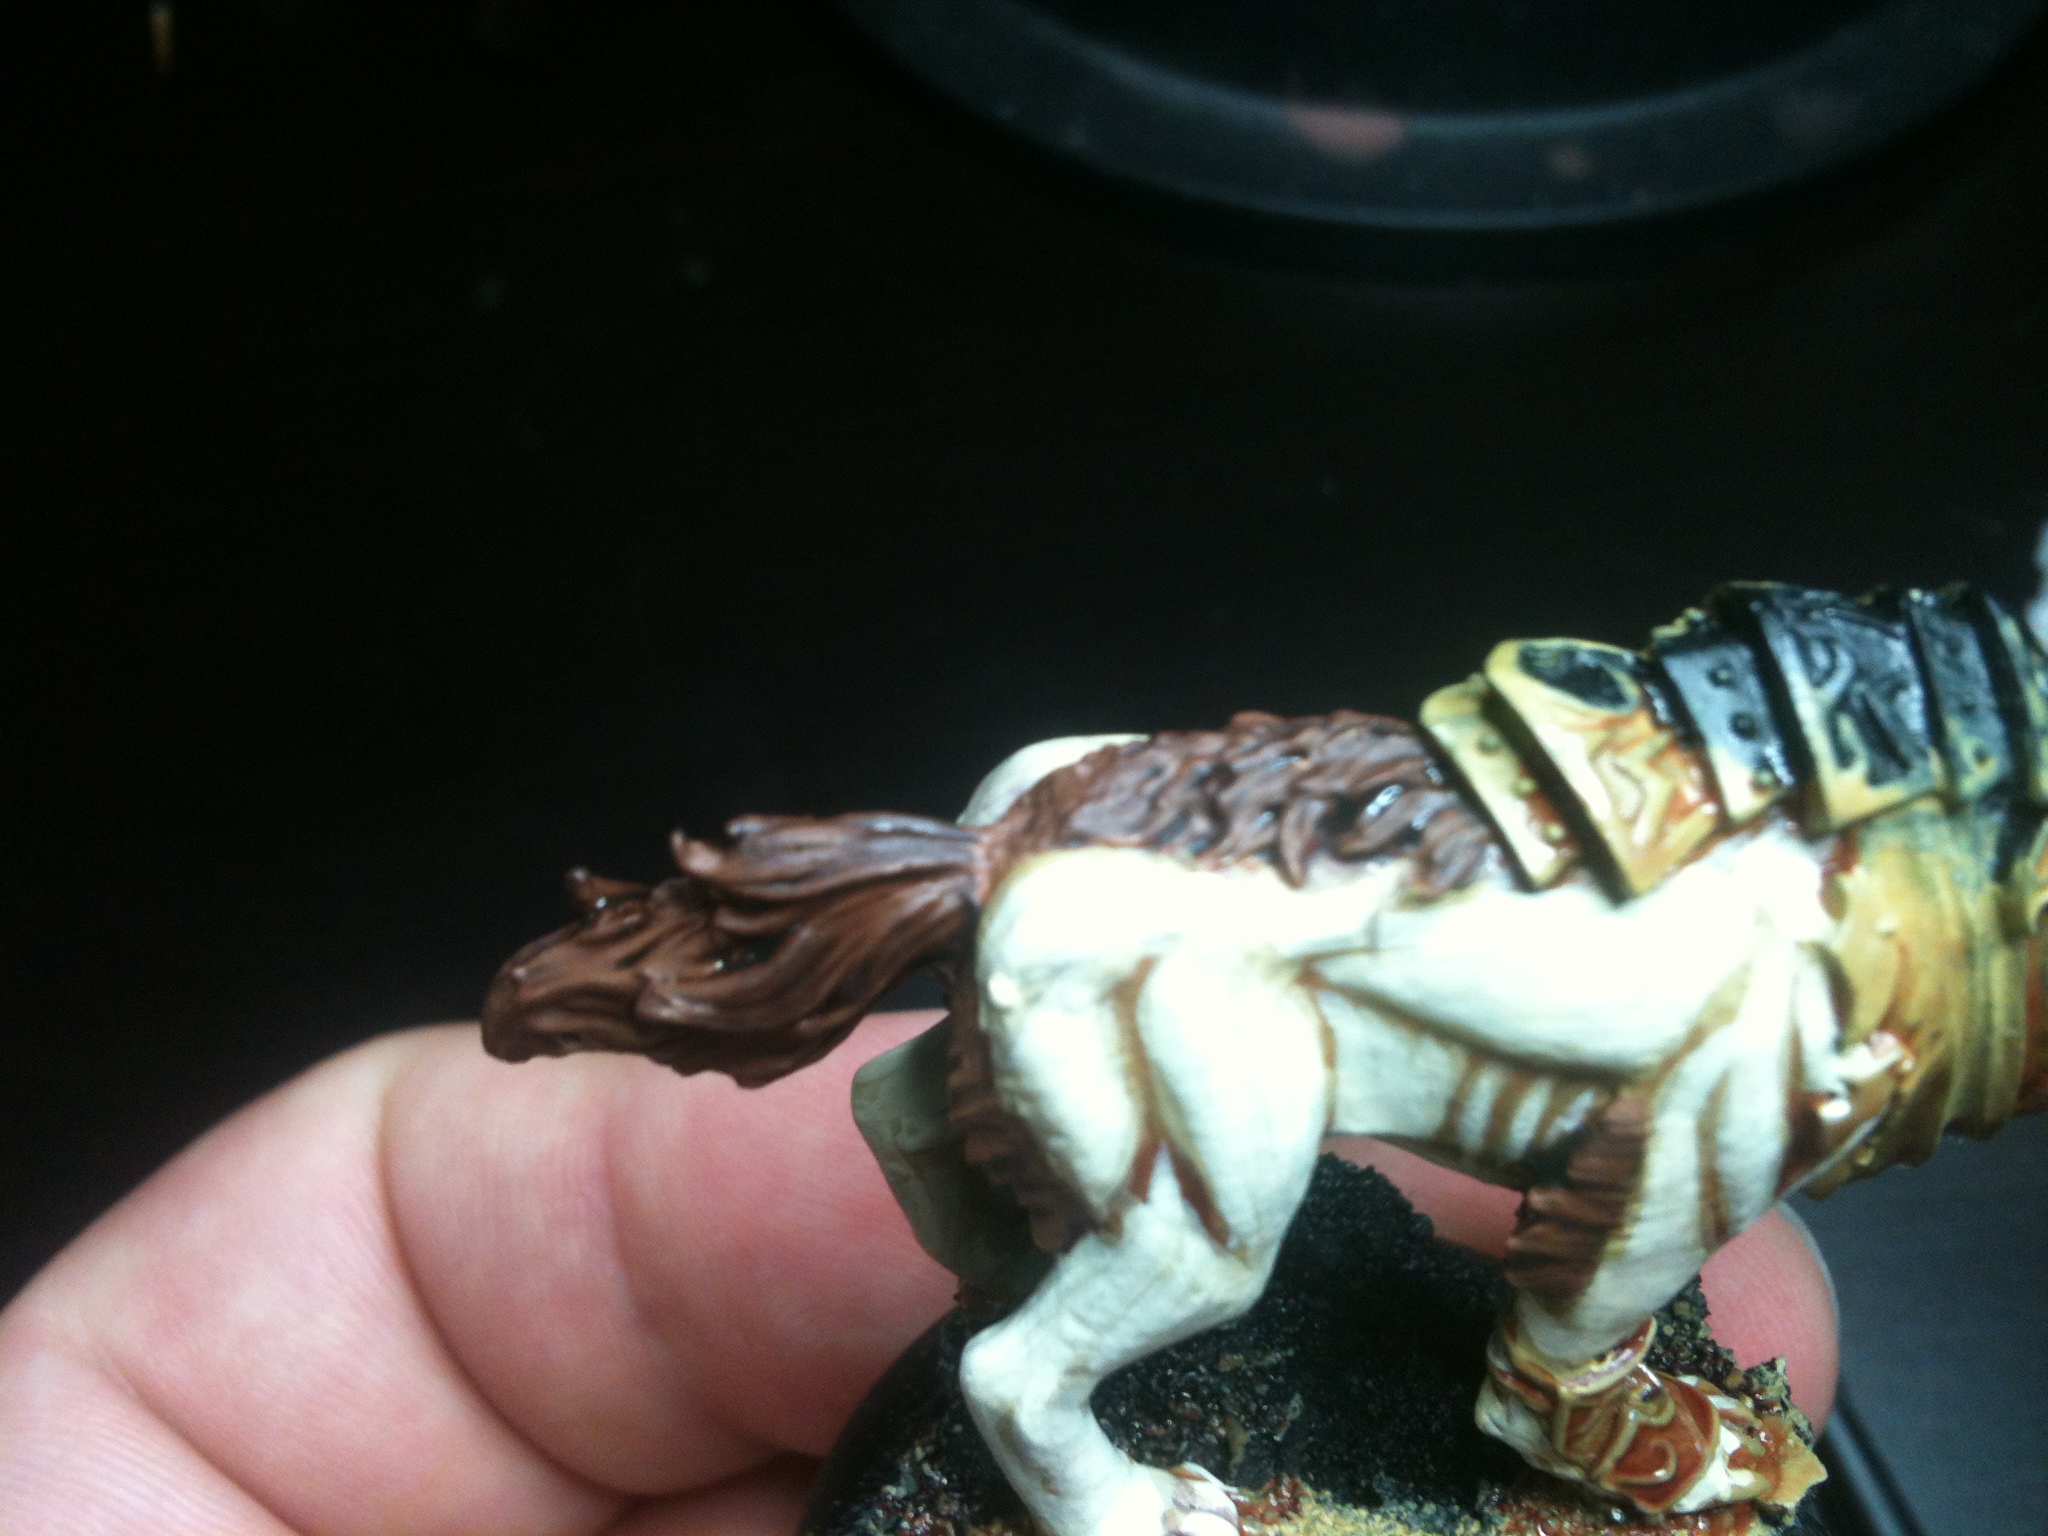
After the wash dries, highlight the top of the fur with pure Bestial Brown.
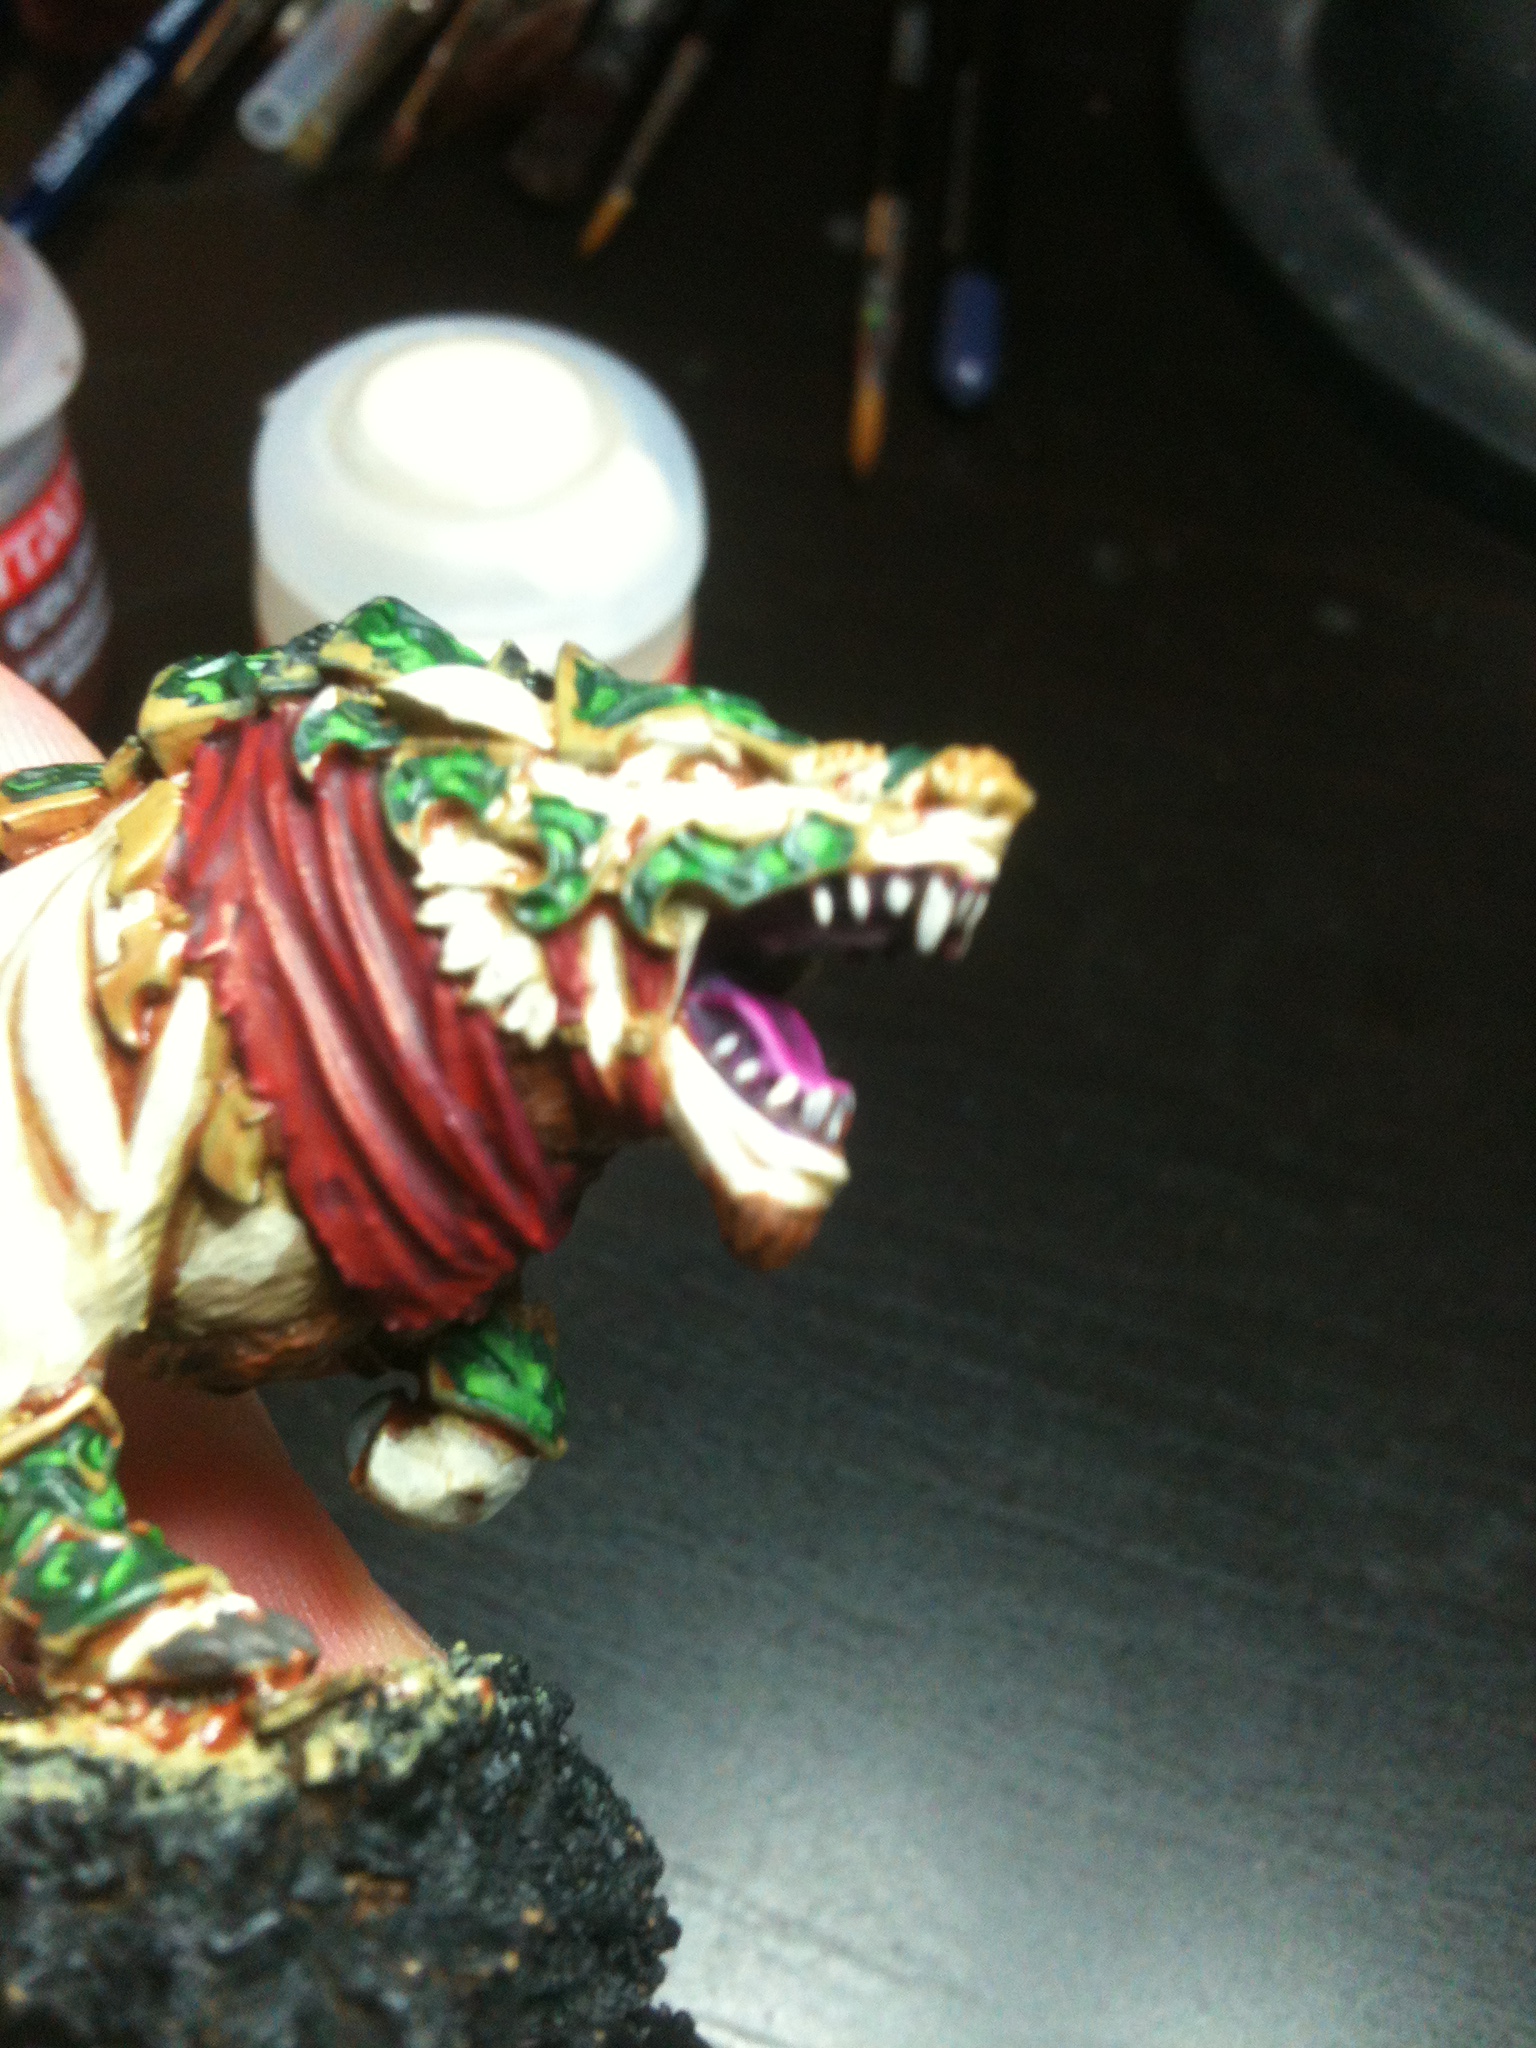
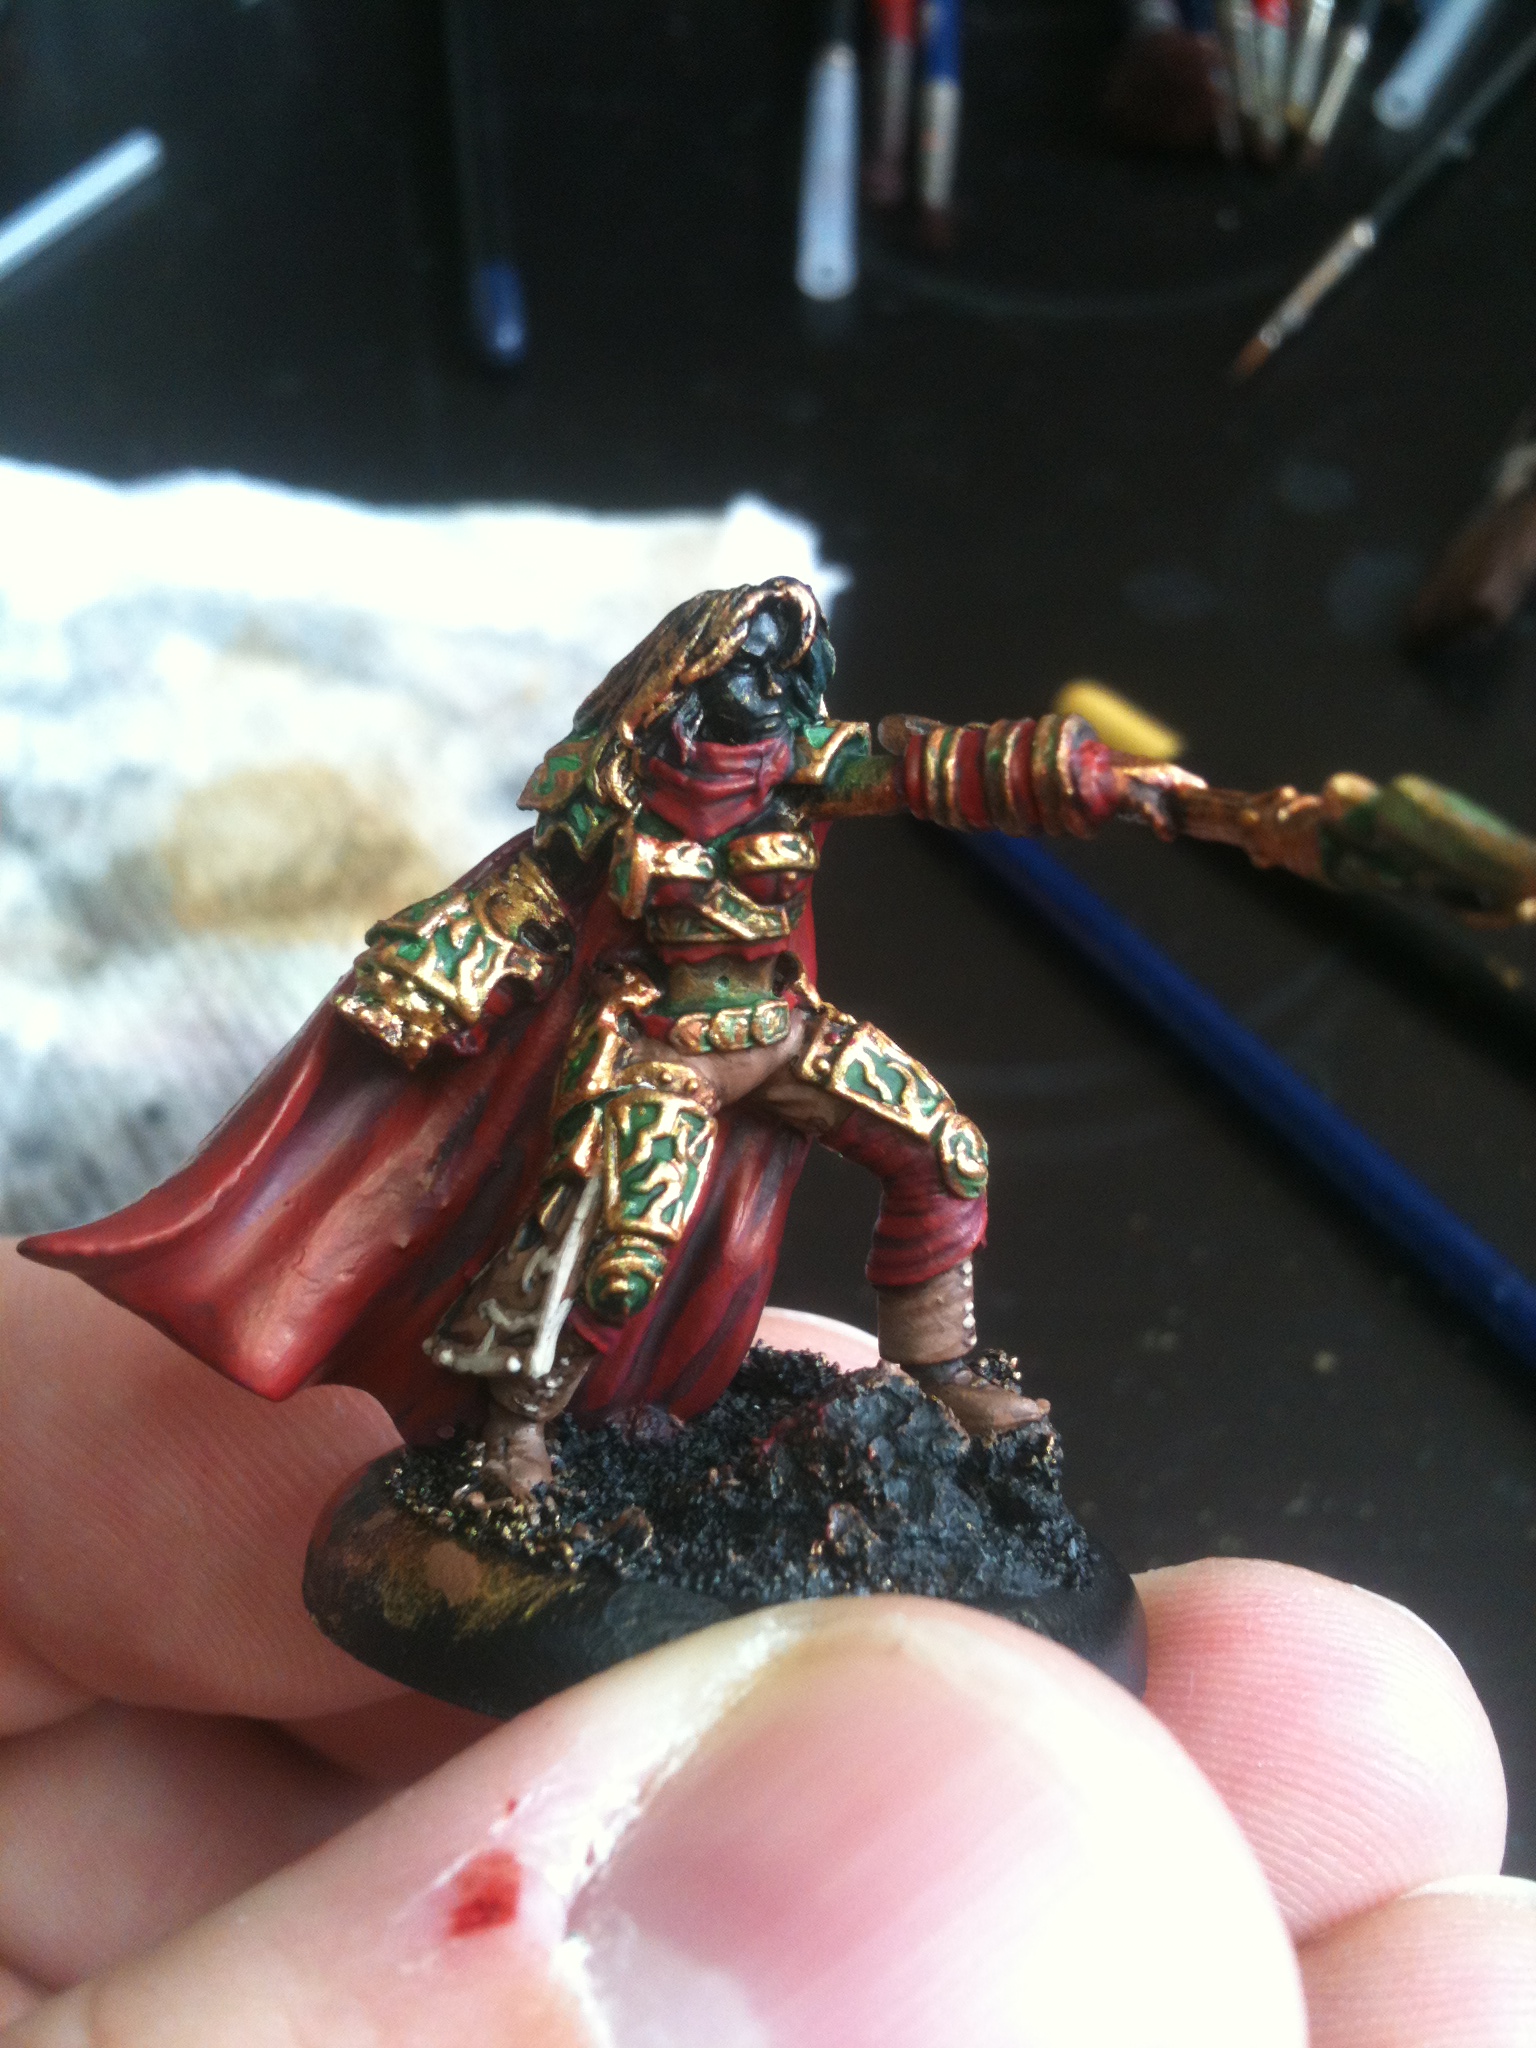
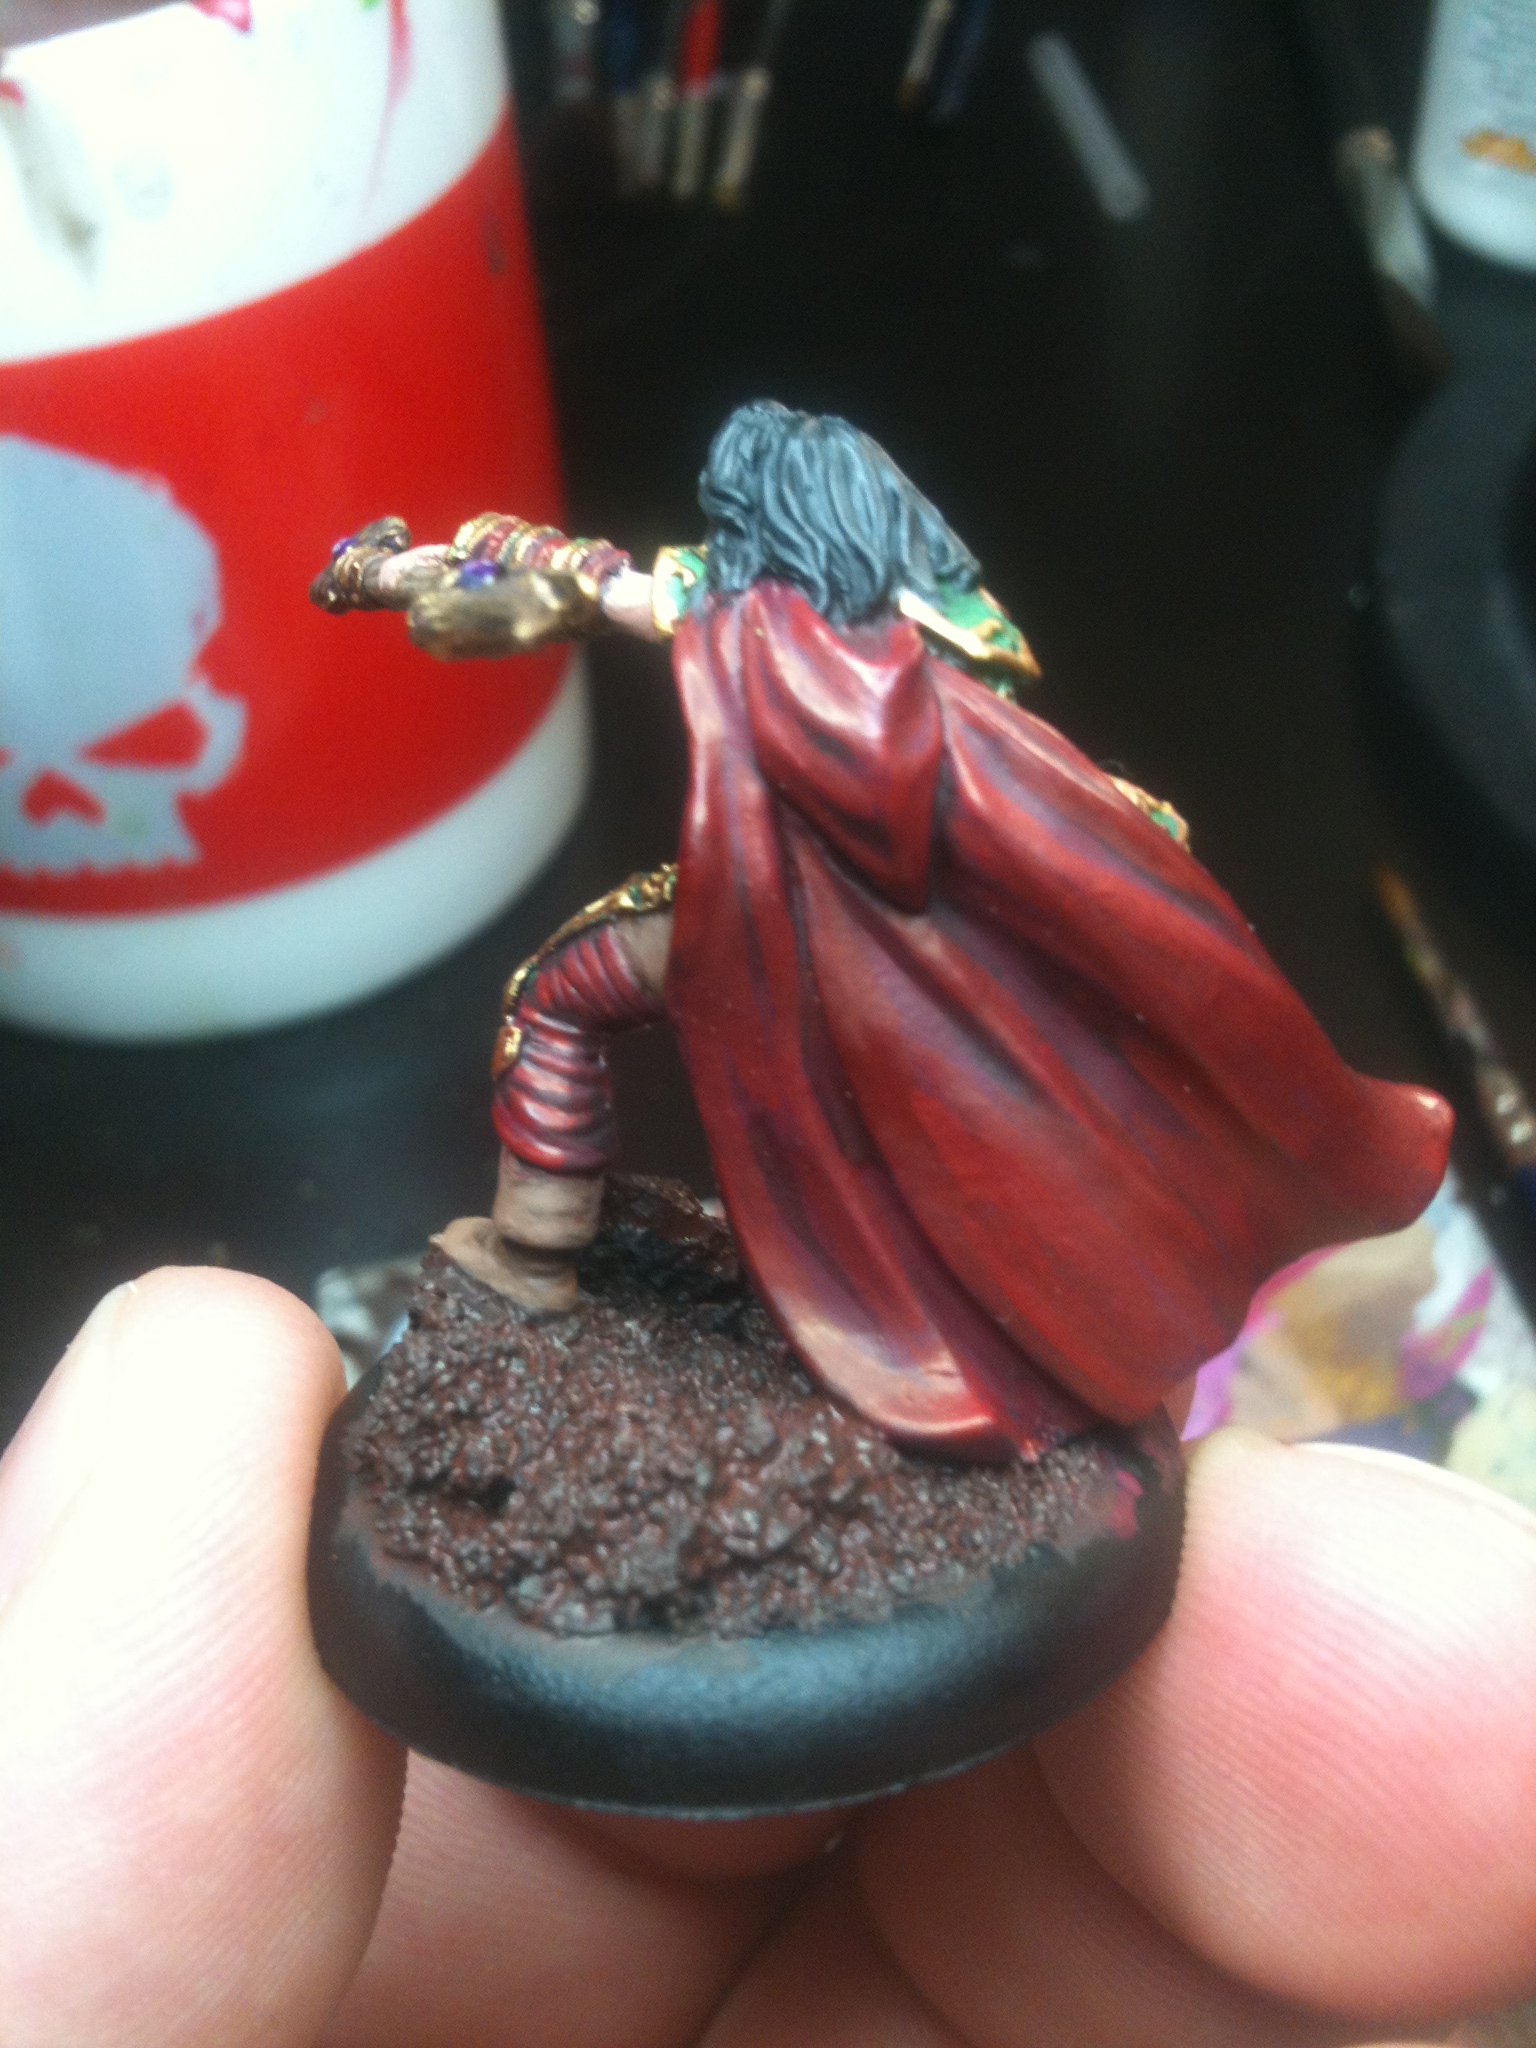
We are almost there. Only the details are left. We are now going to take on Laris’ scarf. Start by base coating the scarf with Scab Red.
Give the scarf a heavy wash of Ogryn Flesh and once that dries another wash of Devlan Mud.
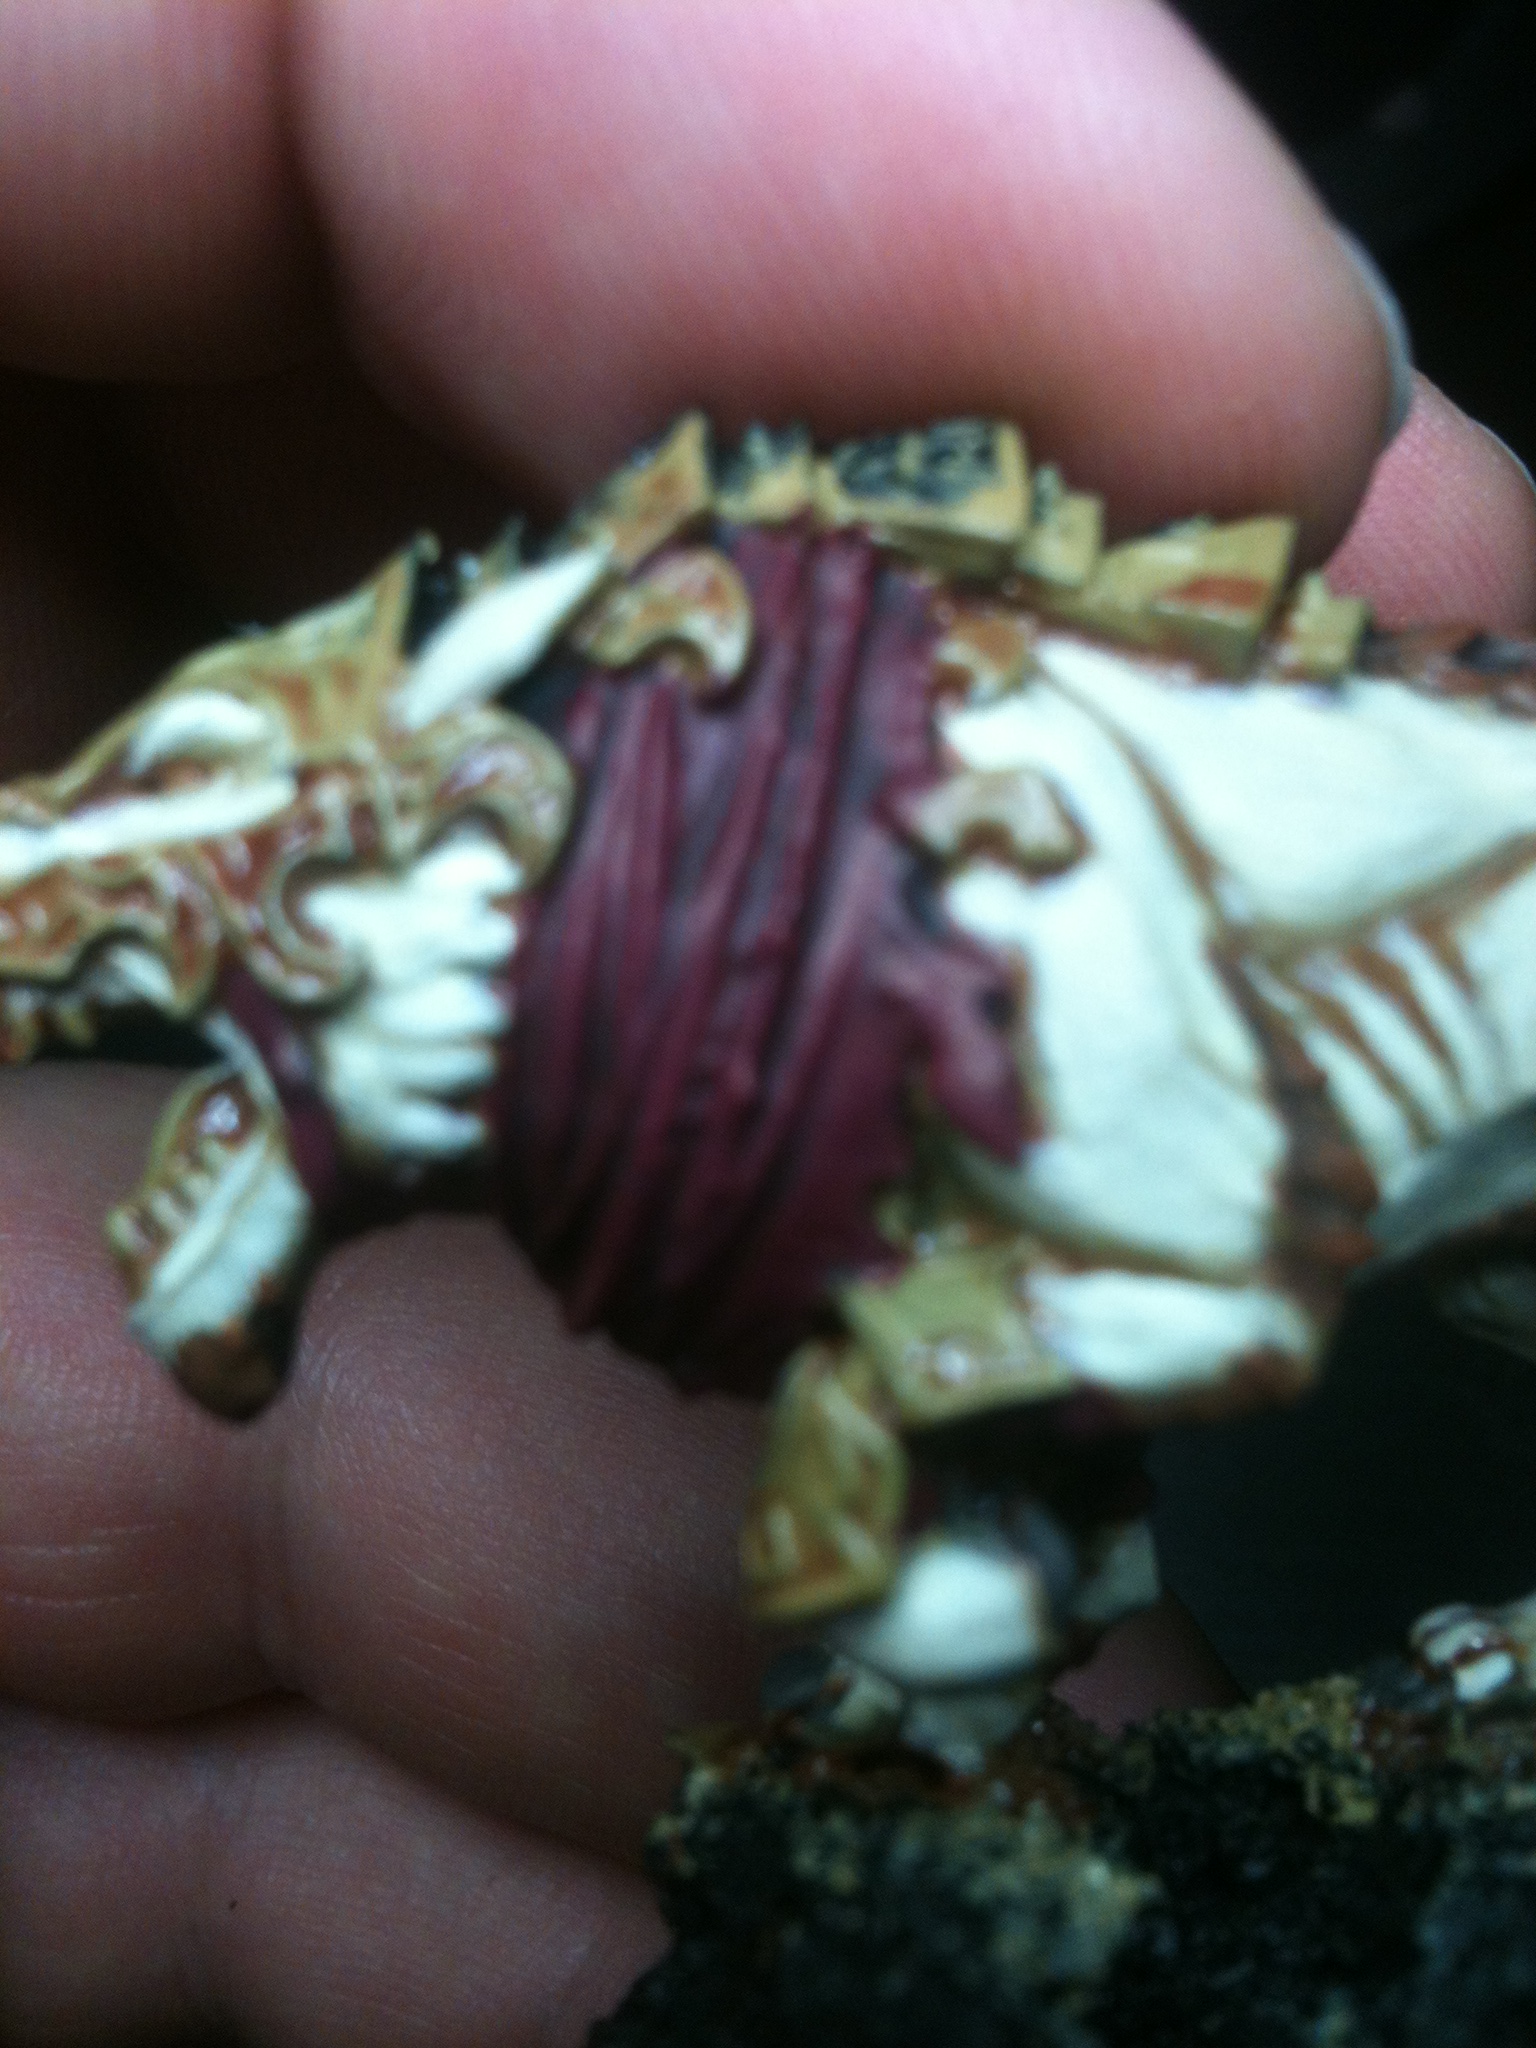
Now we highlight the scarf with Scab Red. Leave only the valleys of the scarf dark. The final highlight is a 1:1 mix of Scab Red and Blood Red. This is applied to the very highest peaks in the folds of the scarf.
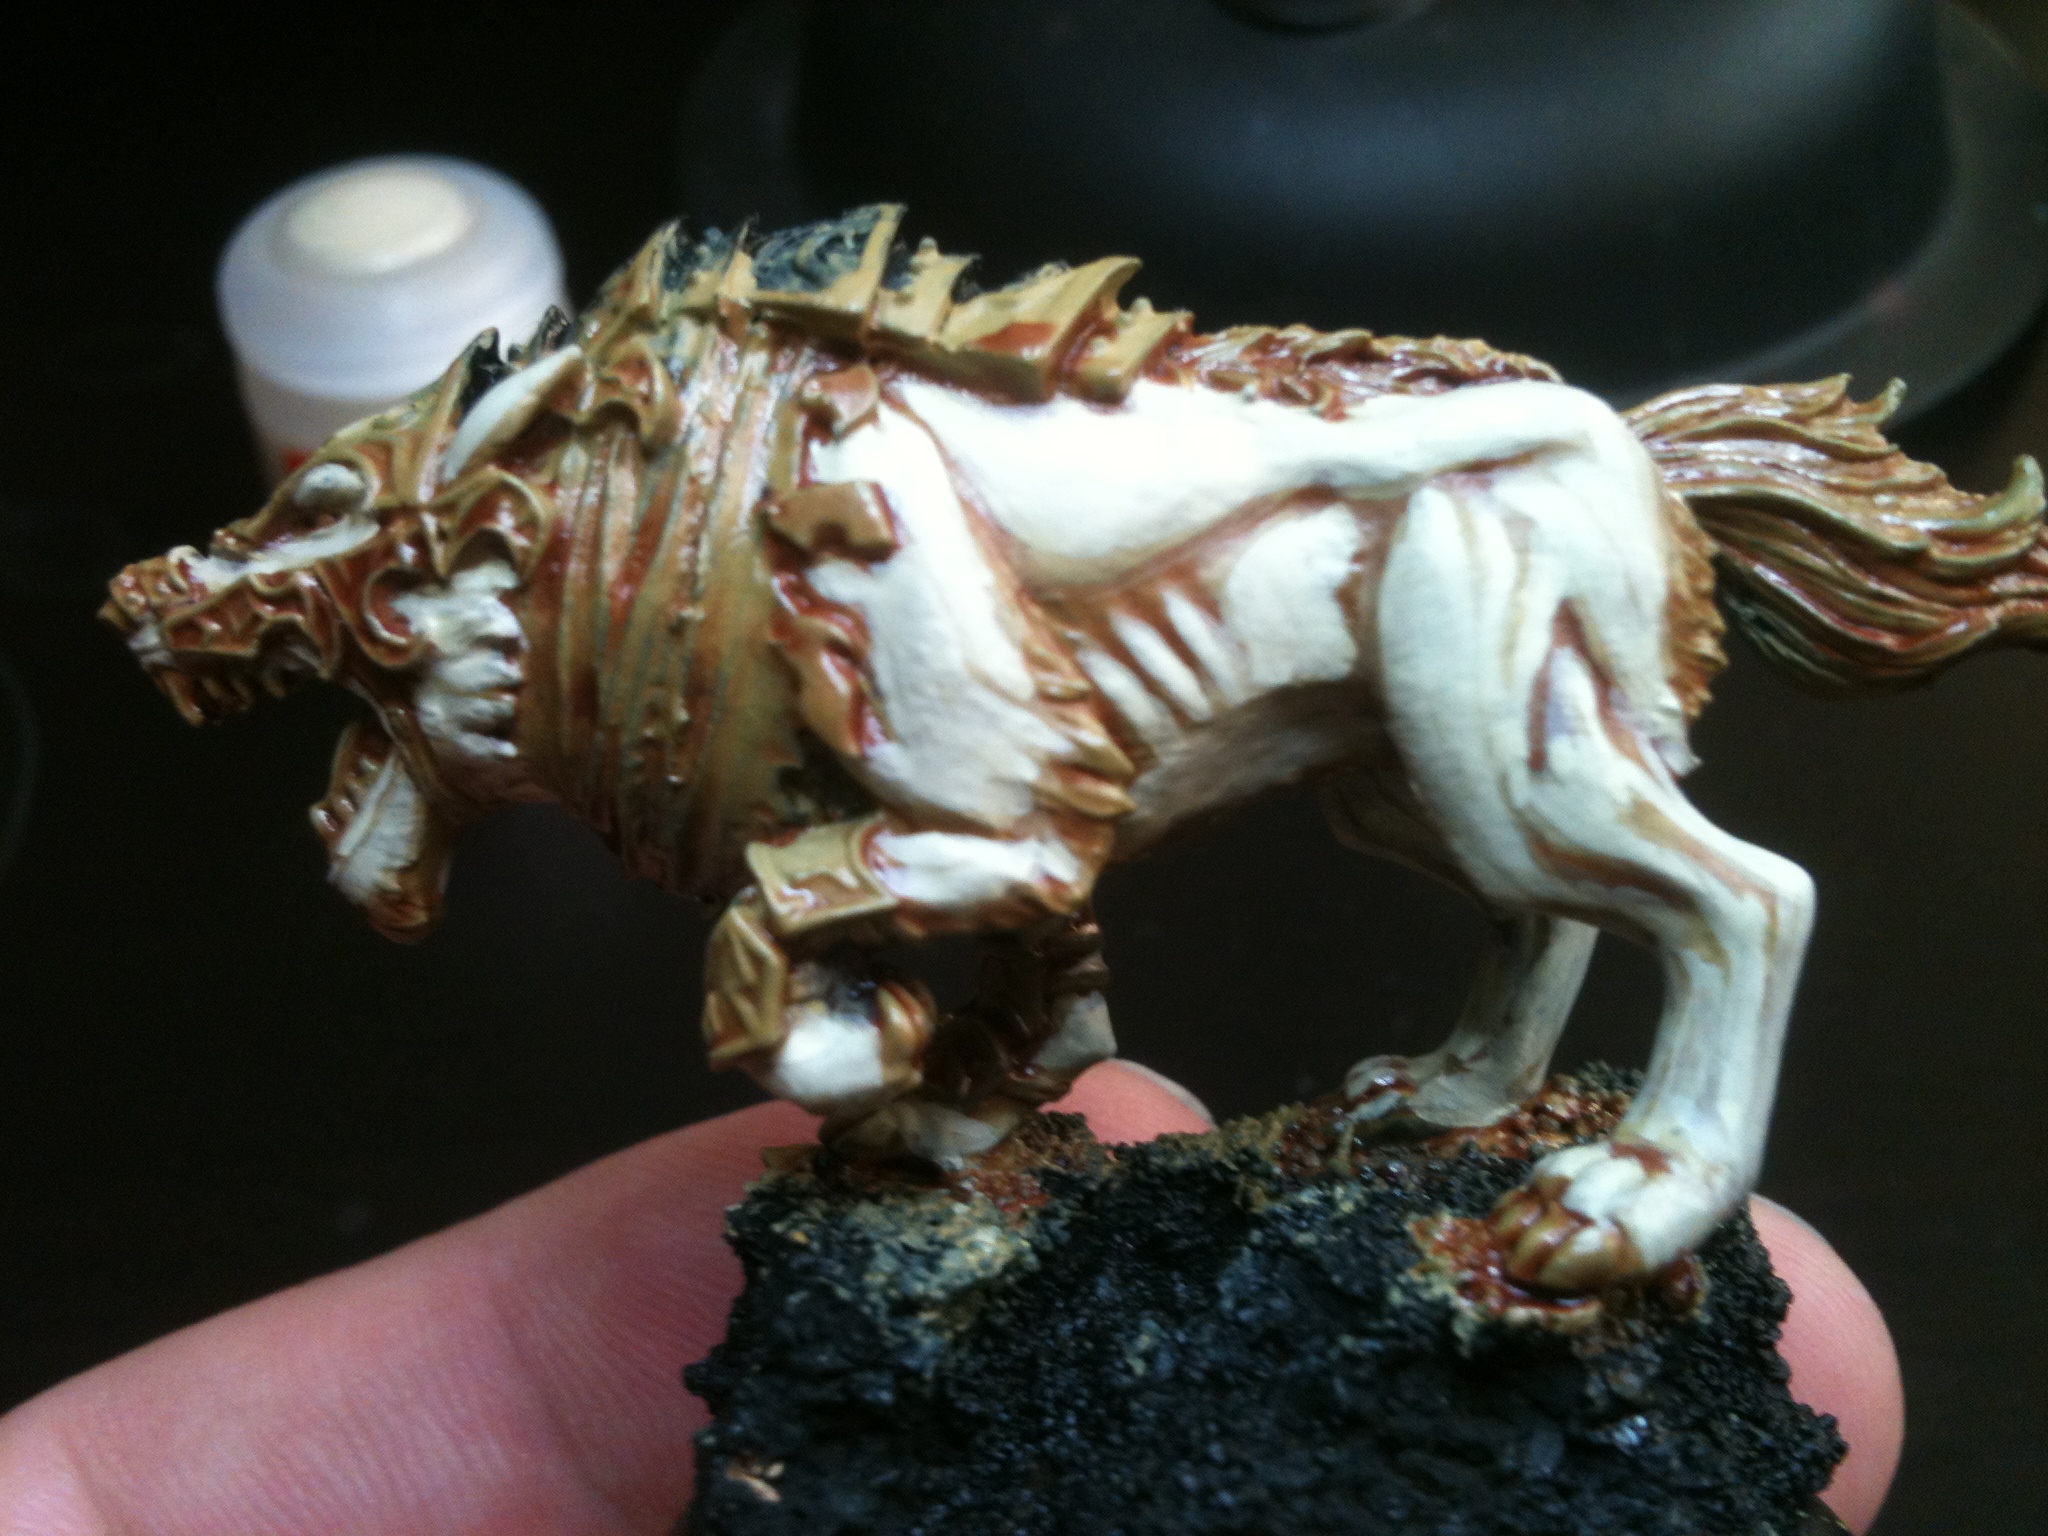
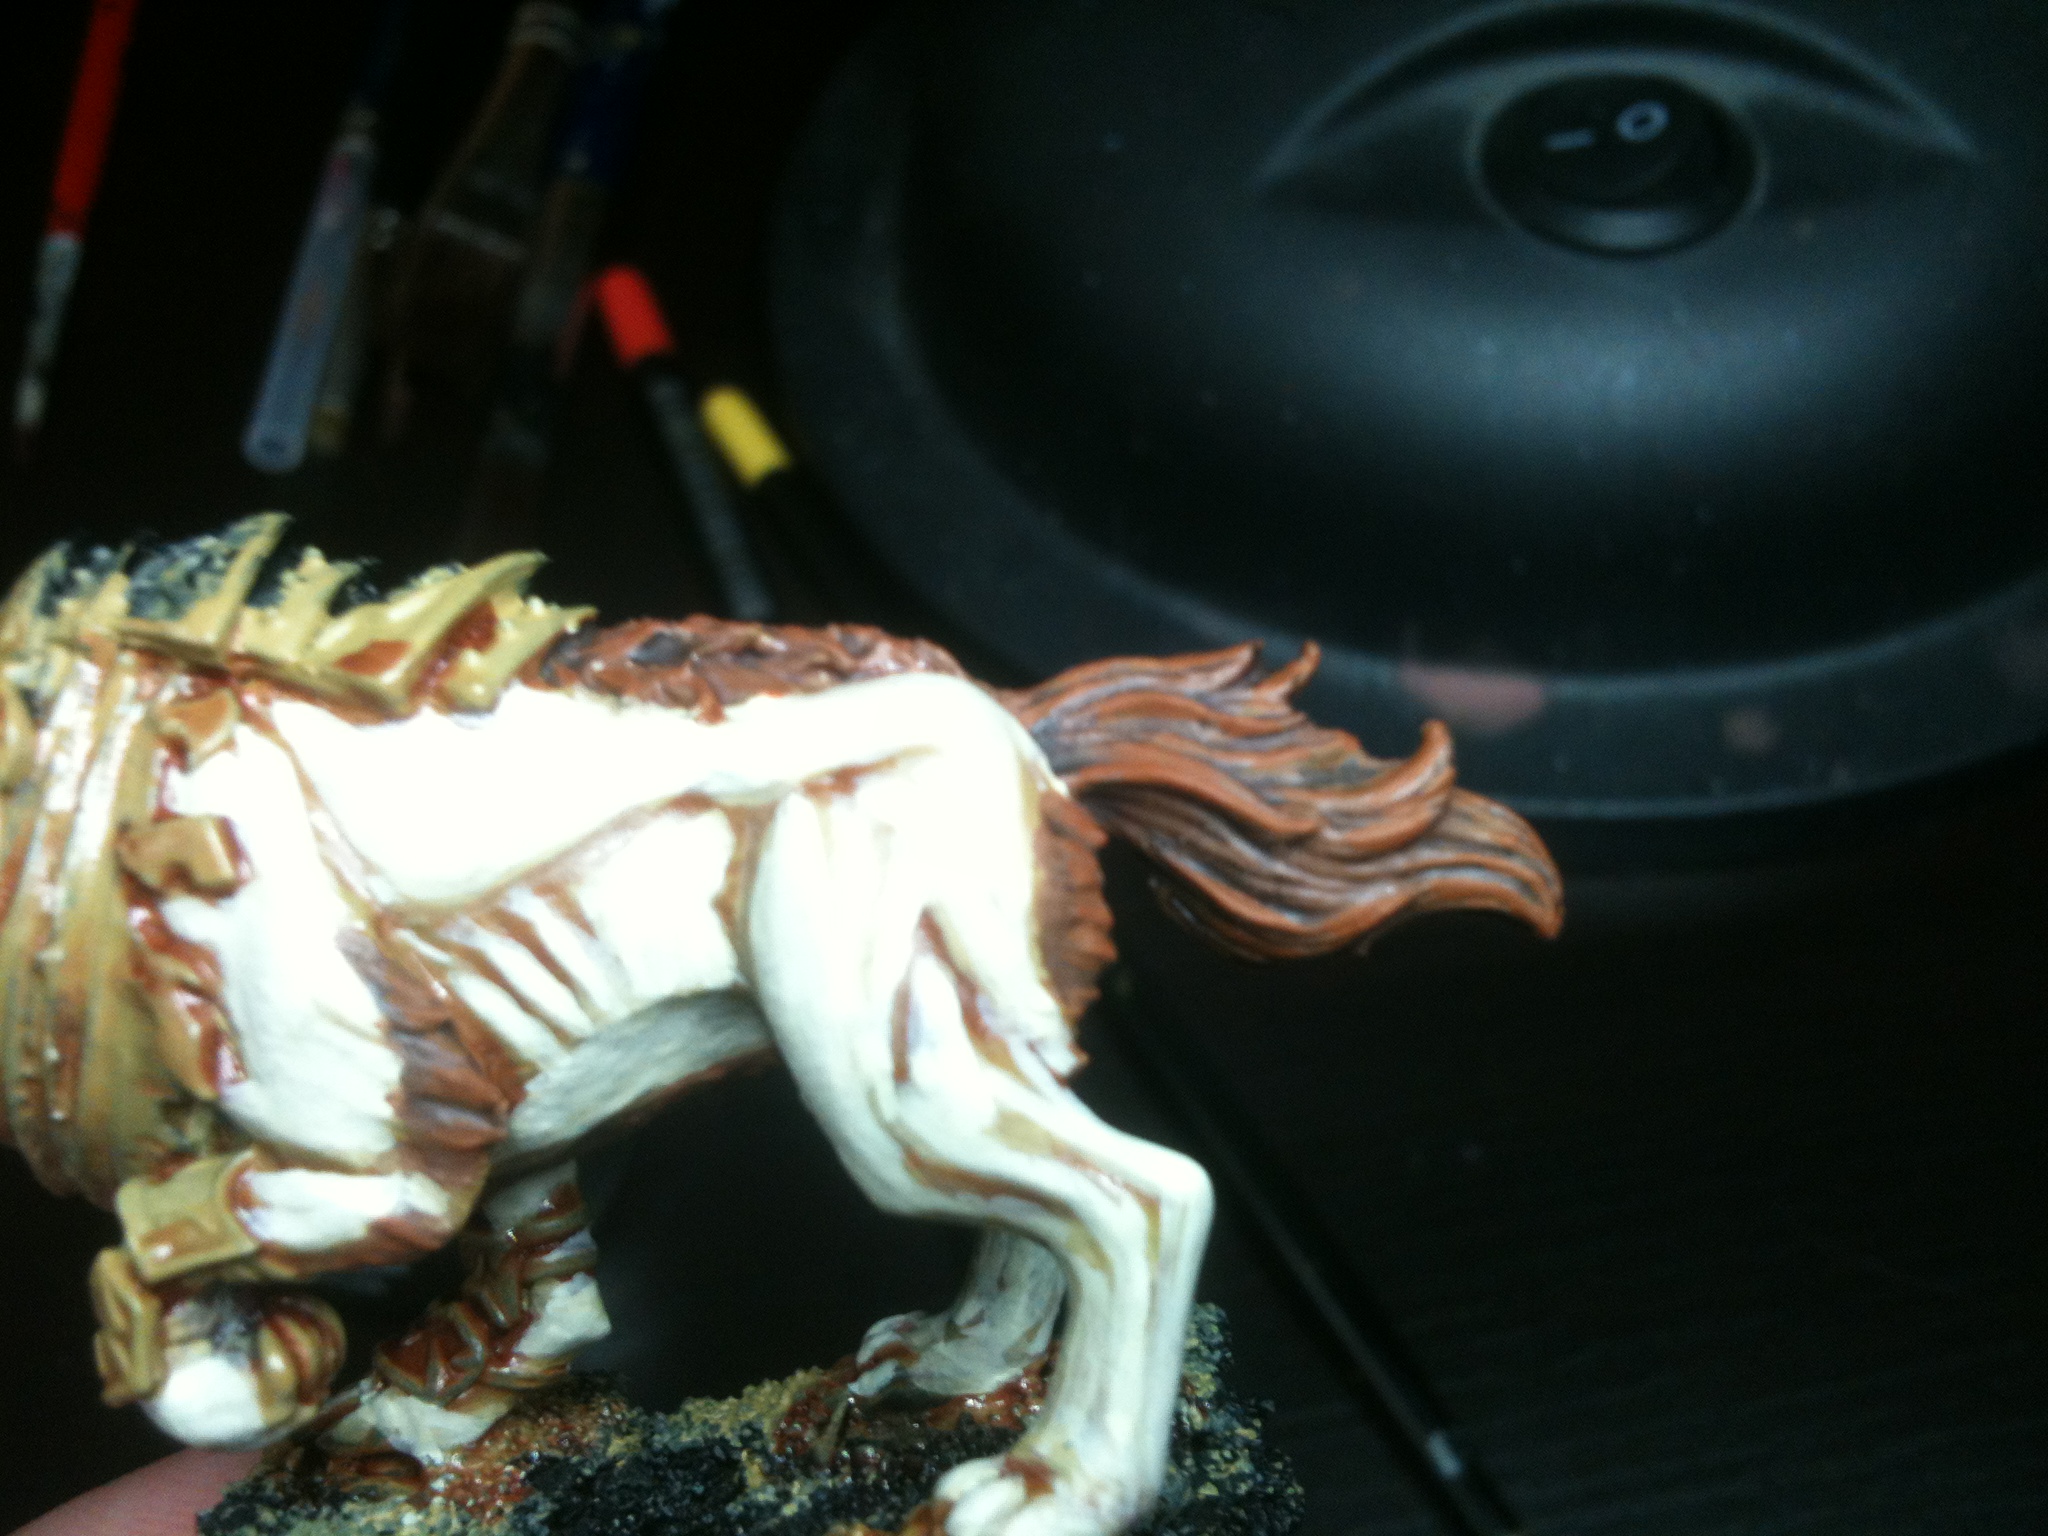
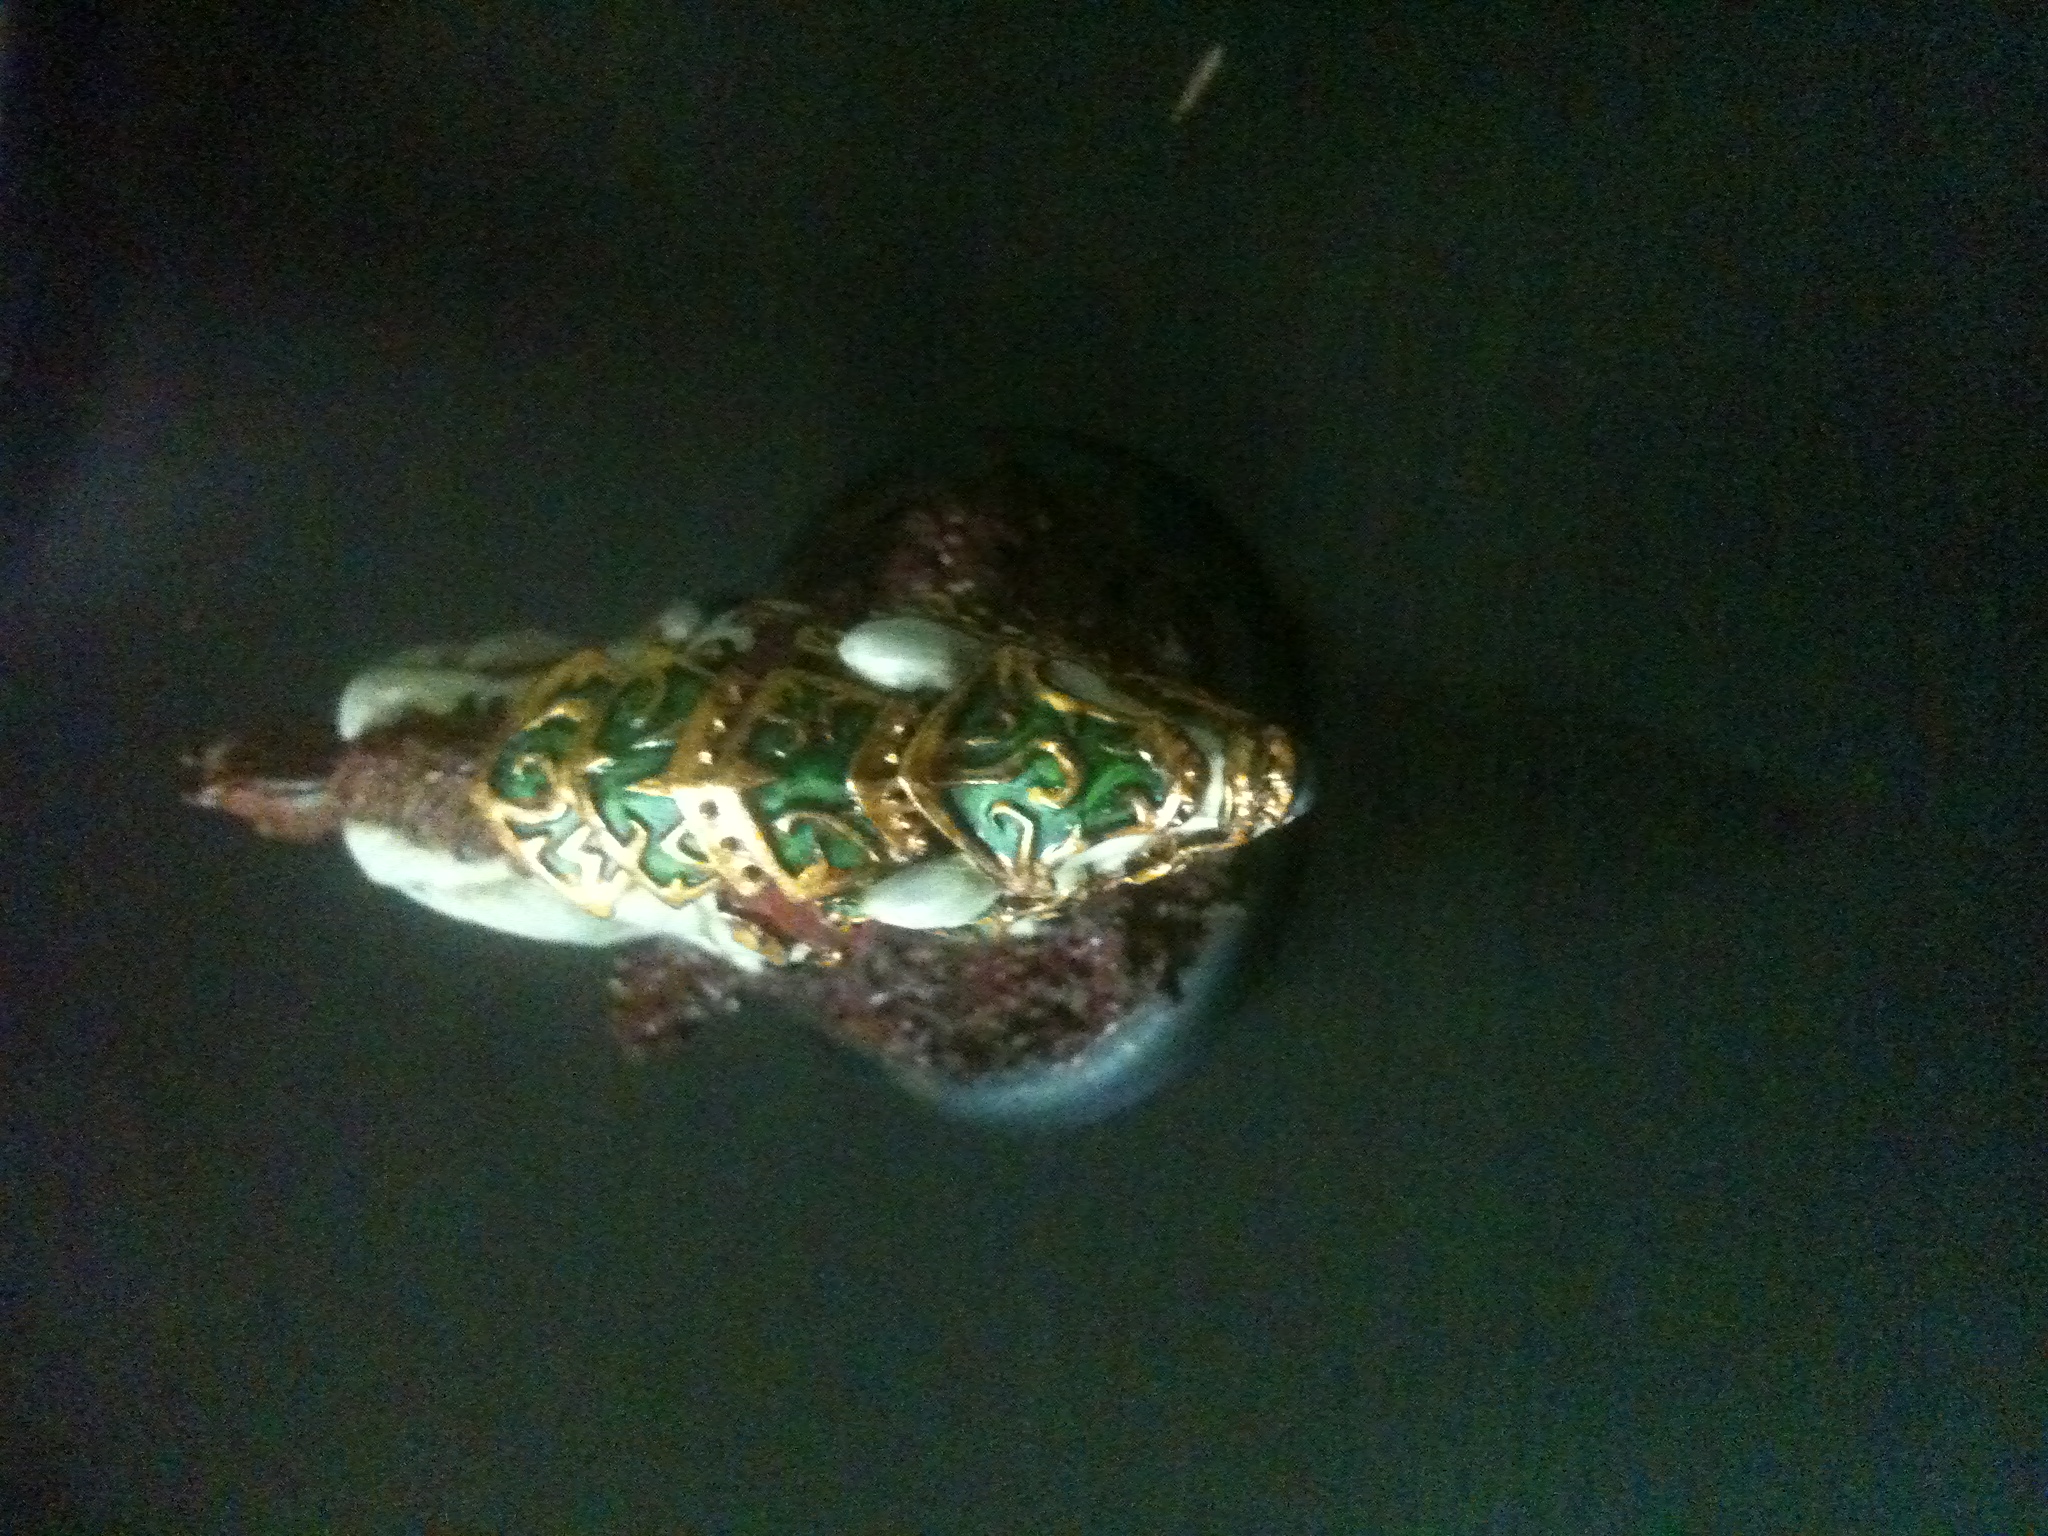
Armour time!
Basecoat the lacquered area Orkhide Shade. Highlight that with Dark Angels Green leaving just the edges as Orkhide. The final highlight is a mix or Dark Angels Green and Scorpion Green in a 2:1 ratio.
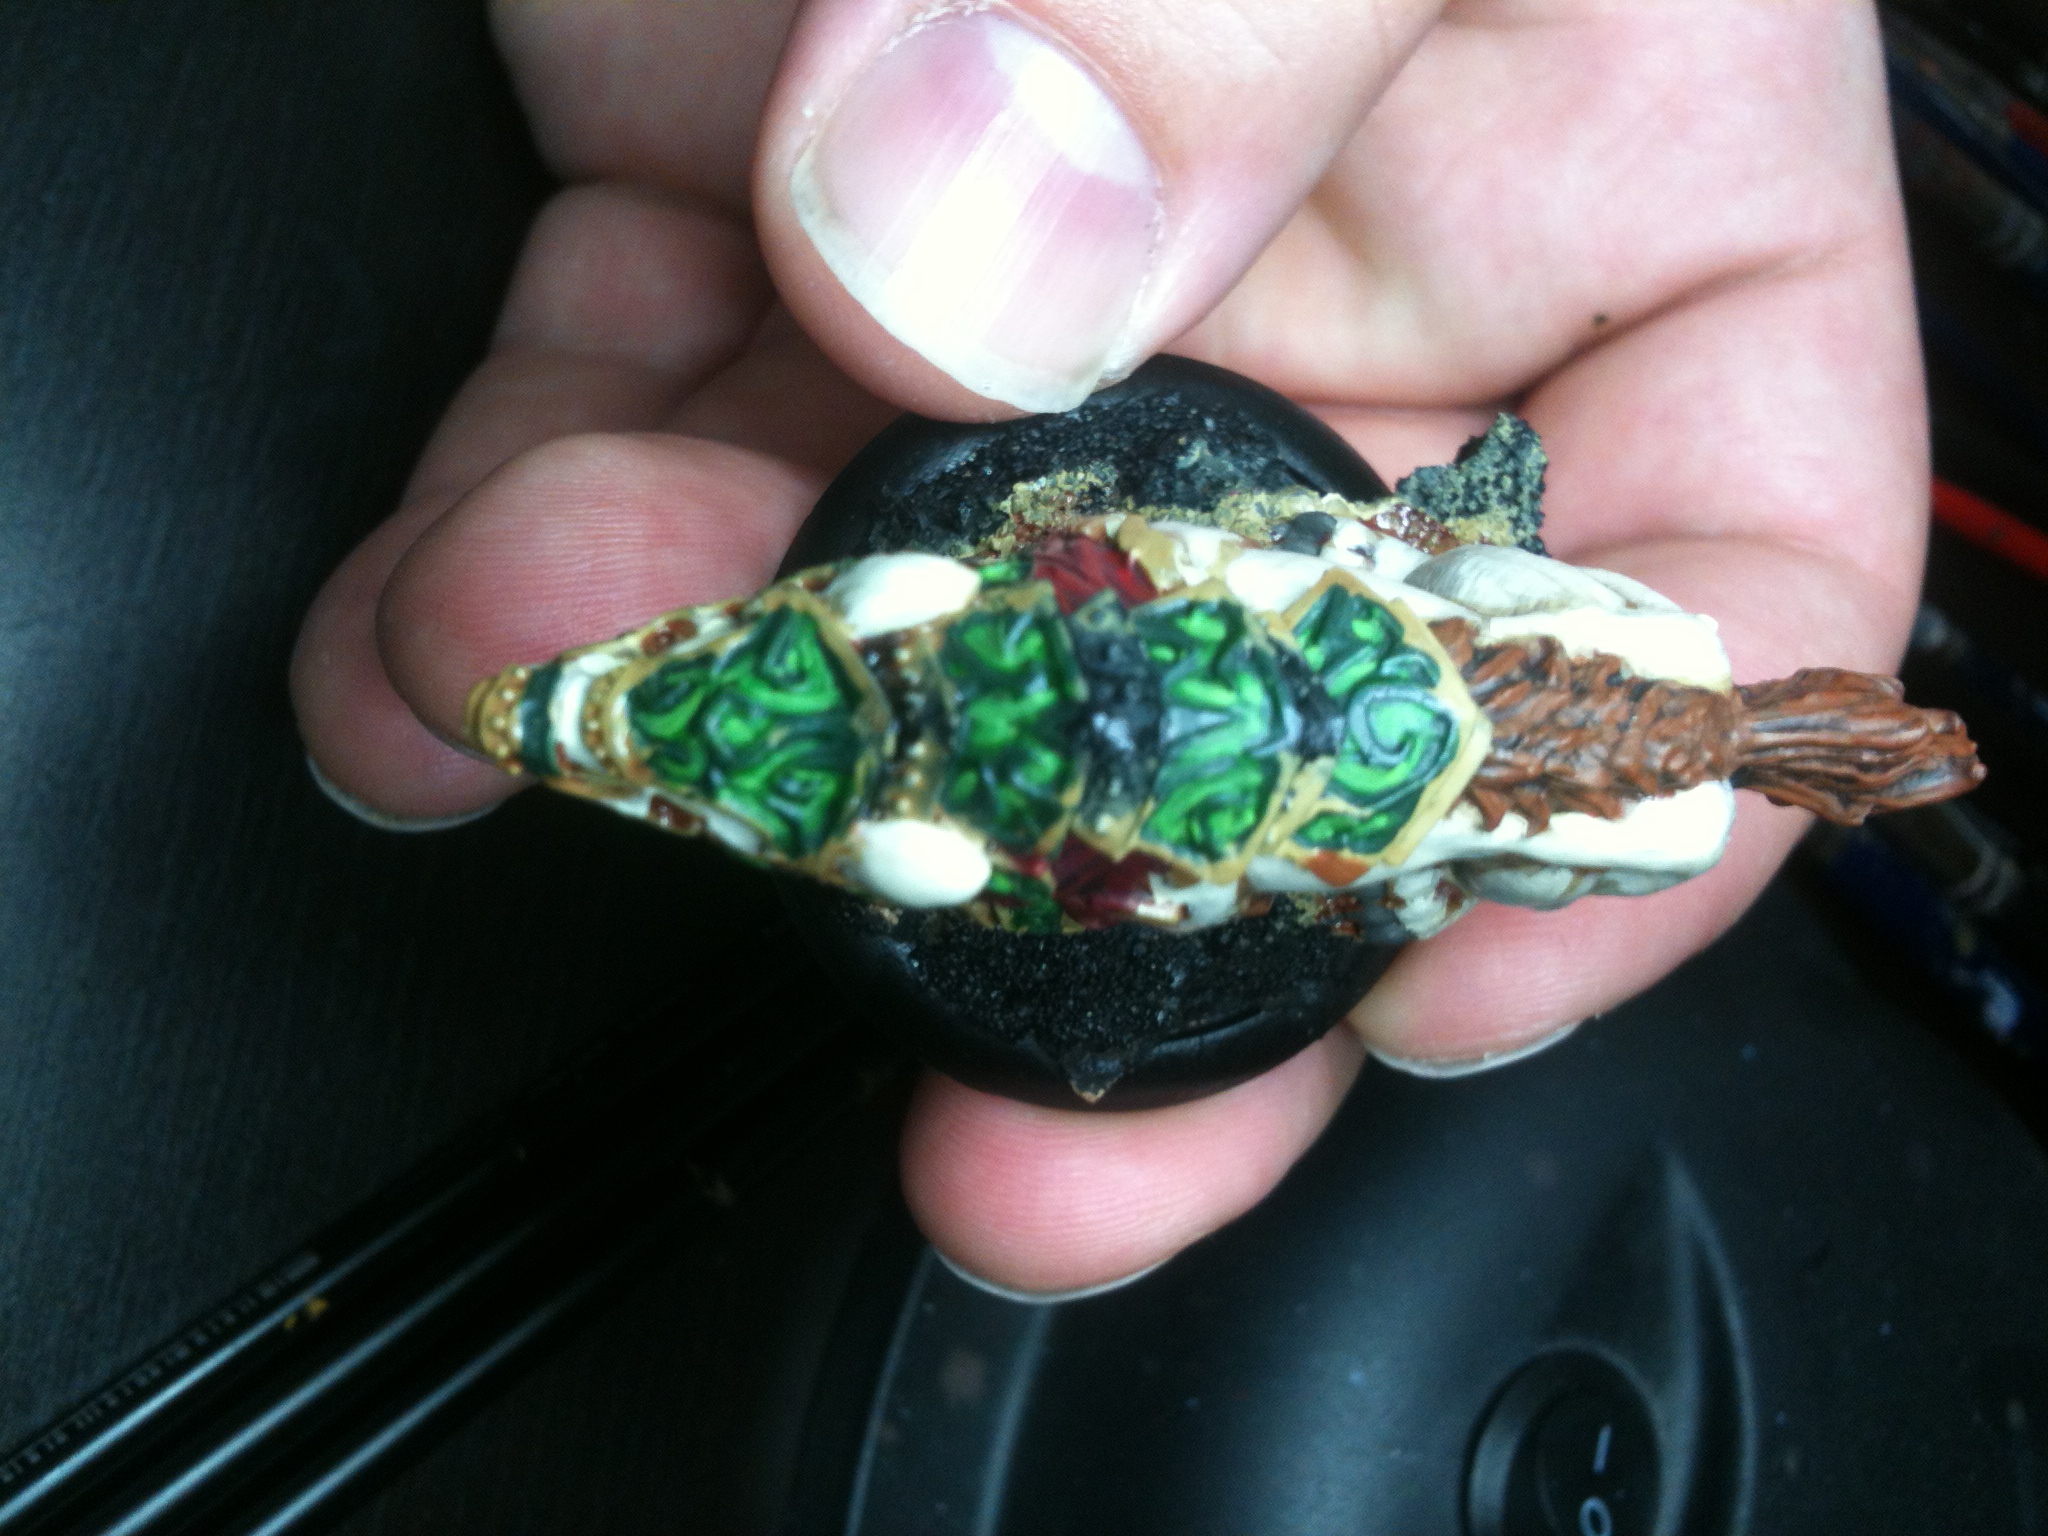
For the metal I base coat with Tin Bitz and do consecutive highlights of Dwarf Bronze, Shining Gold and then Burnishes Gold.
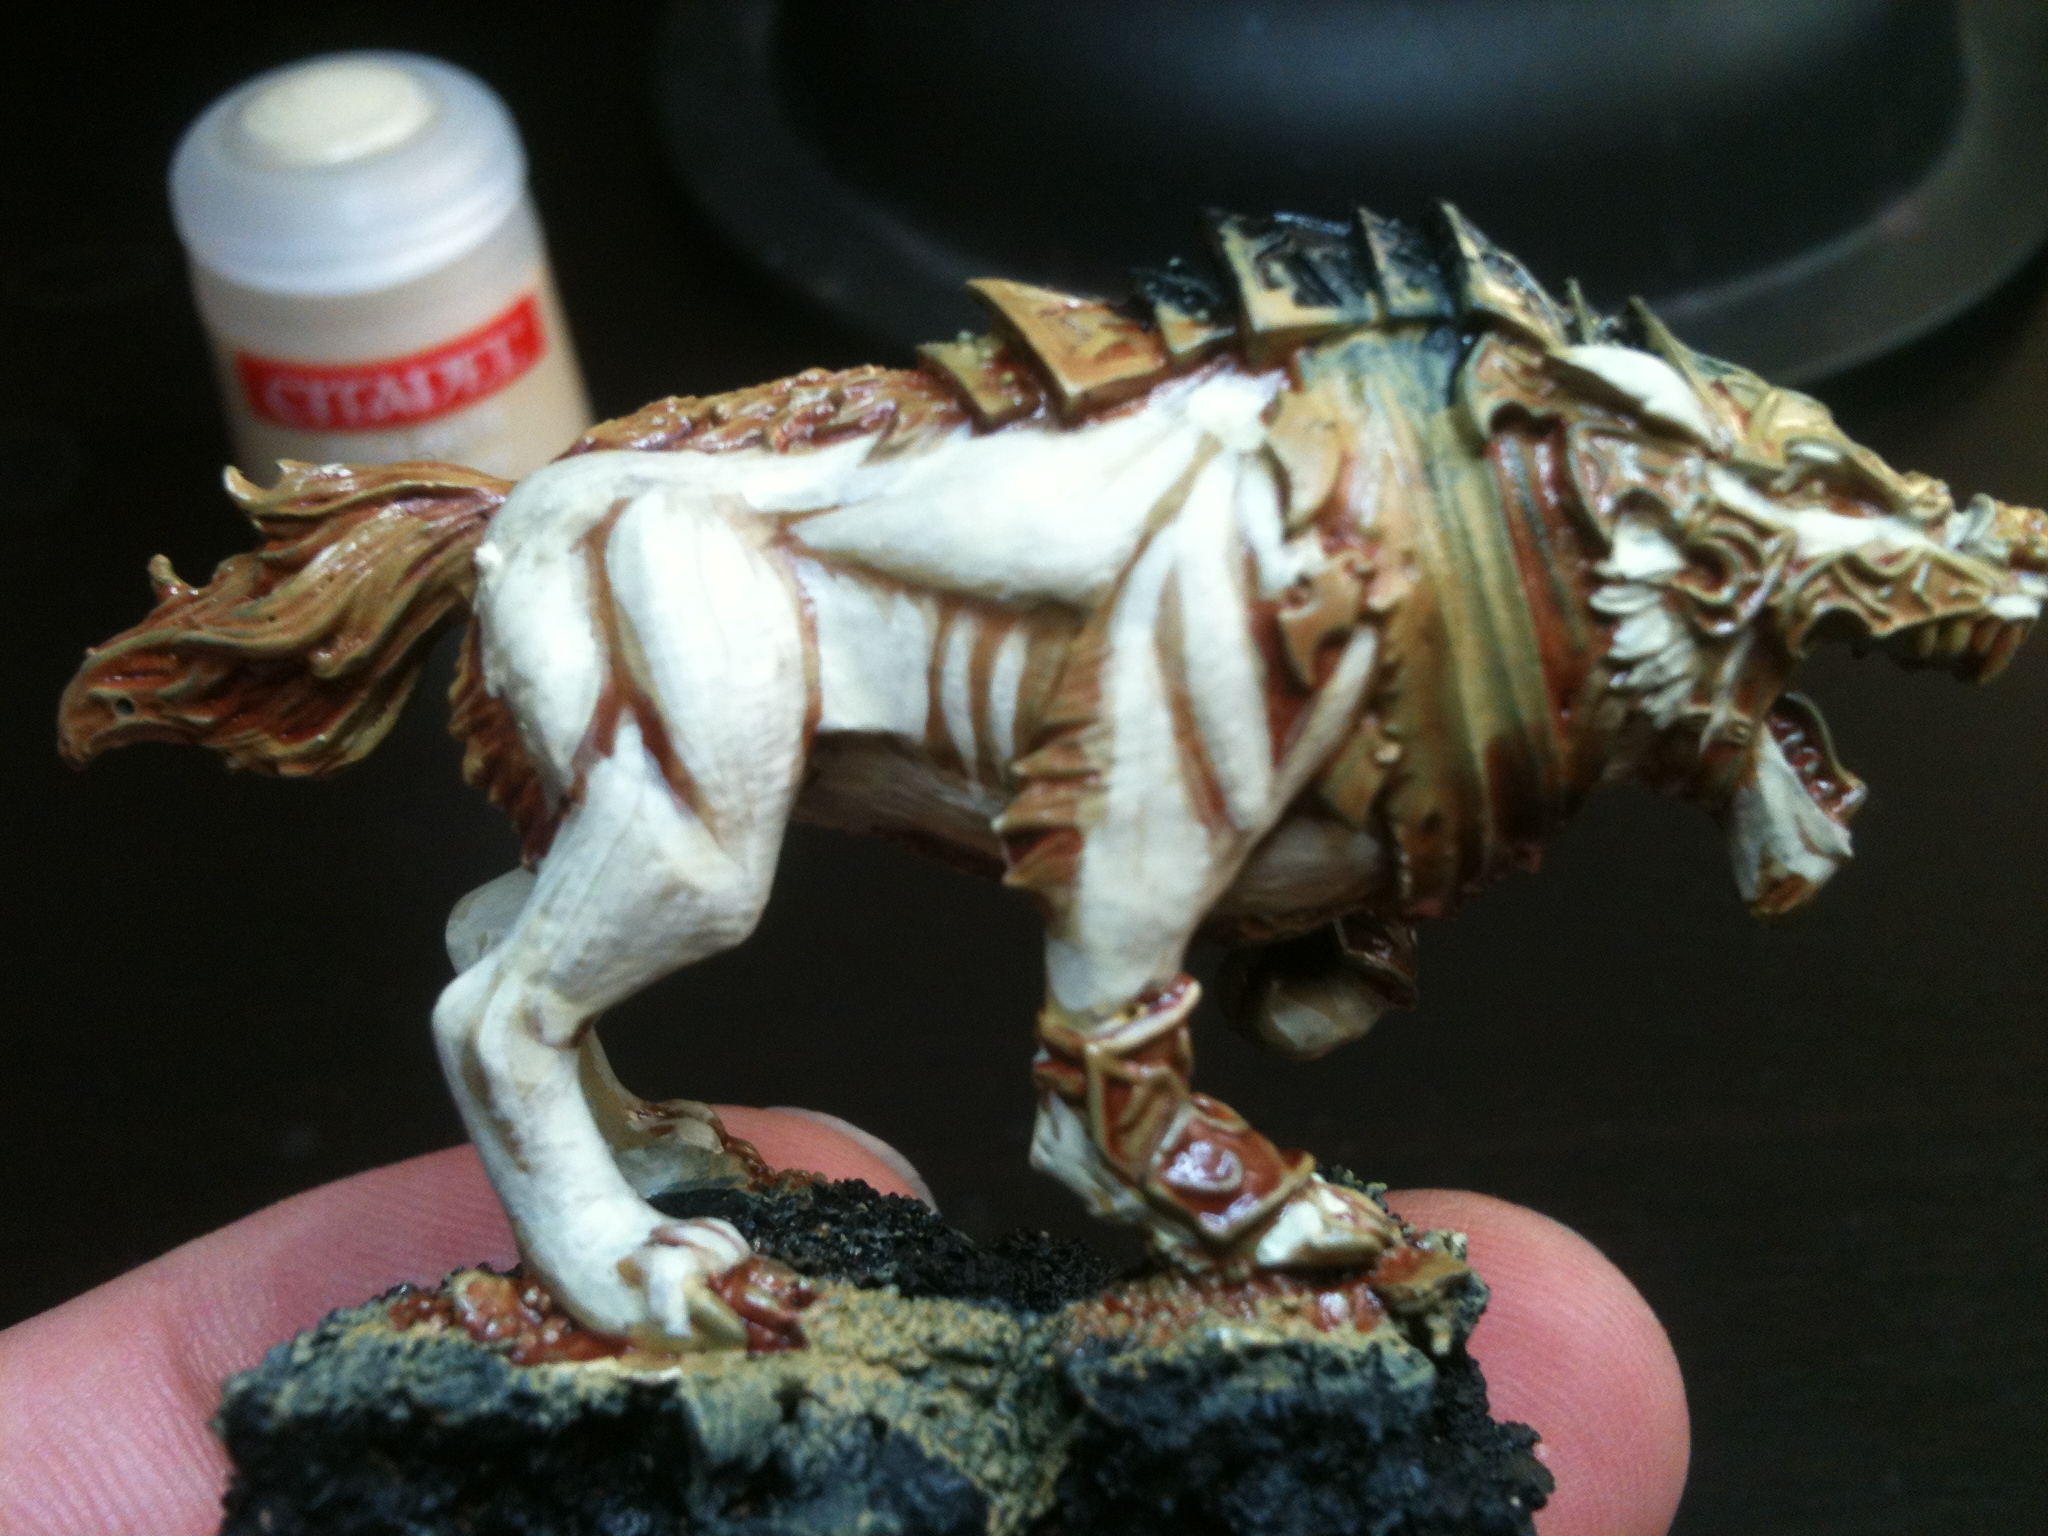
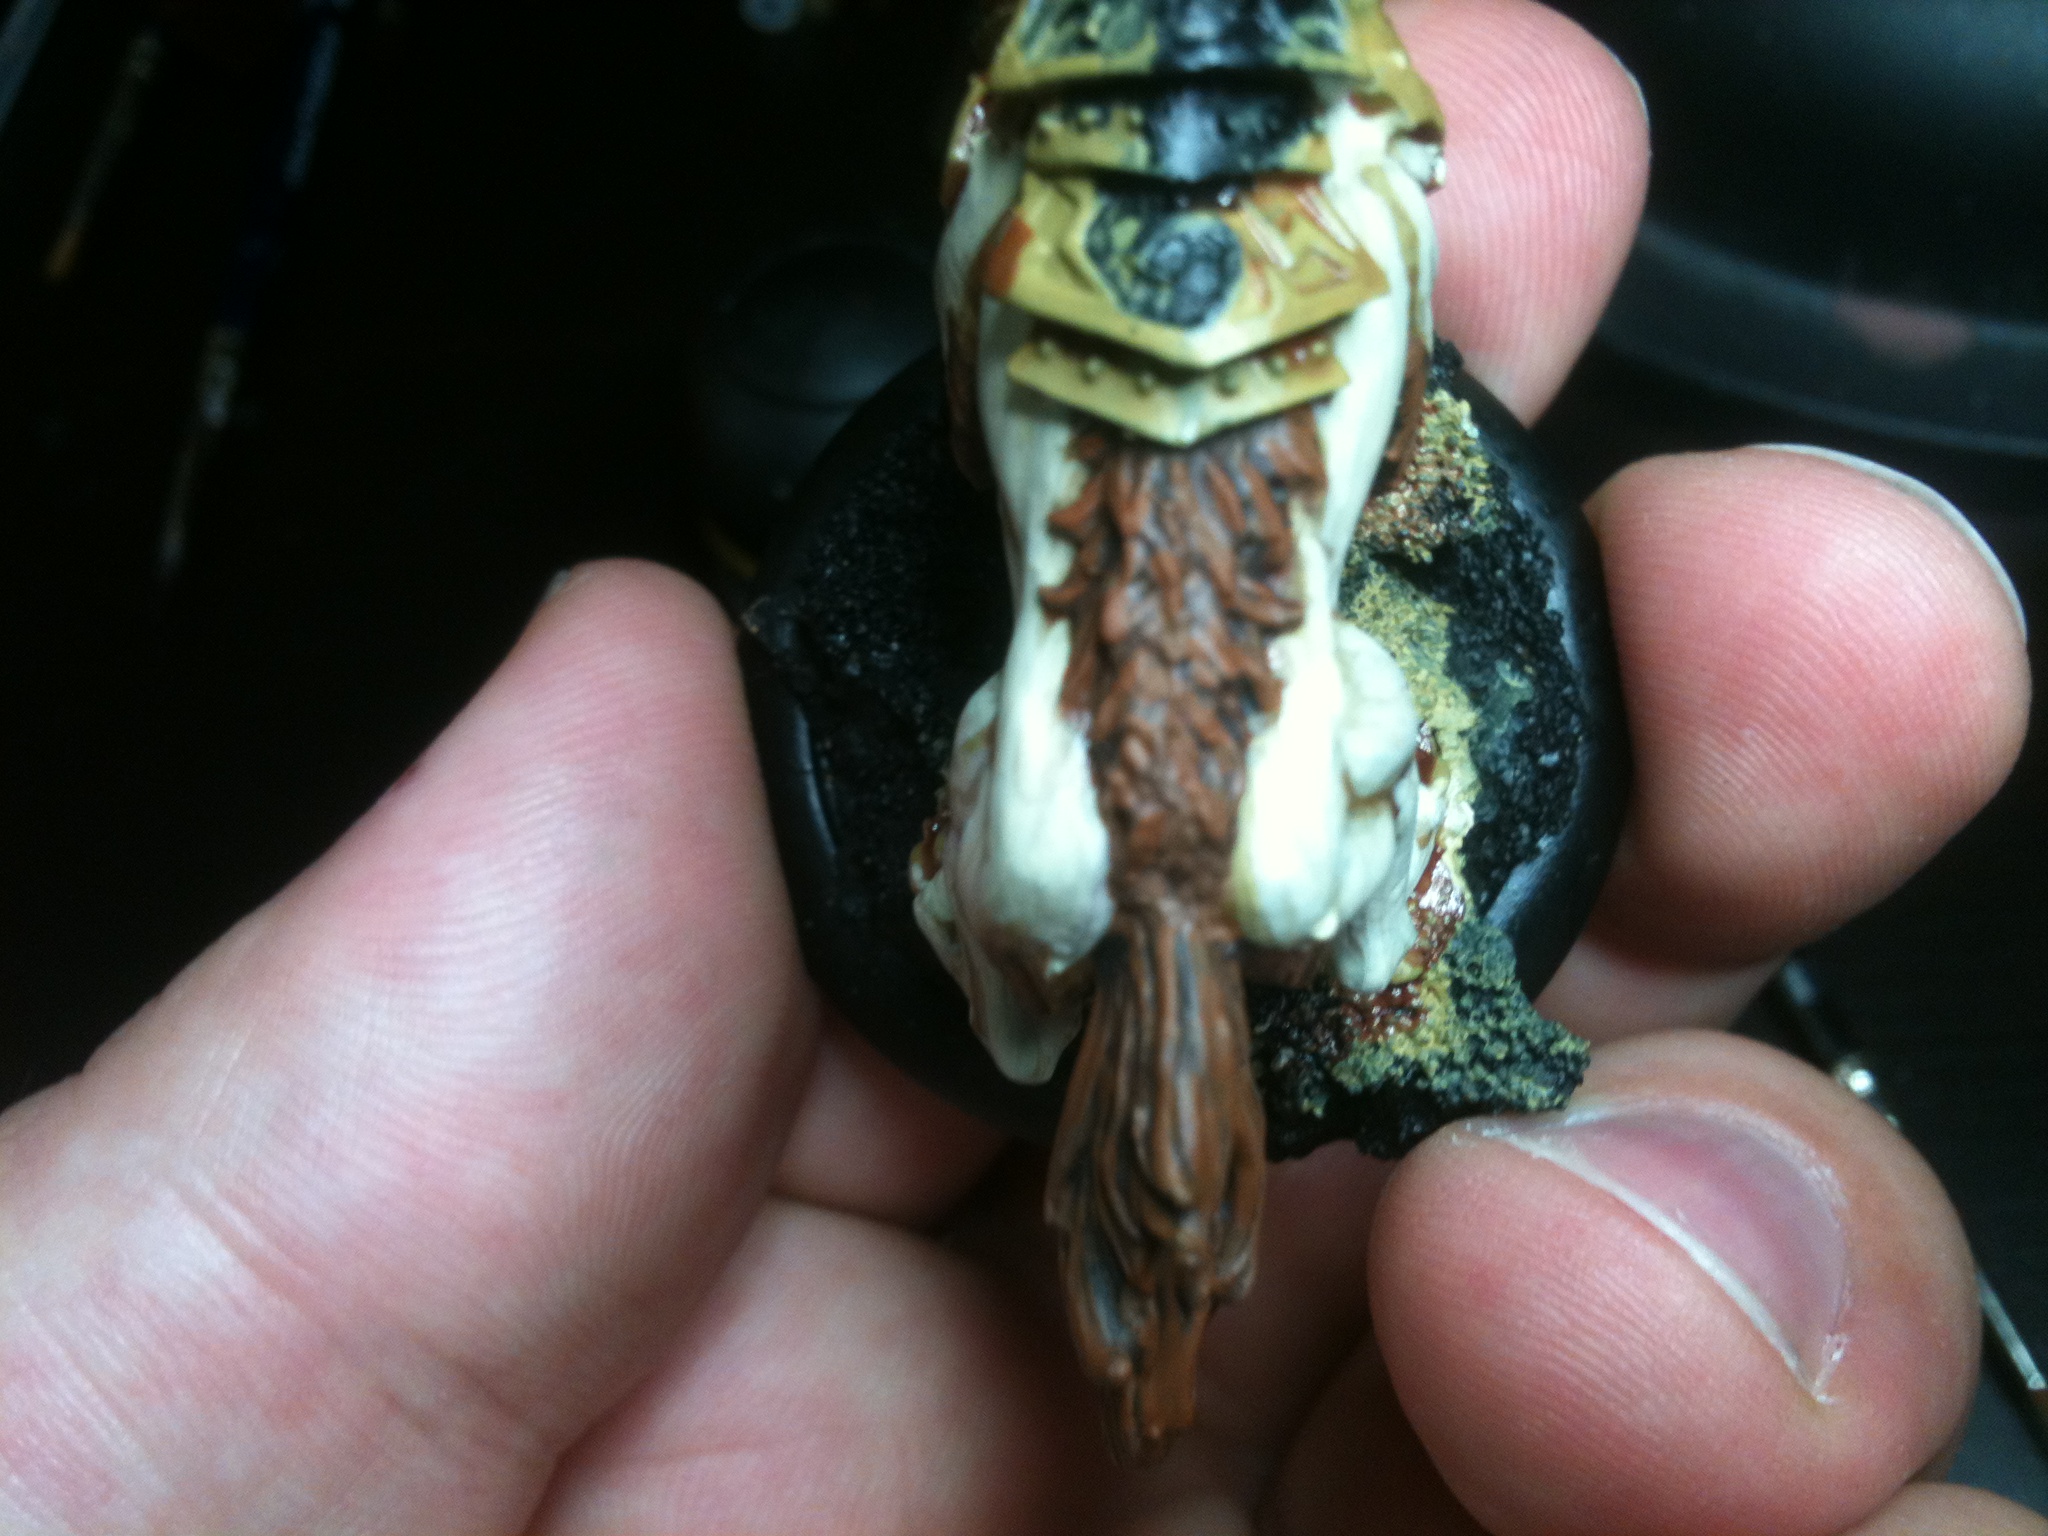
And now for the final details.
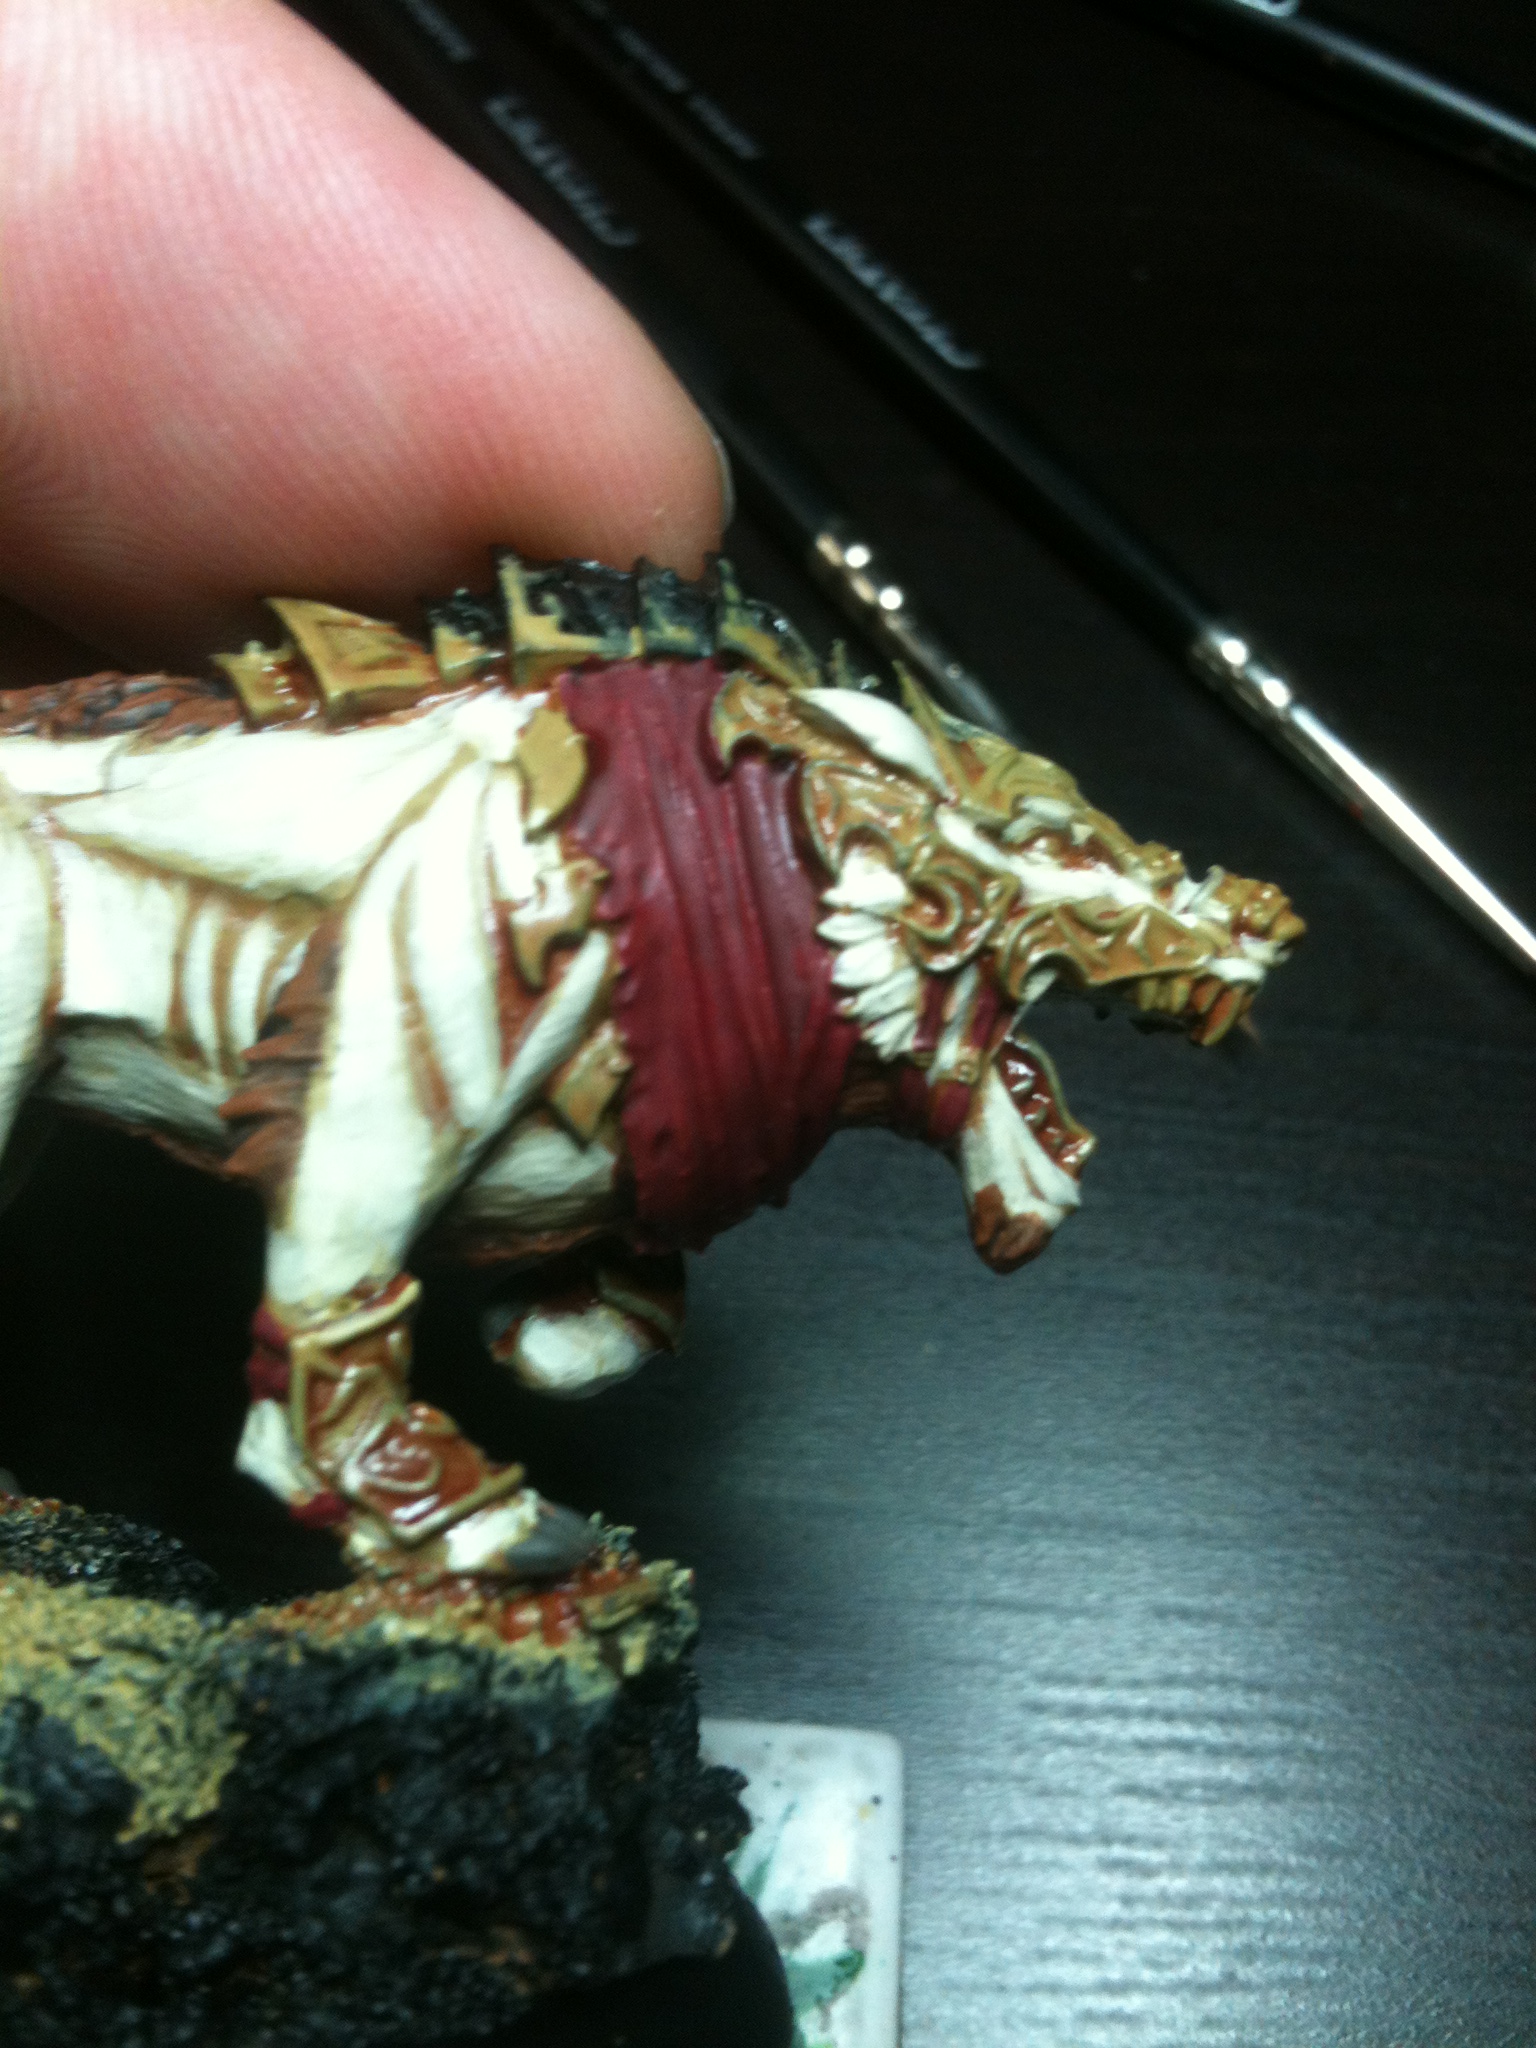
Base coat the mouth with Warlock Purple and then wash it with Leviathan Purple. Once the wash dries, highlight the tongue and gums with Warlock Purple and then with a mix with Warlock Purple and a dash of Bleached Bone. The teeth were base coated Scorched Brown and the highlighted with Bleached Bone. The Claws and Nose are a base coat of Charadon Granite with a Badab Black wash.
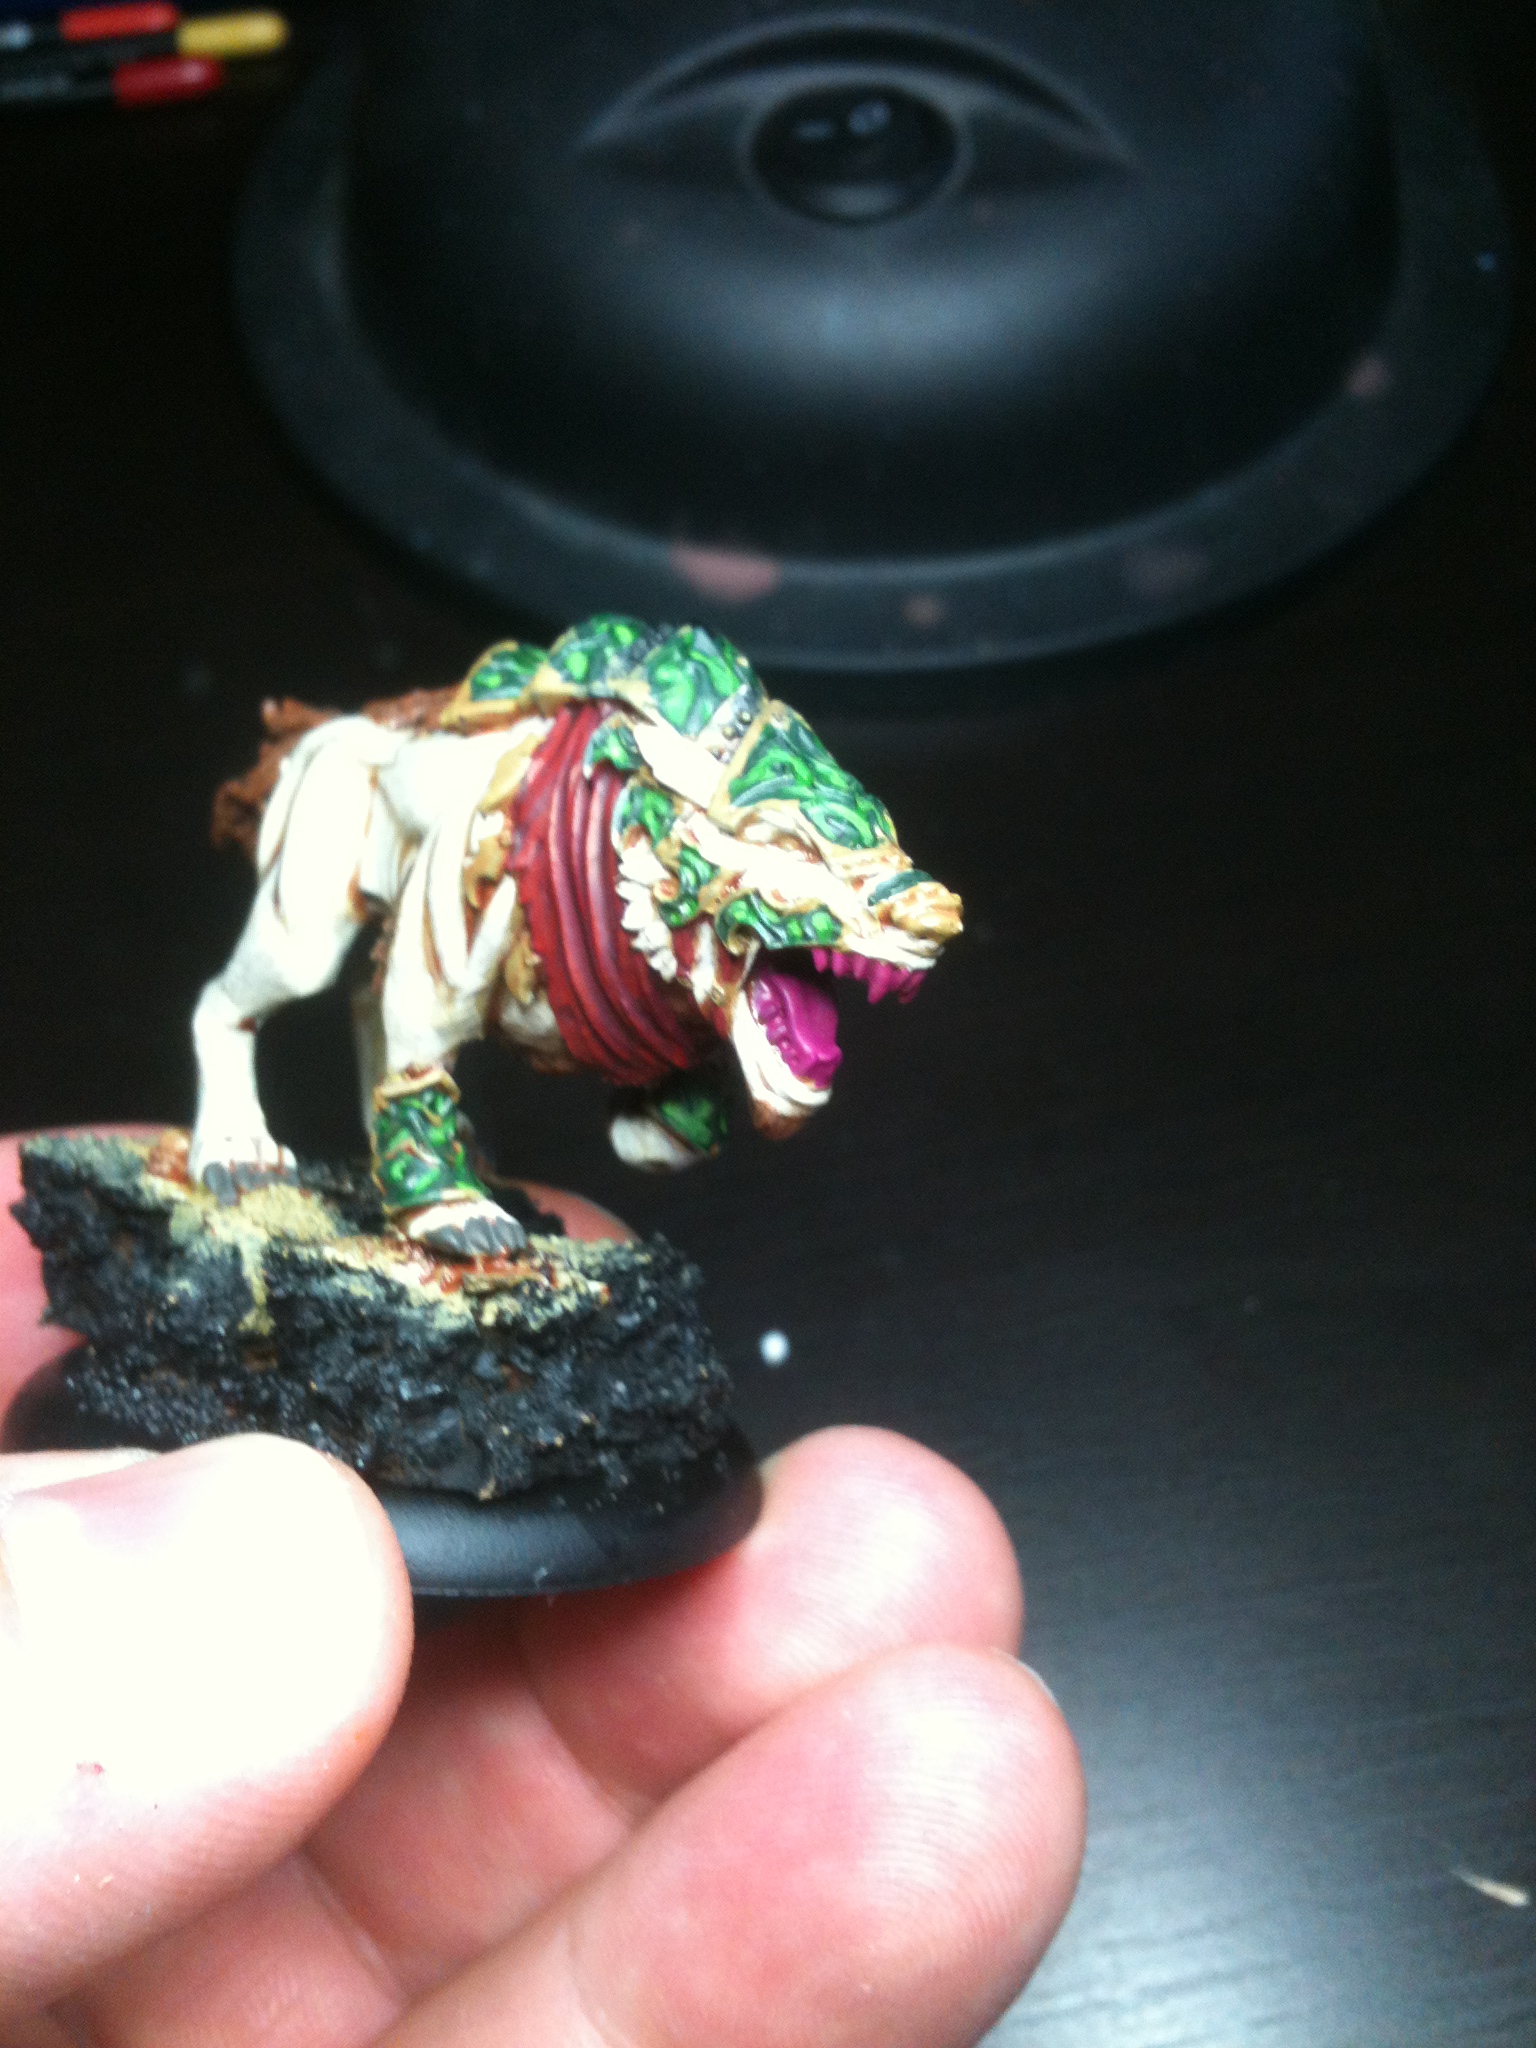
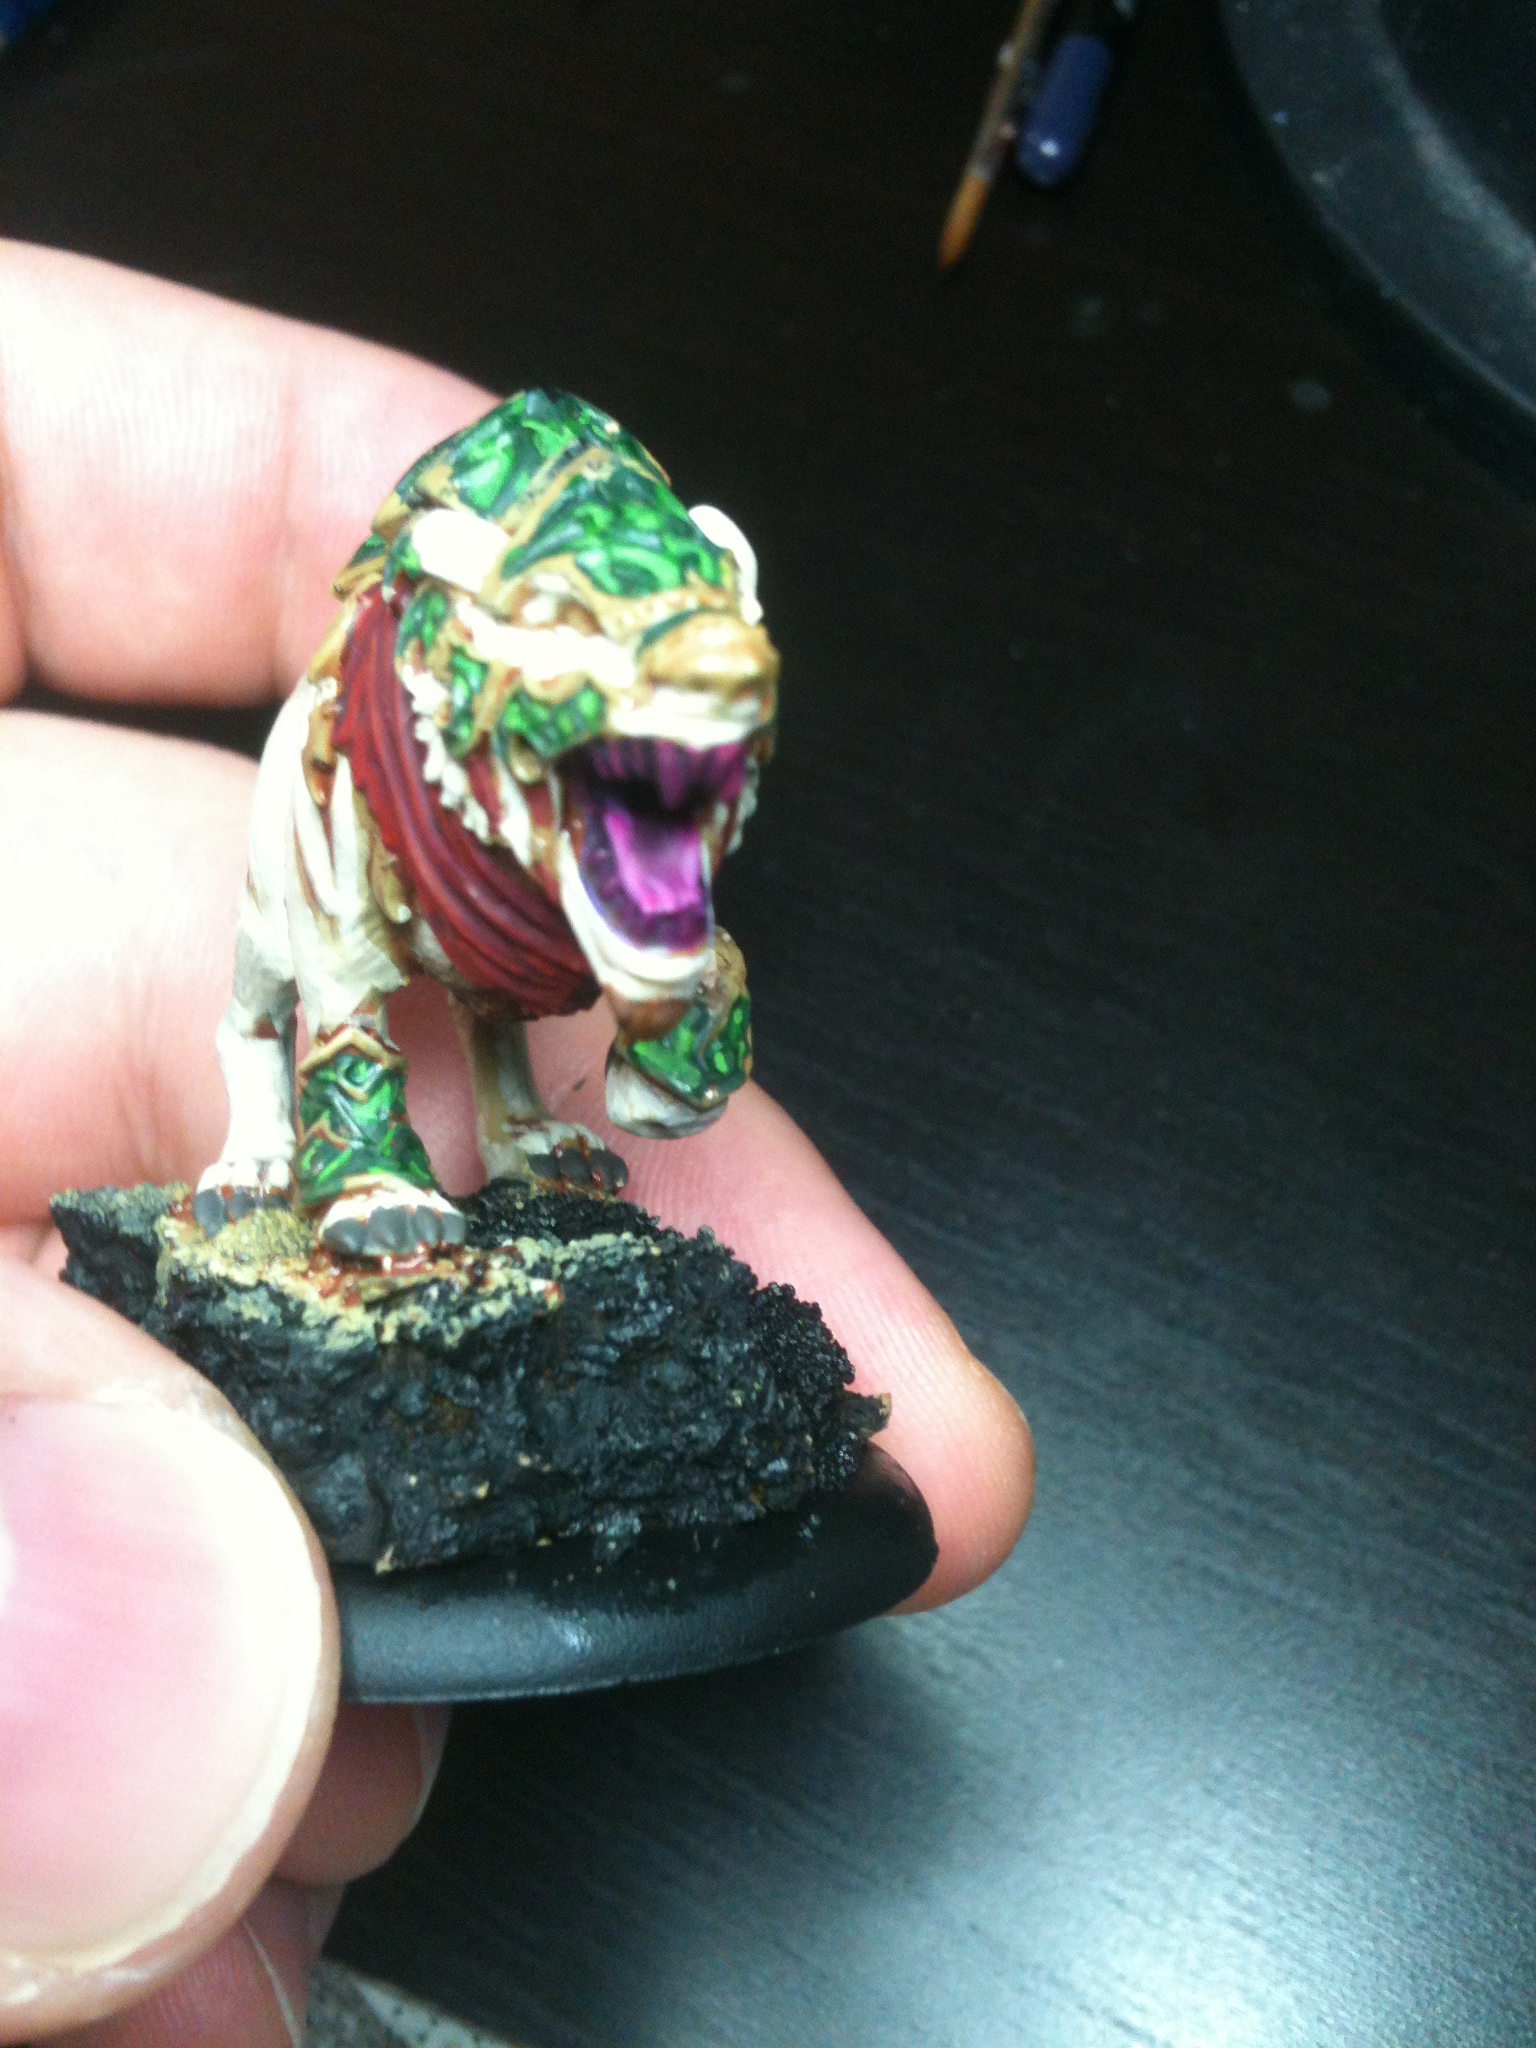
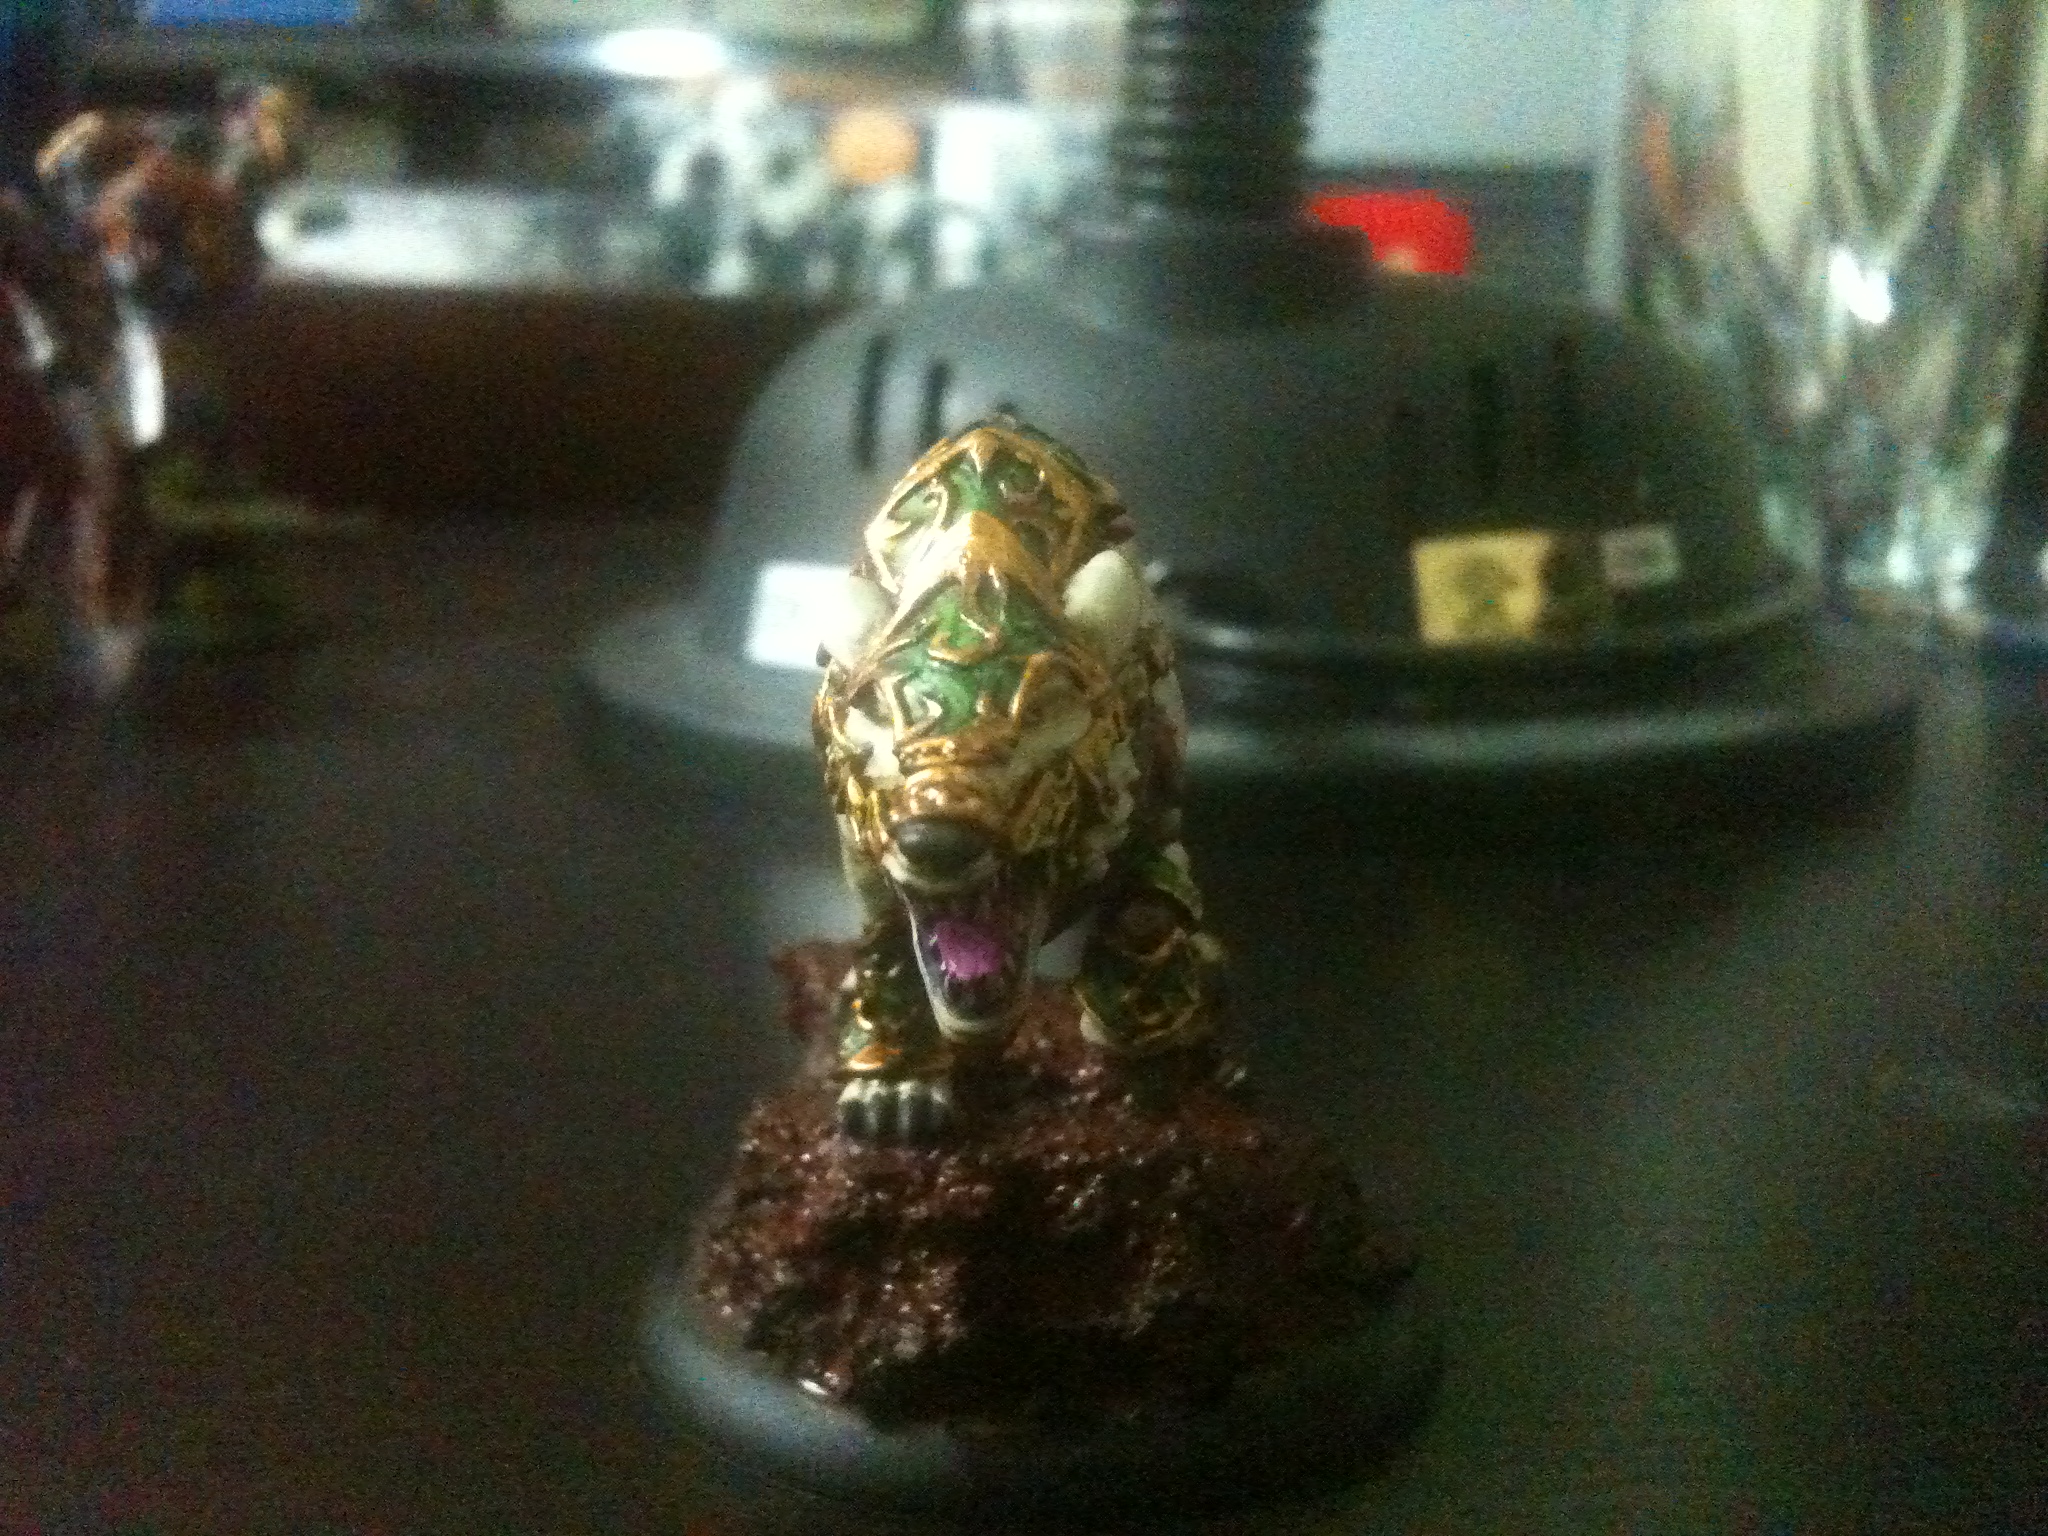
And with that we are all done! Laris is fully painted and ready to go.
Now we move along to the next step in our painting journey we start painting Laris’ master; Kaya the Moonhunter.
Just as with Laris after assembly I primed Kaya black.
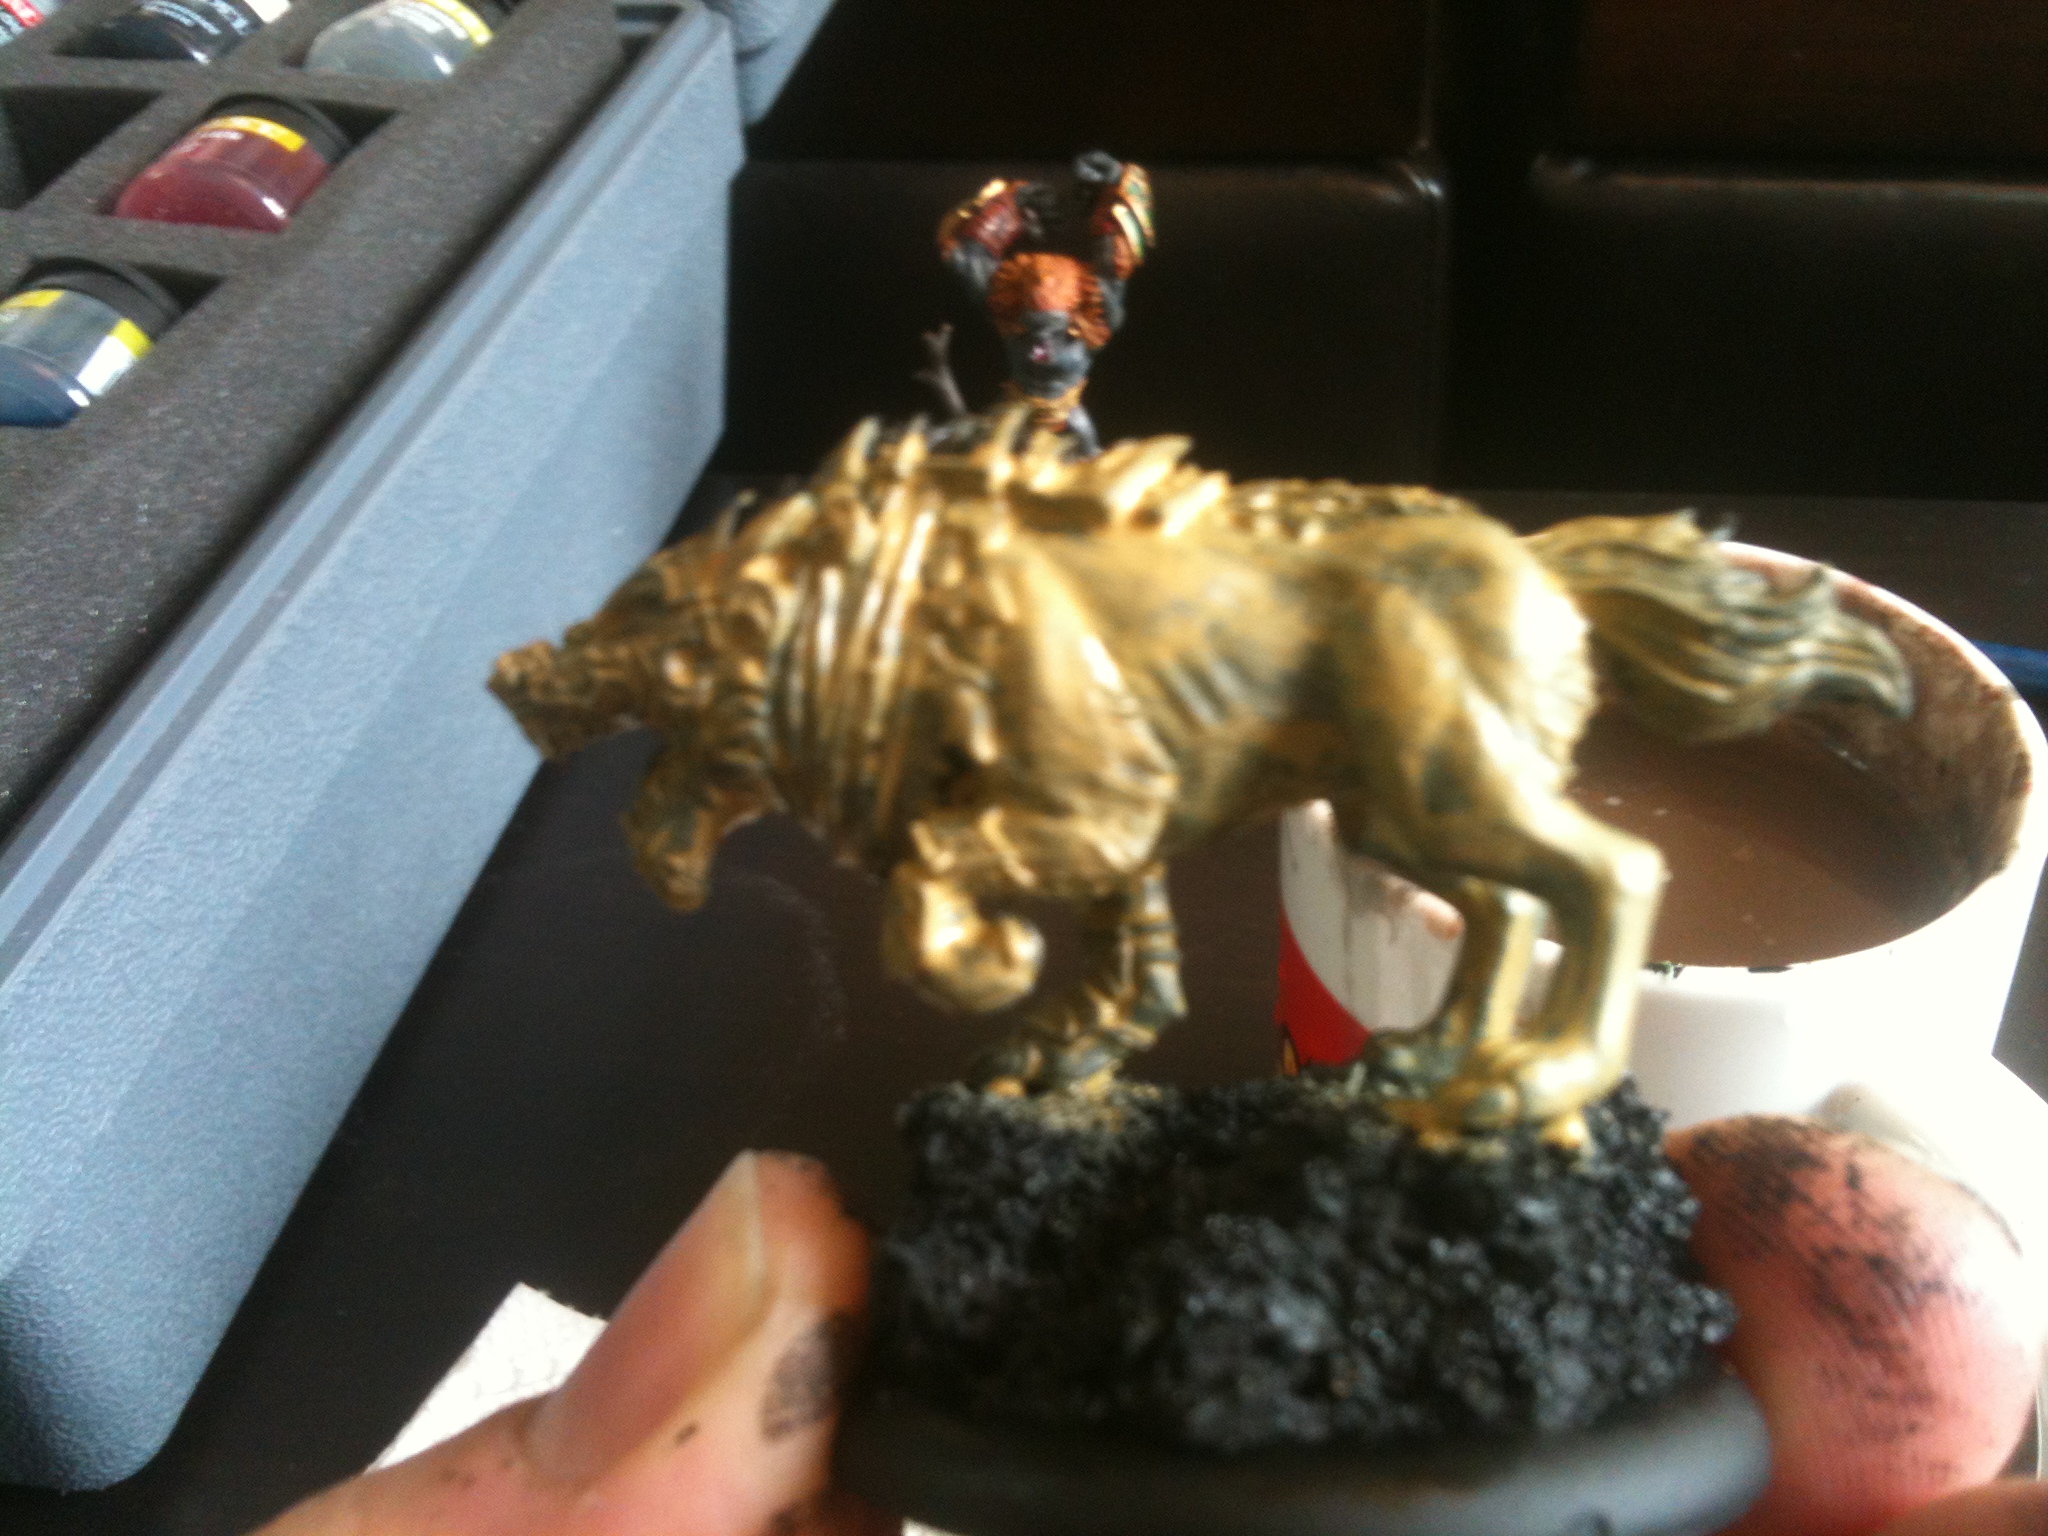
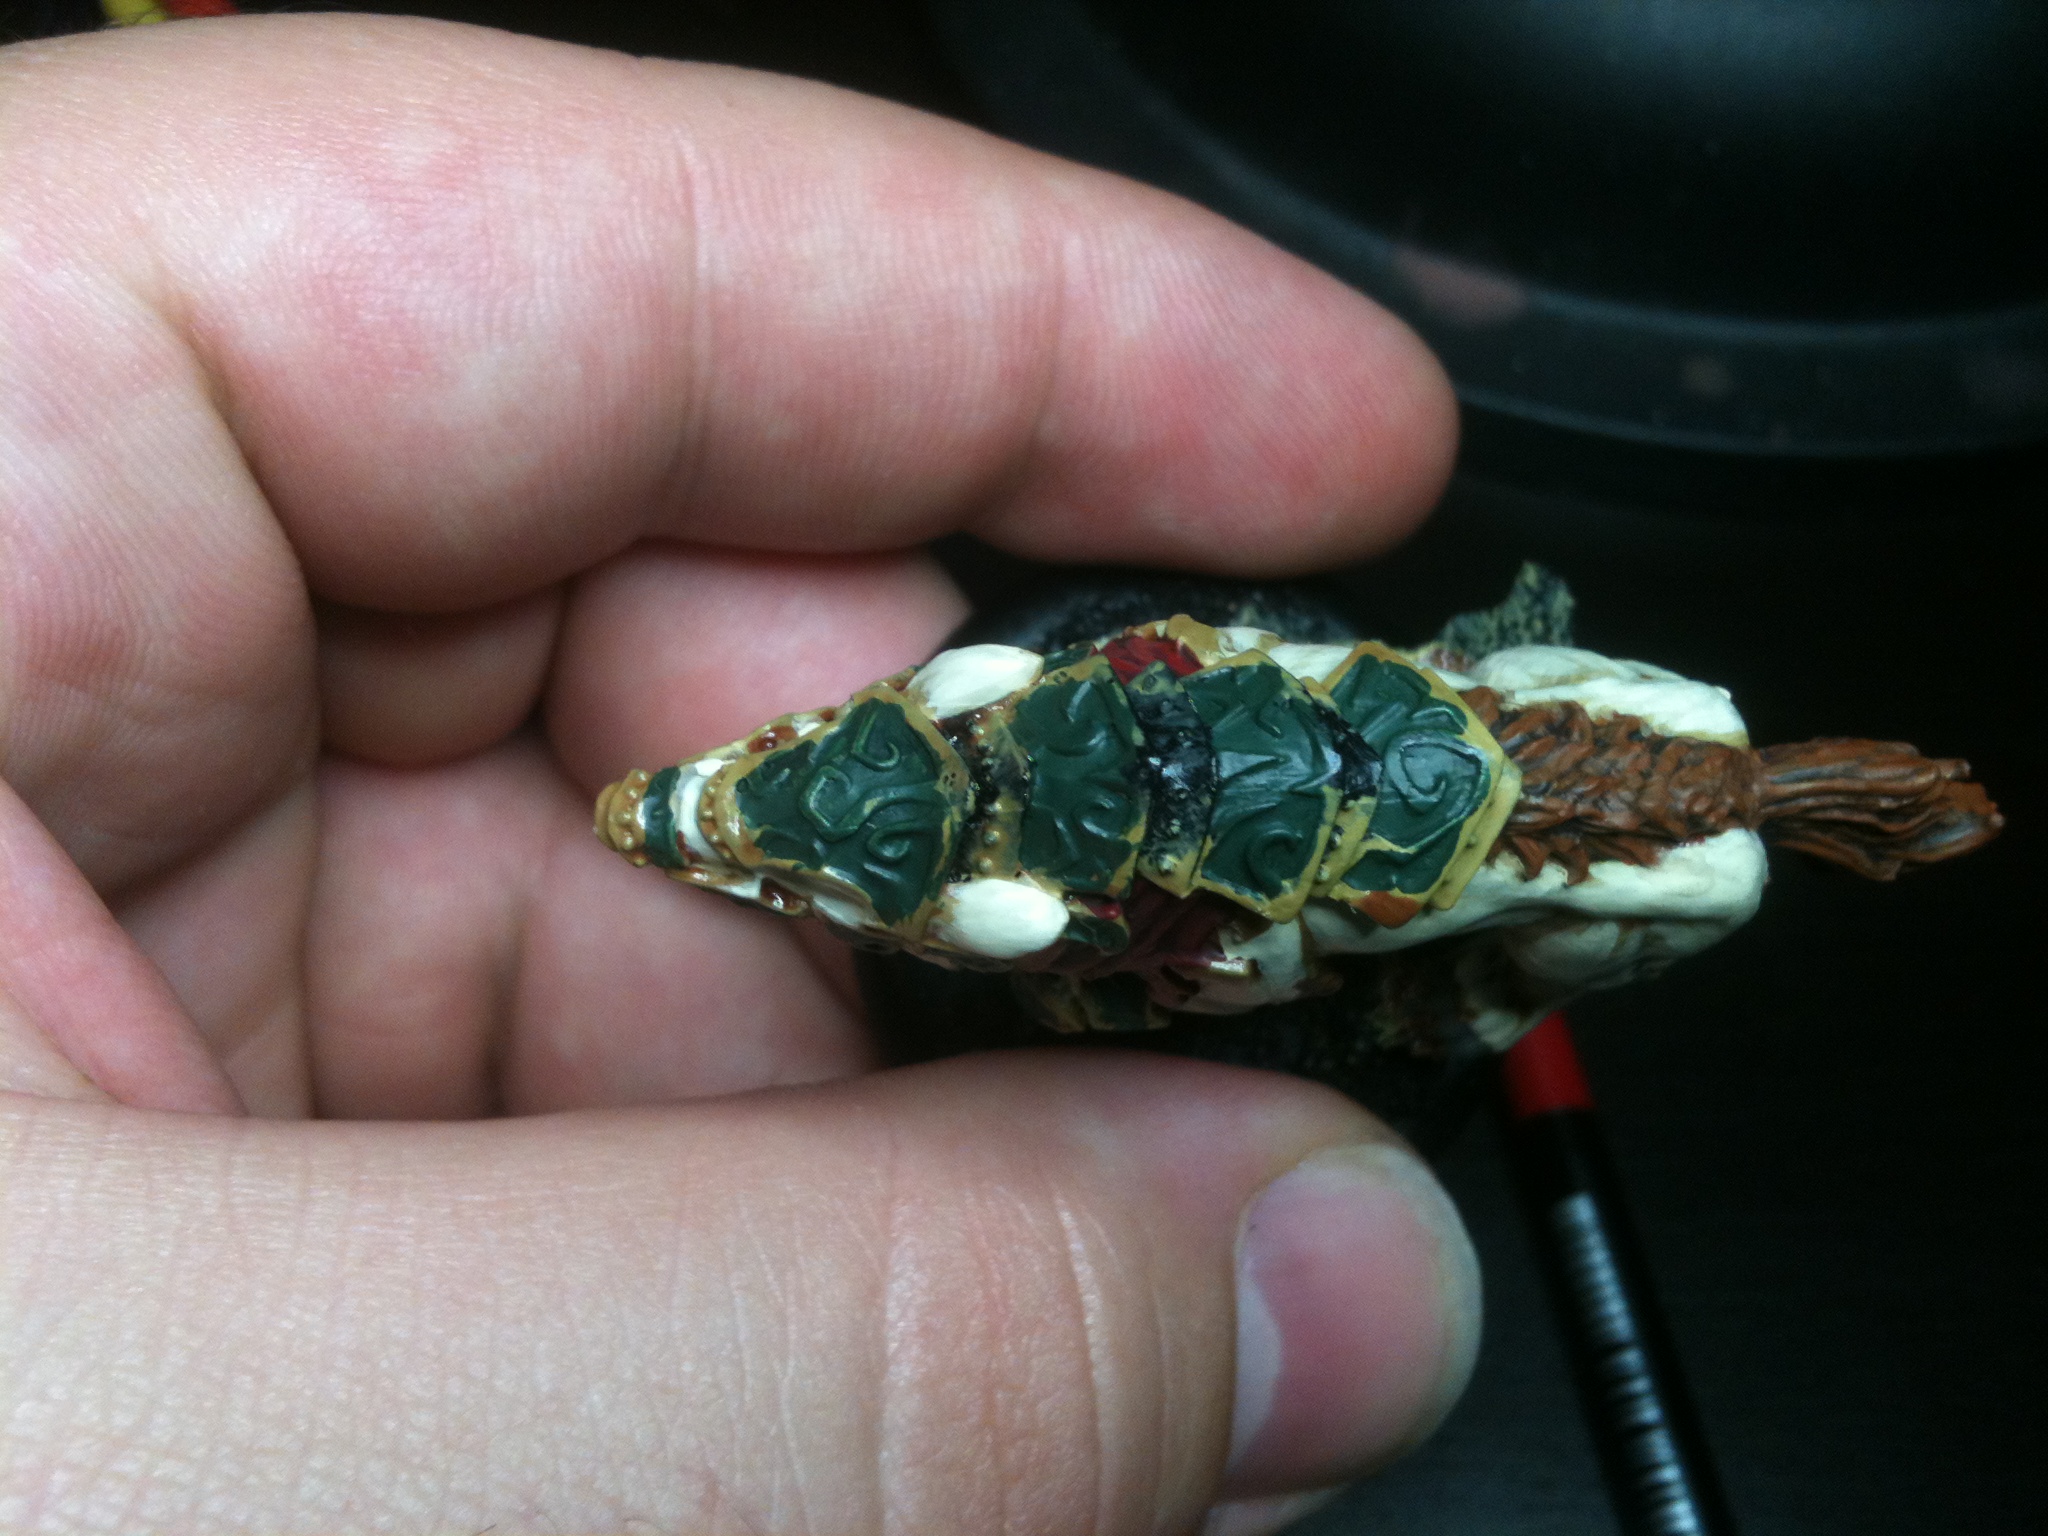
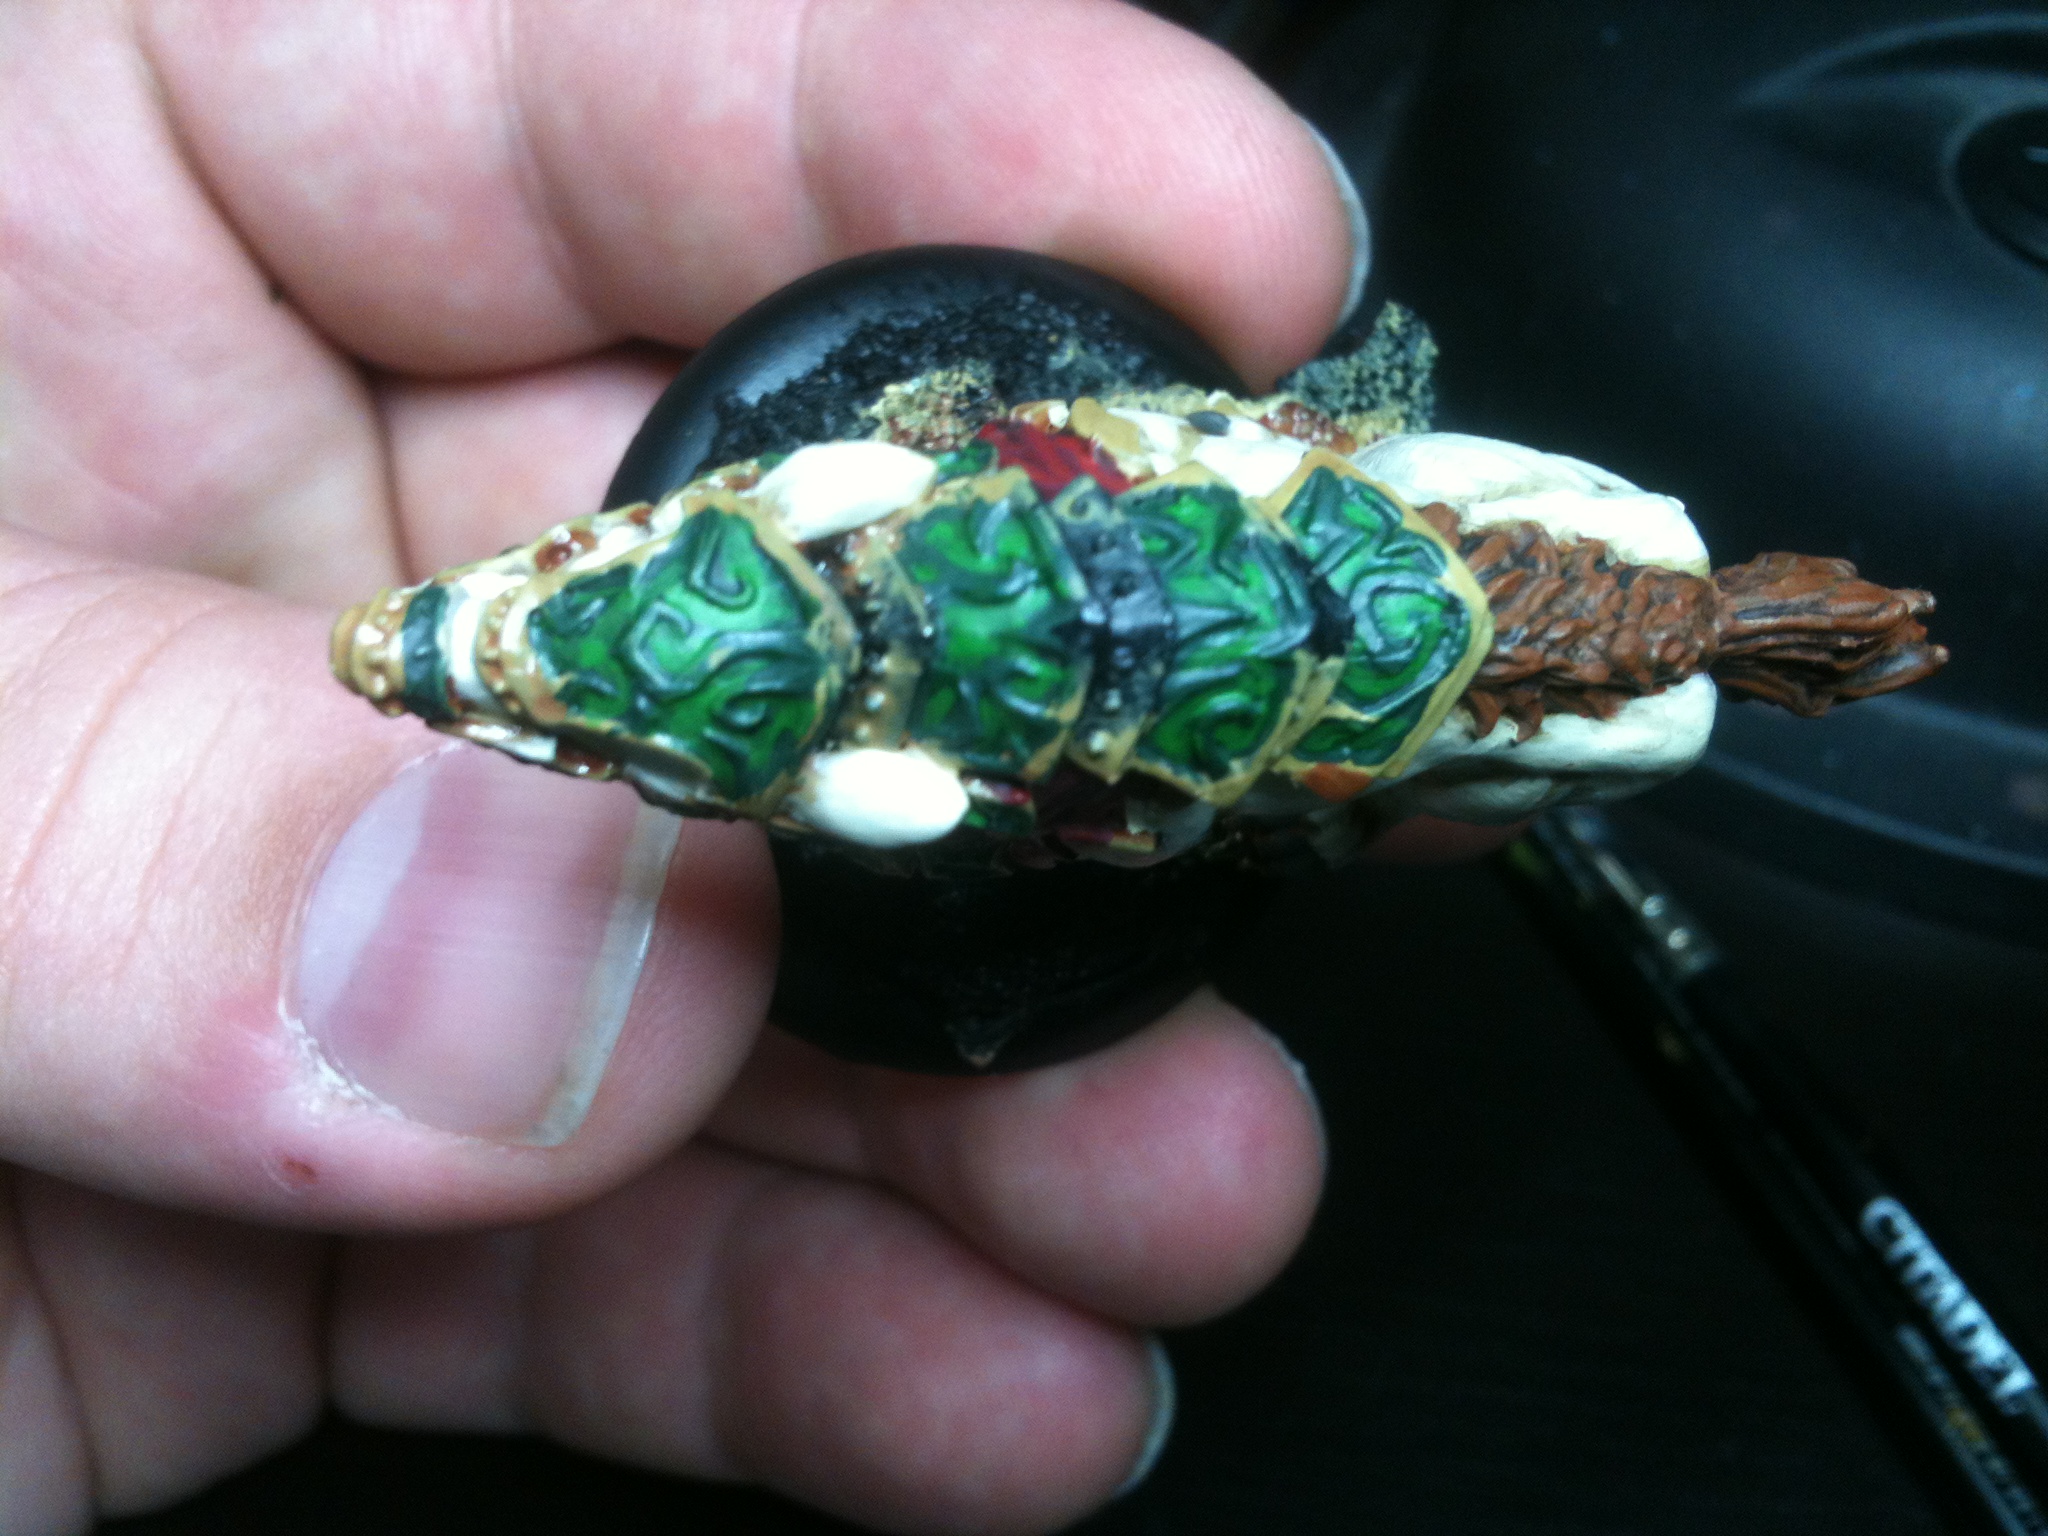
I stared Kaya by doing her armour. The reason for this (as you can see by the picture) is that it’s a very messy process. I wanted it out of the way so that I could be as careless as I needed to be without needing to go back too much and cleanup messy areas.
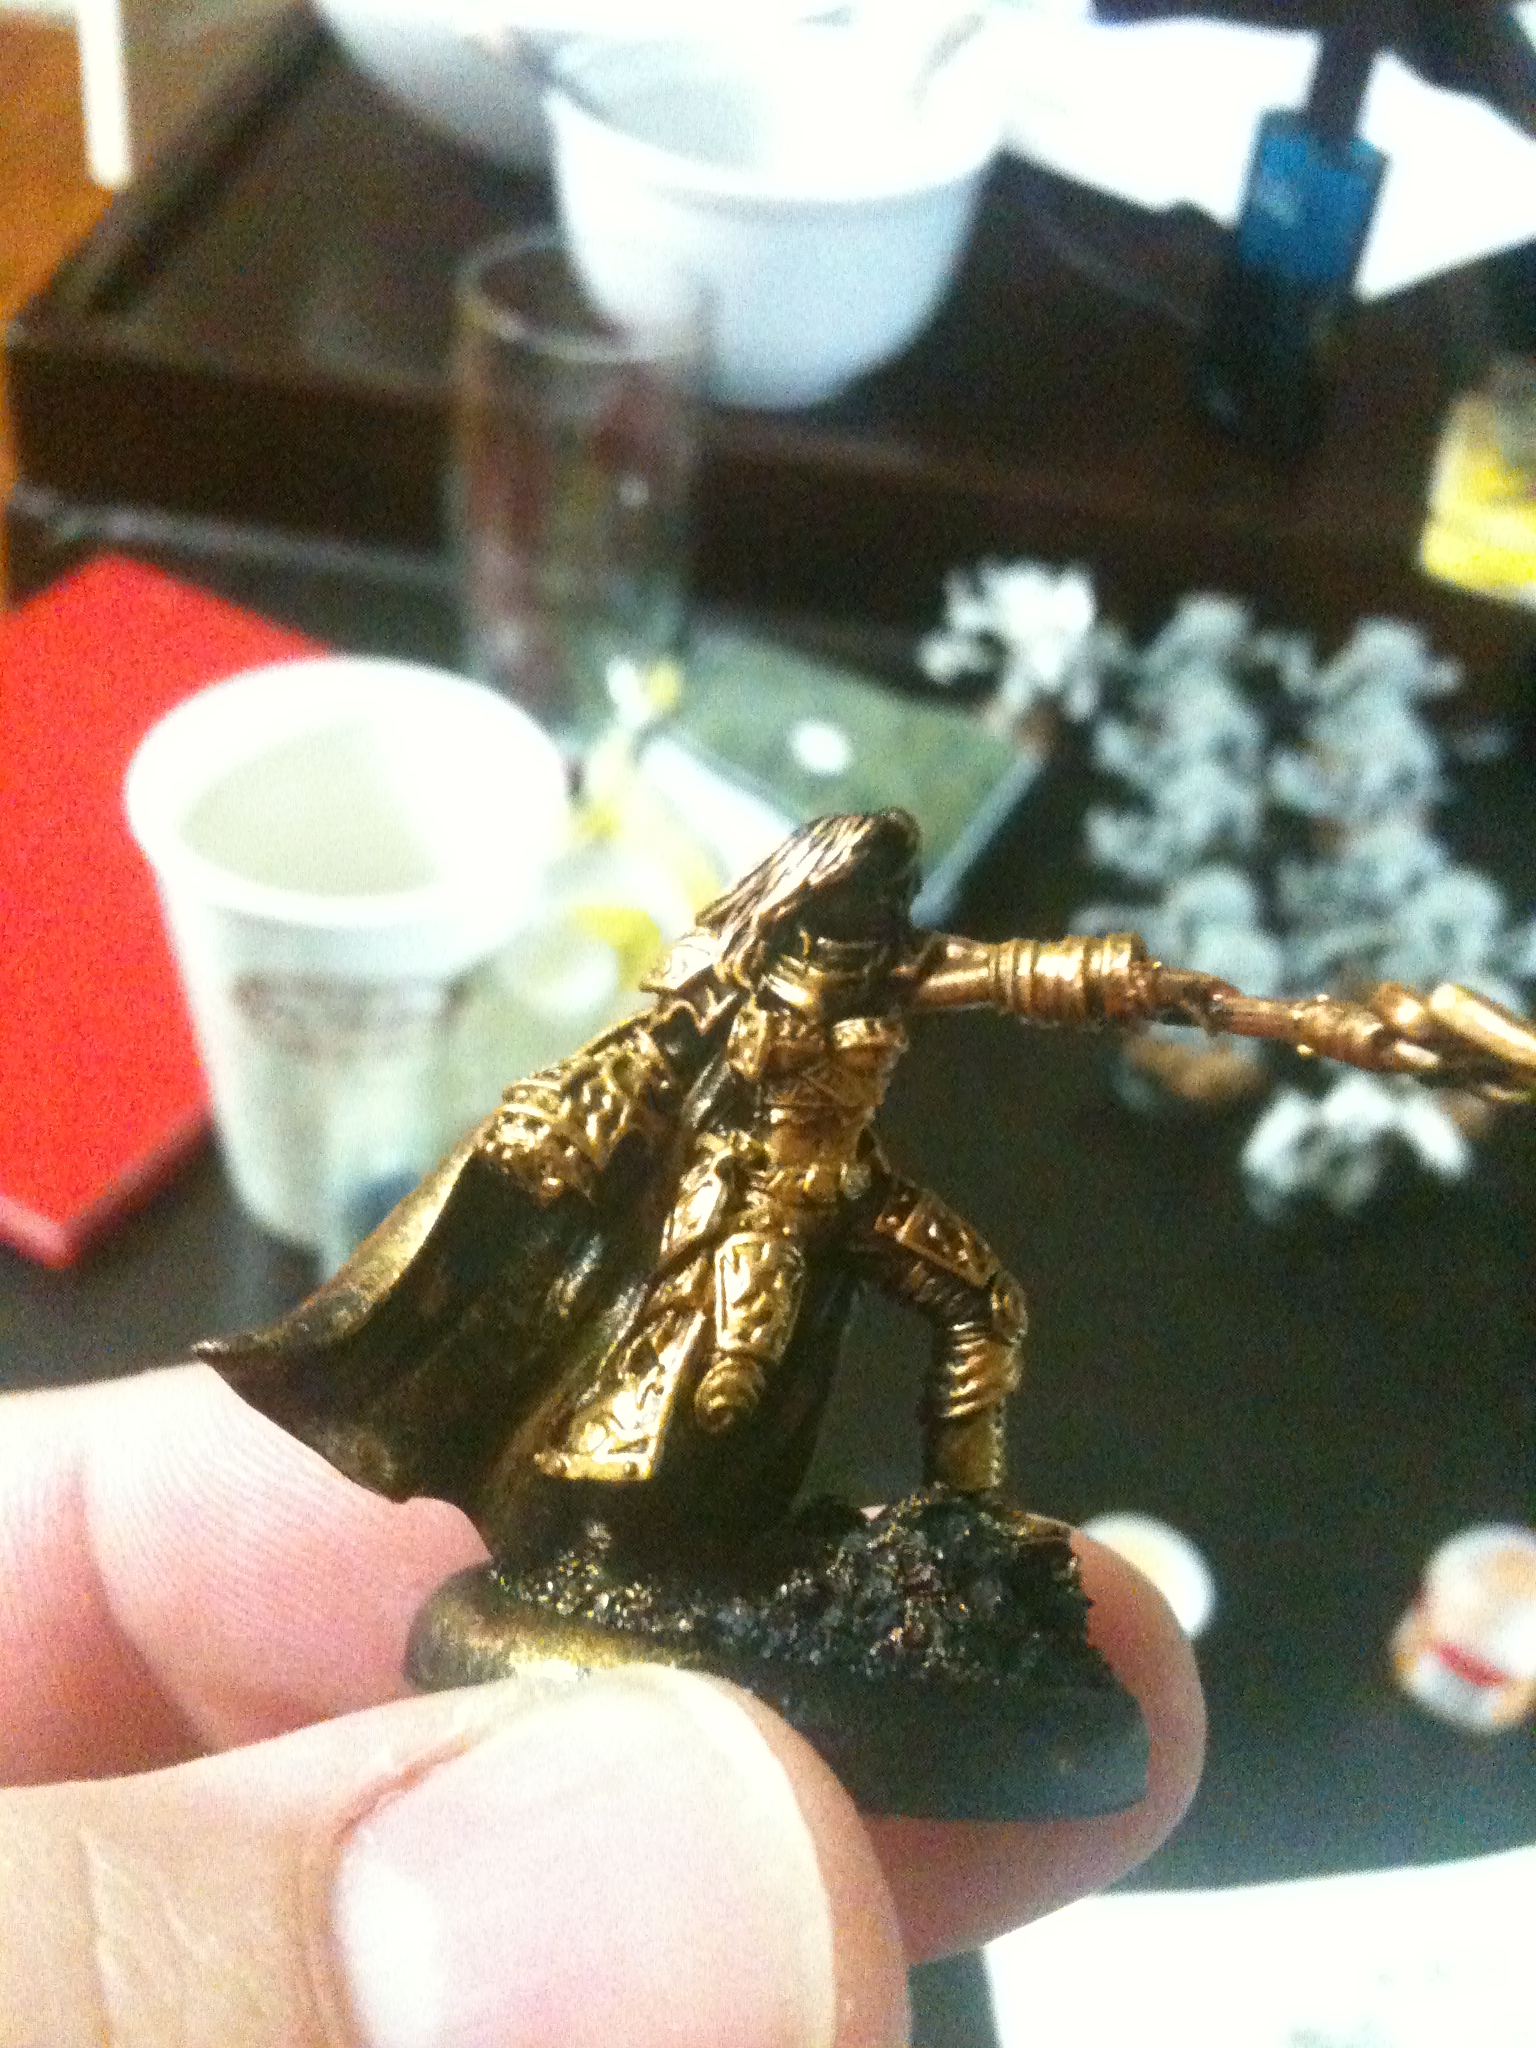
I started the armour by applying a base of Tin Bitz, followed by a heavy dry brush of Dwarf Bronze. Next a light dry brush of Shining Gold. Once this was finished I applied a watered down wash of Skull White to all the armour plates. This is in preparation for the Thrakka Green wash to match the other armour plates of my army.
After the Thrakka Green wash dried I went back over and cleaned up (the Thrakka Green over spill) the armour plates with Shinning gold and added a final highlight of Burnished Gold.
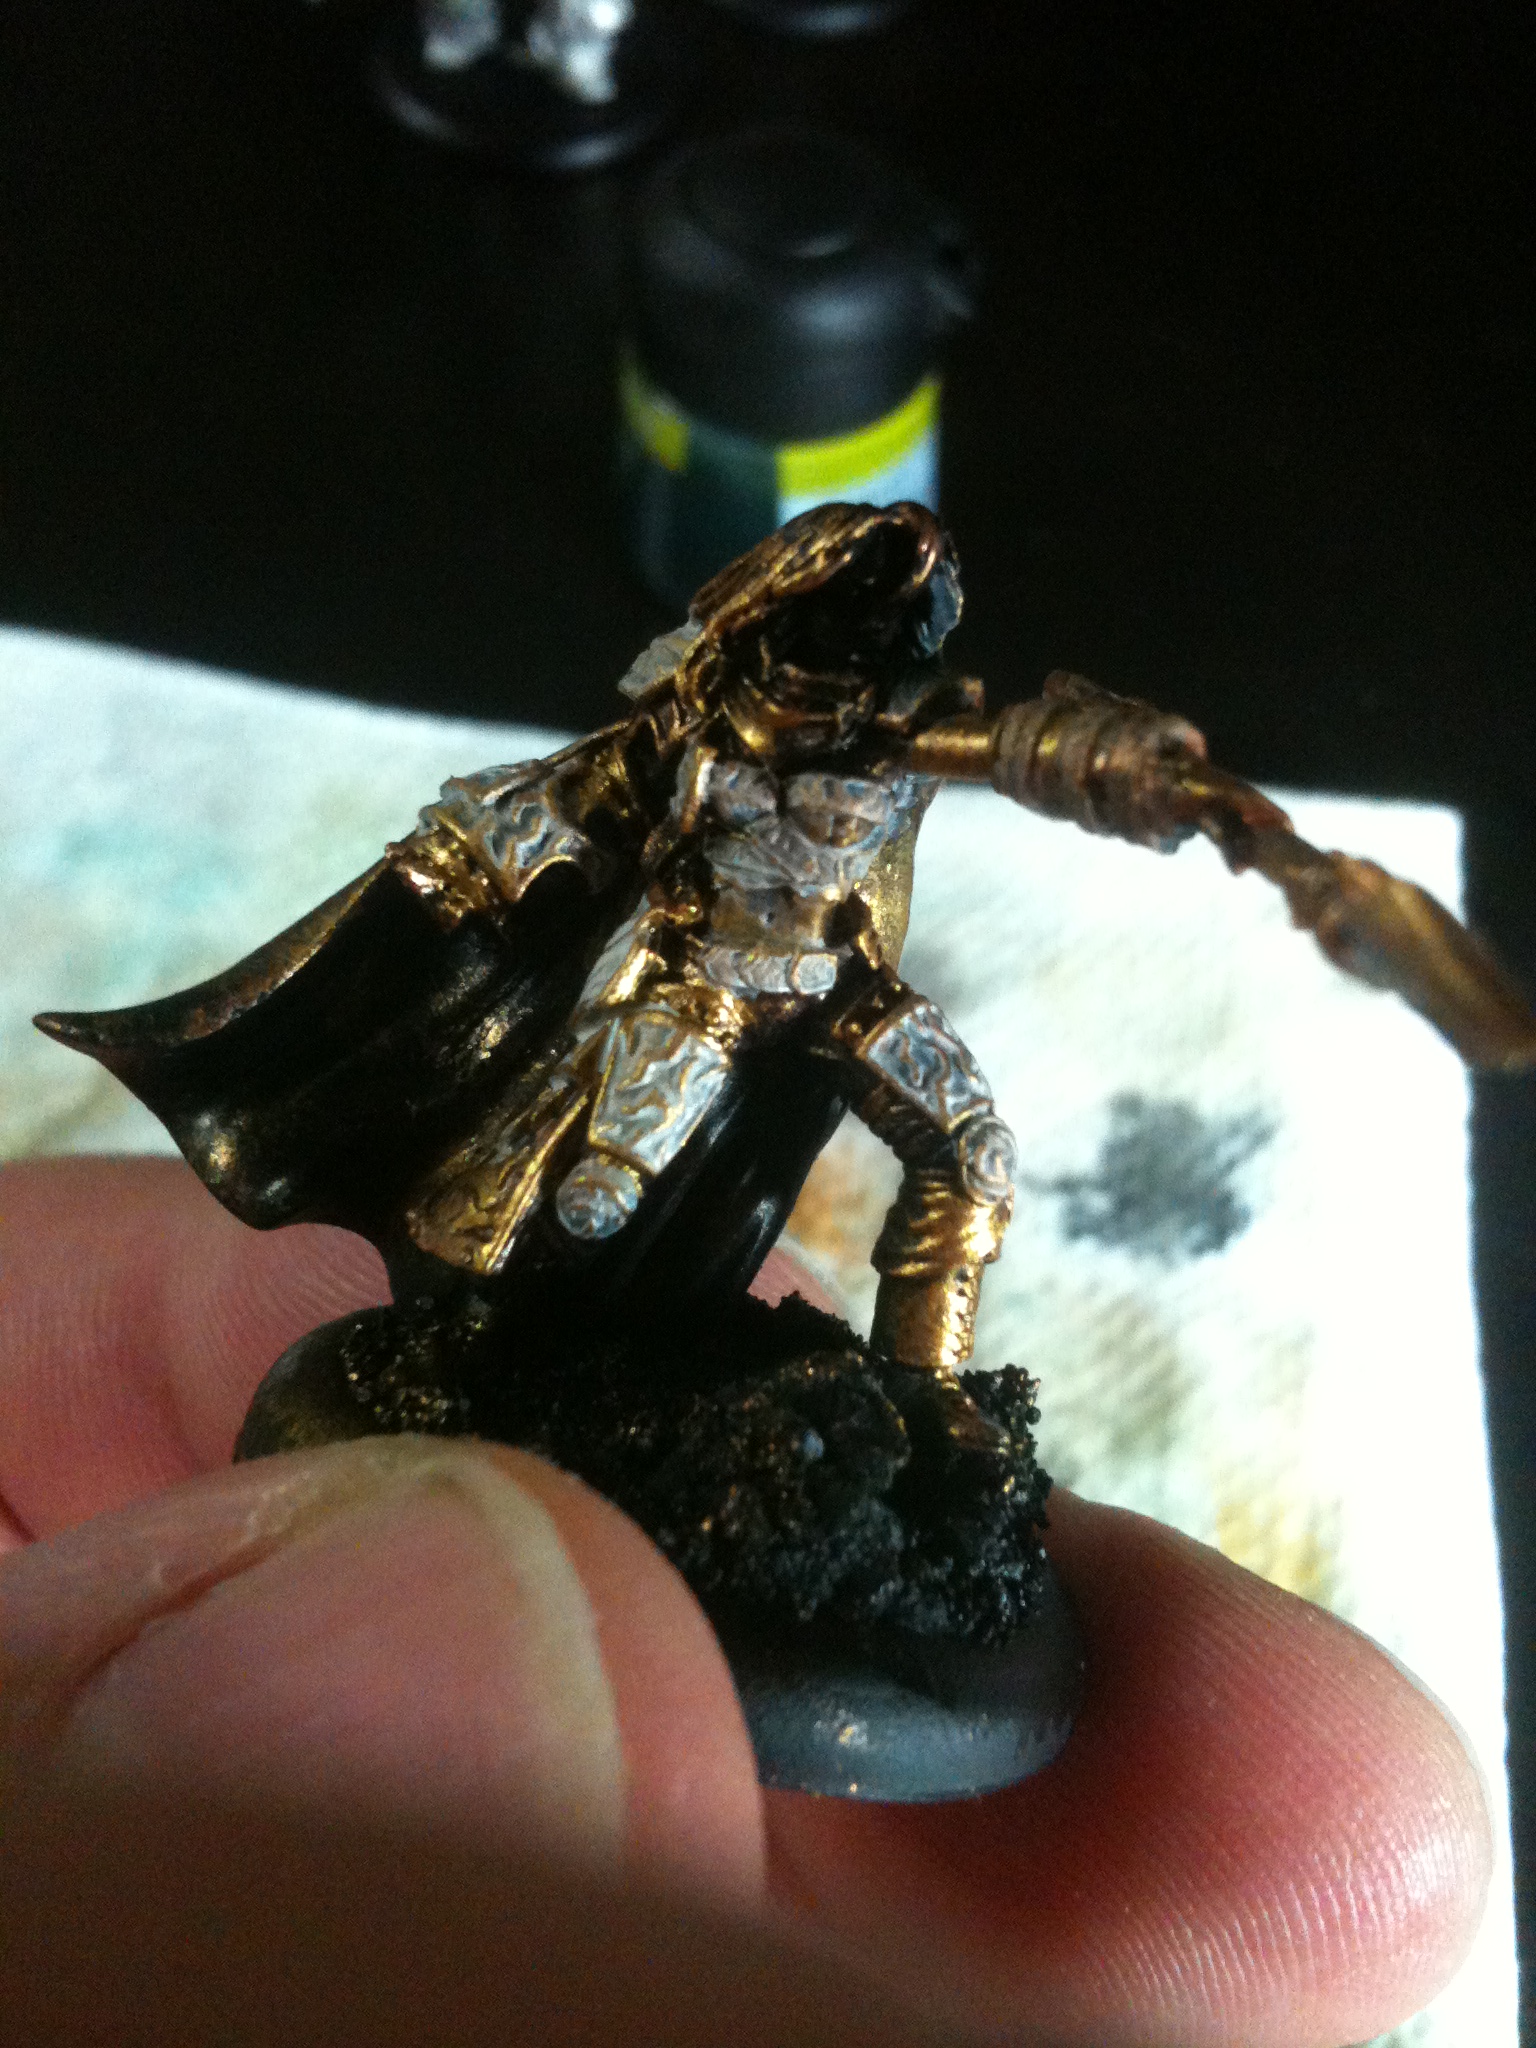
Next I moved on to the leather on the model. Base coating the pants, boots and the sash on Kaya’s right side with a Calathan Brown (this is a Foundation paint which is thicker than regular paint so be sure to remember to water it down a bit more than usual). Next came a wash of Devlan Mud (talent in a bottle …. This is by far one of the best washes in the GW line). After the wash dried I mixed a bit of Bleached Bone into the Calathan Brown (about a 3:1 Calathan Brown to Bleached Bone mixture) and watered it down to the consistency of melted ice cream and applied it as a highlight. To finish it off I applied a Bleached bone highlight on to the laces of Kaya’s boots and the sash to make them stand out a bit more.

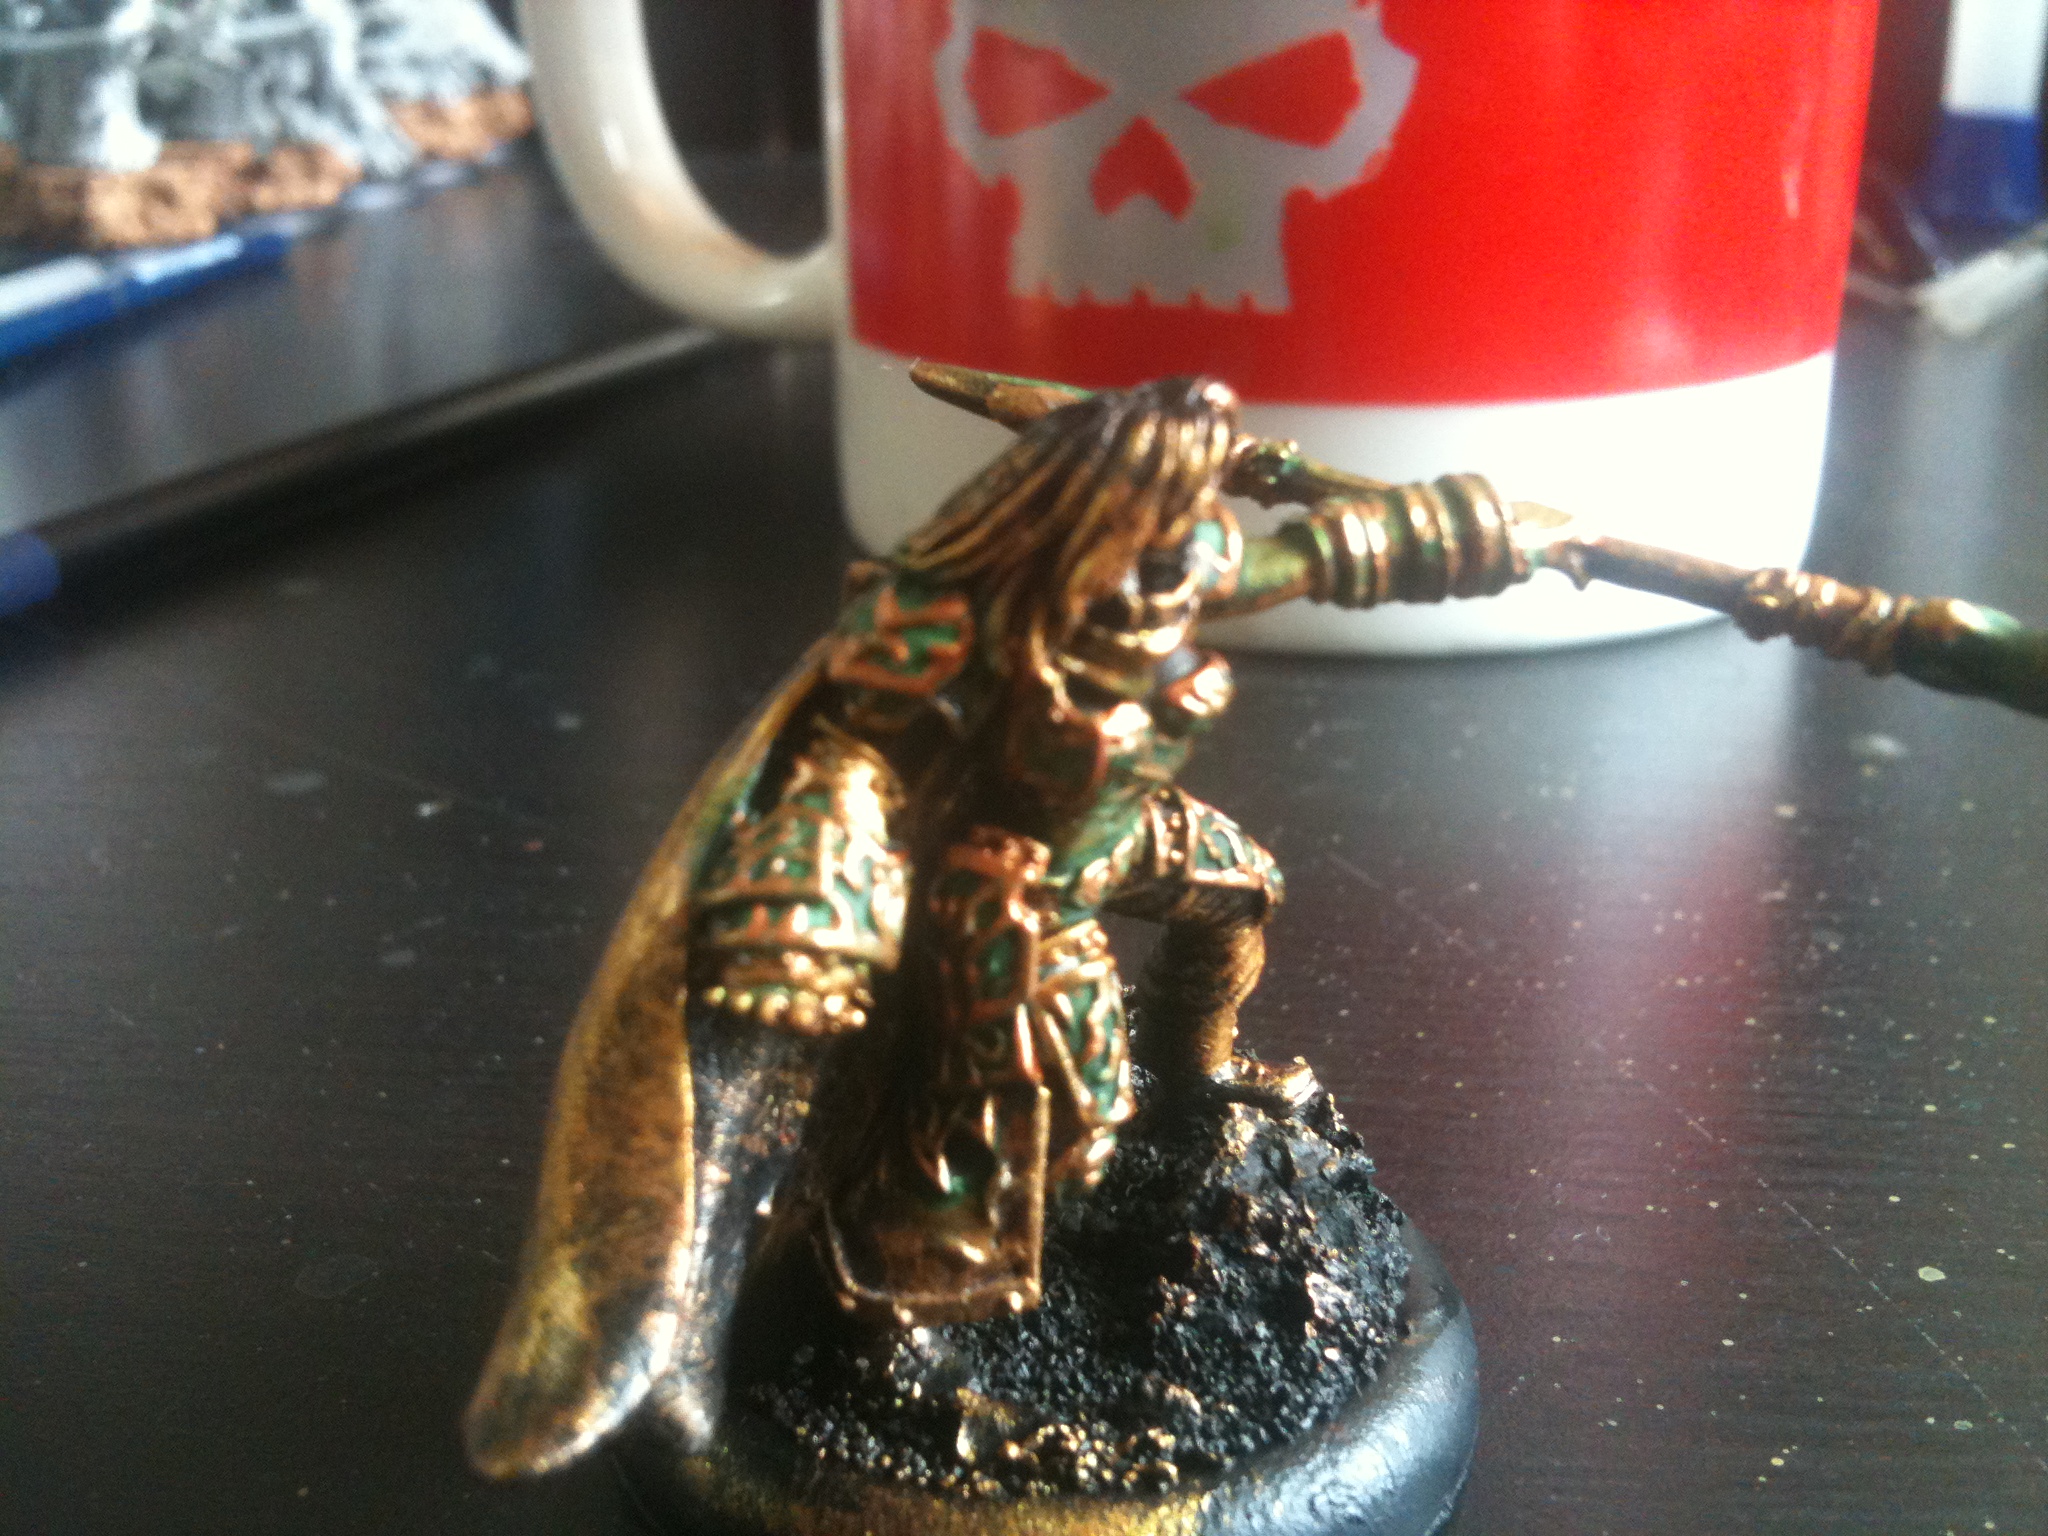
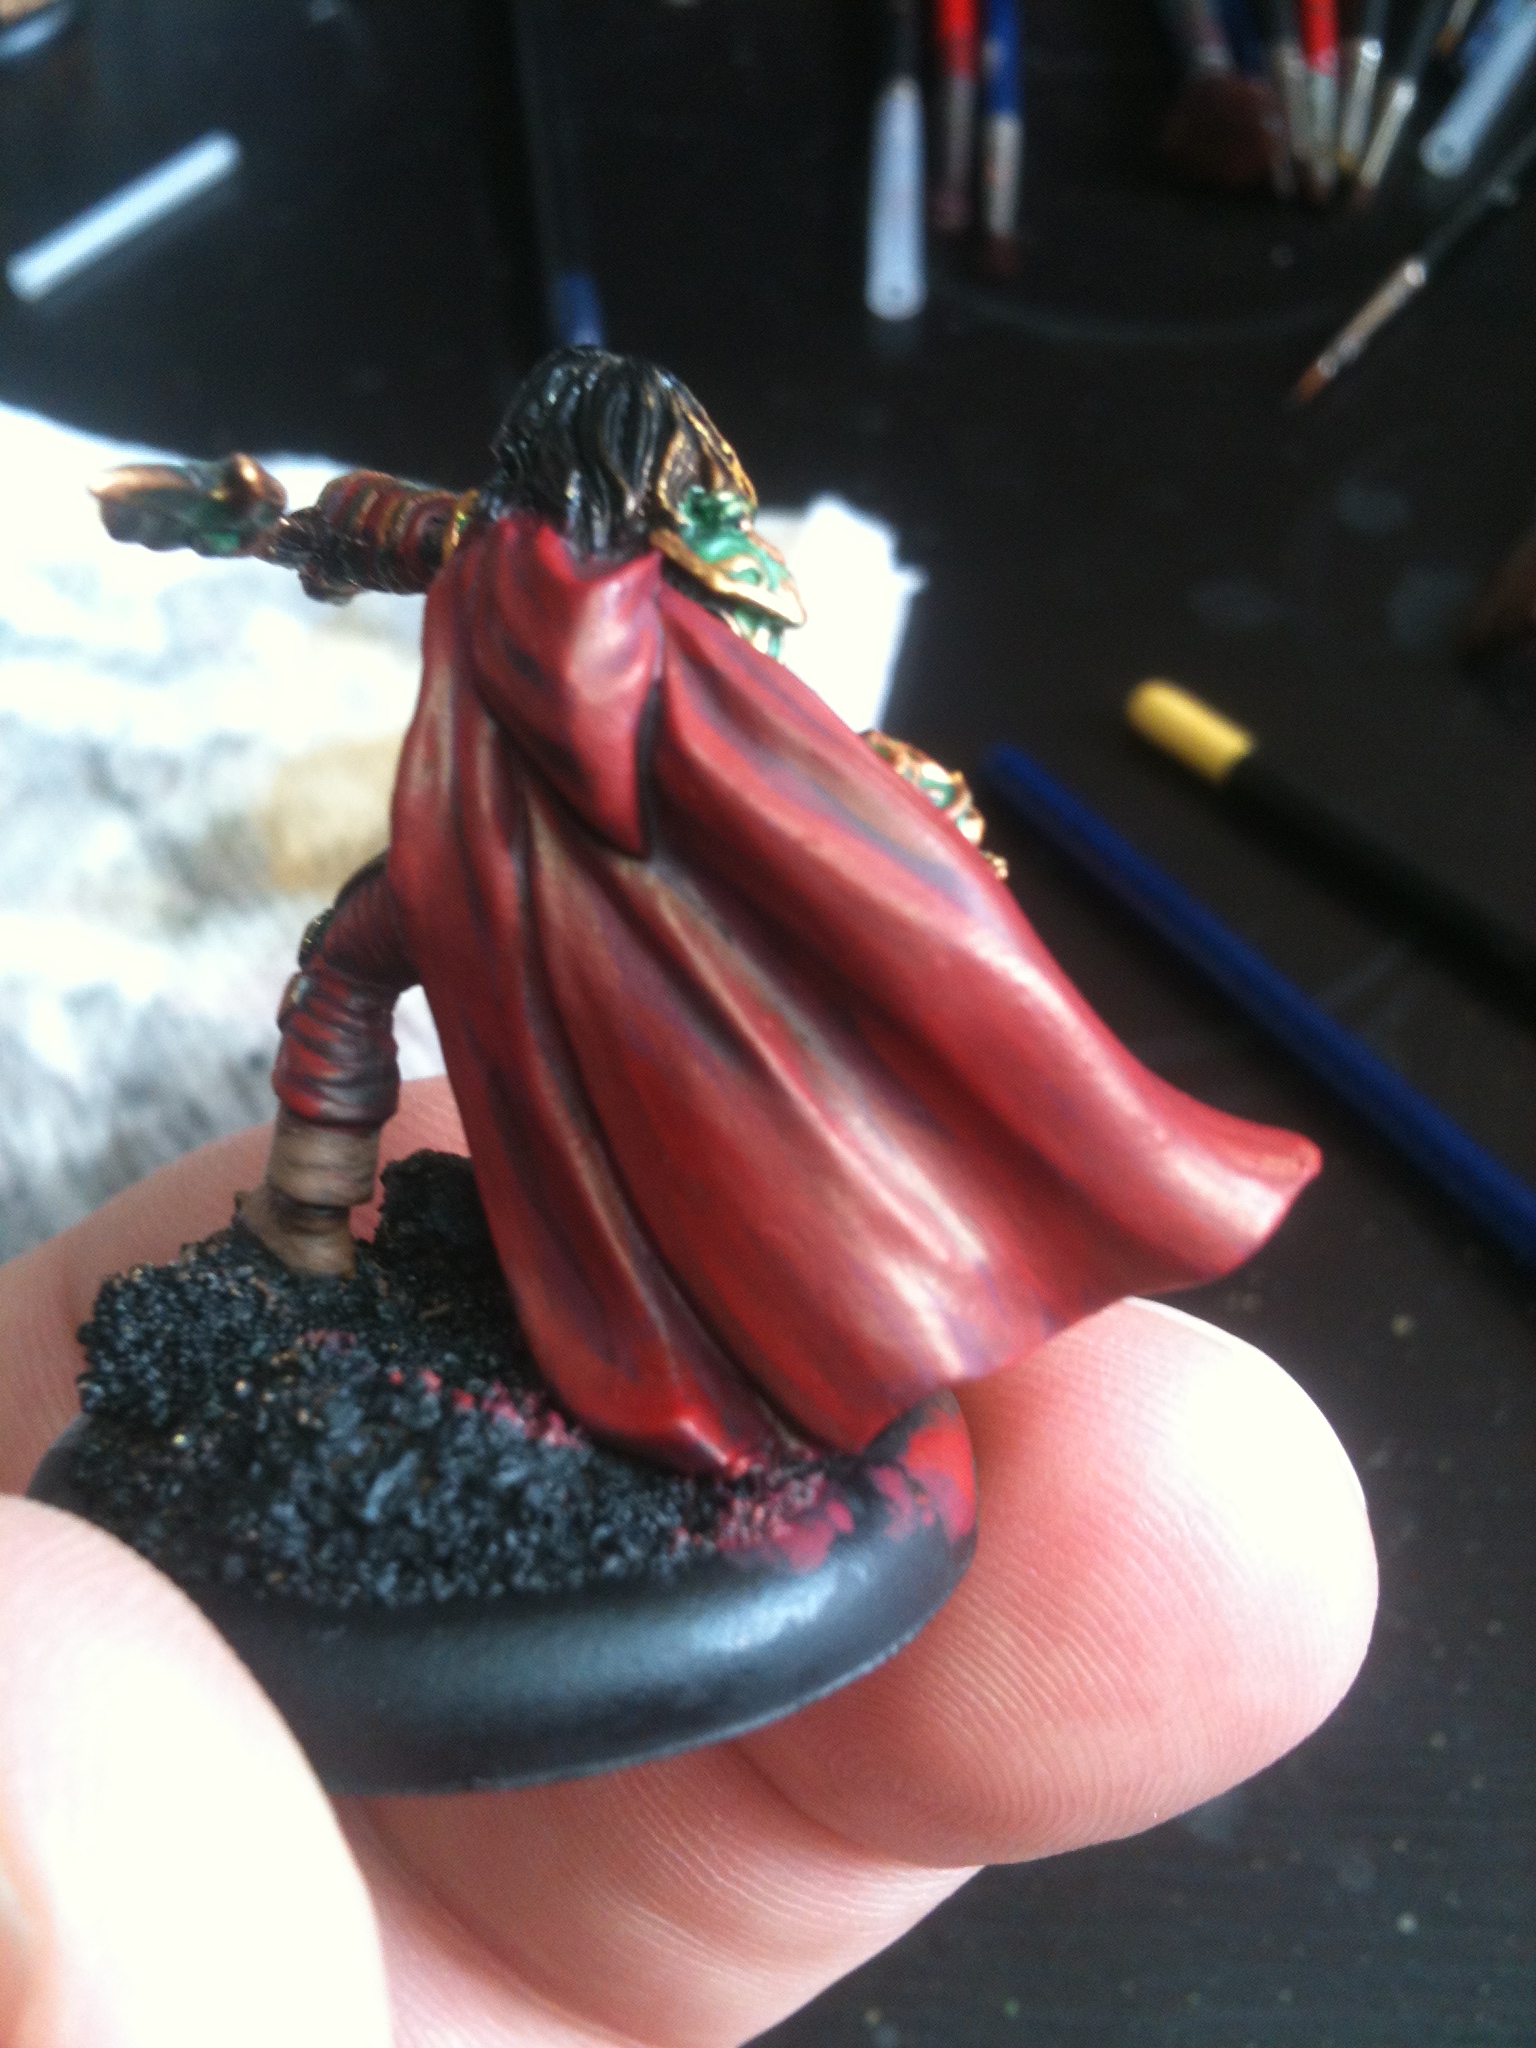
Moving along to Kaya’s Cloak and other cloth Items I used the same technic I used on Laris to accomplish this step. Its super simple and give a very nice and natural looking red (in my opinion at least).
Now for Kaya’s skin.
I have a basic recipe that I follow for skin. In all honesty I stole this from a good friend of mine after seeing how good his skin tones look.
Frist step I base coat the skin with Calathan Brown, I follow this up with a highlight of 2:1 mixture of Calathan Brown and Tallarn Flesh, then a highlight of straight Tallarn Flesh, followed by a highlight of 2:1 mixture of Tallarn Flesh and Dwarf Flesh, and last but not least a final highlight of straight Dwarf Flesh. Seems like a lot of layers for skin I know. But I like the final look too much to change the recipe.
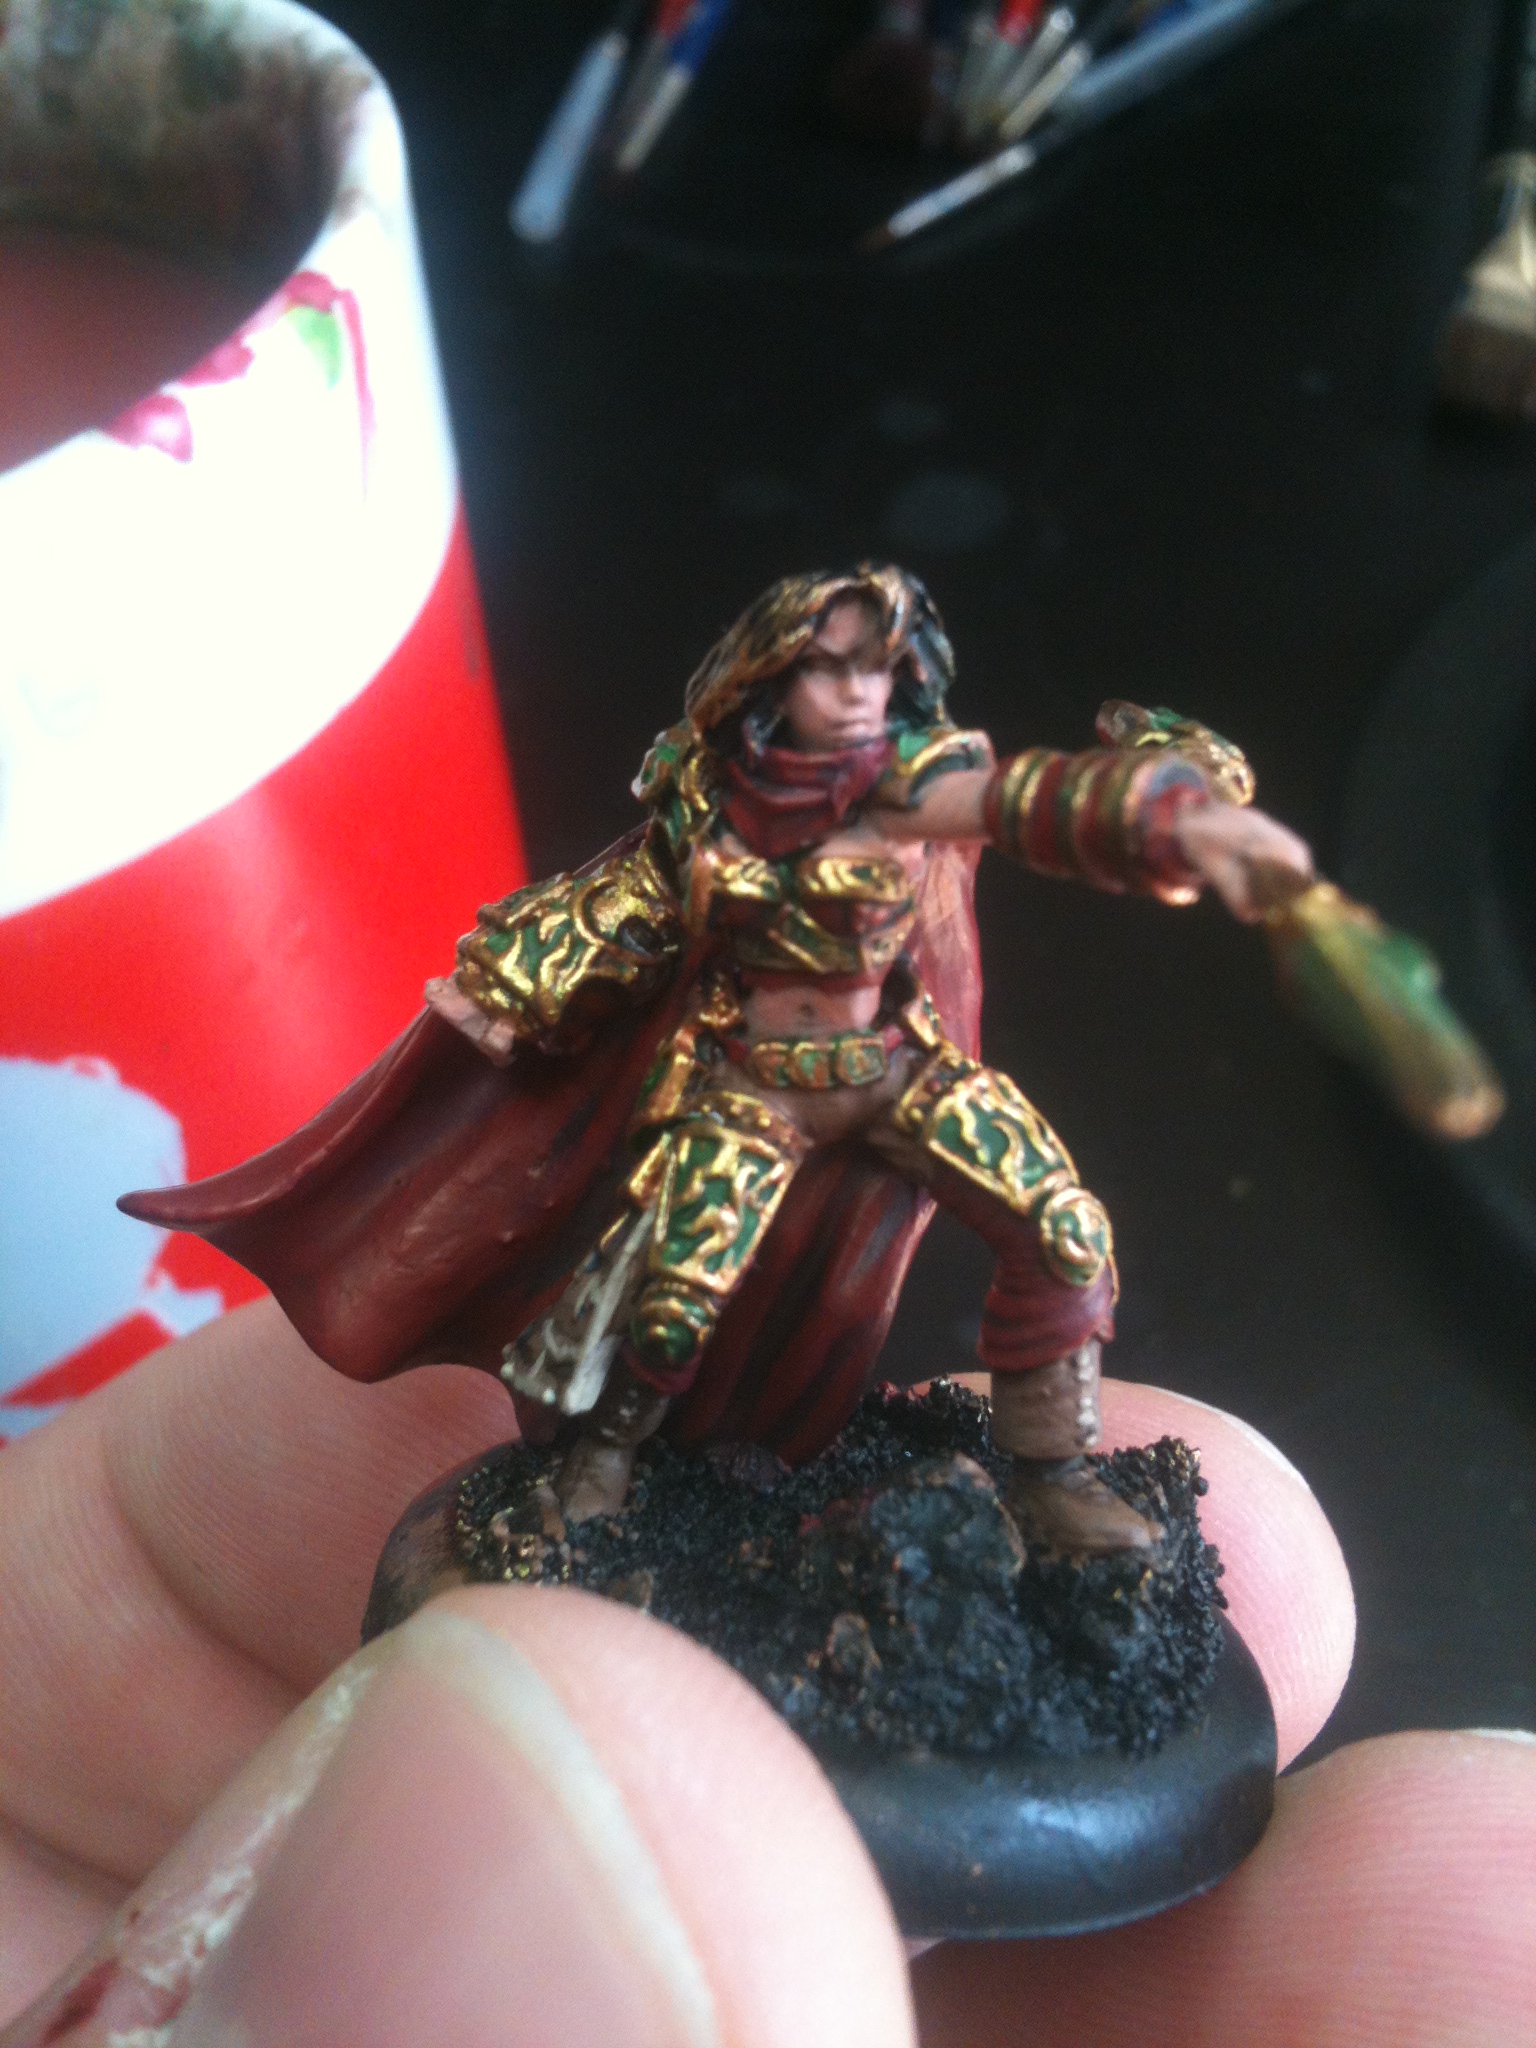
Kaya’s hair was the easiest step of all. I base coated it with Adeptus Battlegrey, then once this step was dry I carefully washed the hair with Badab Black. And Done! Simple right?
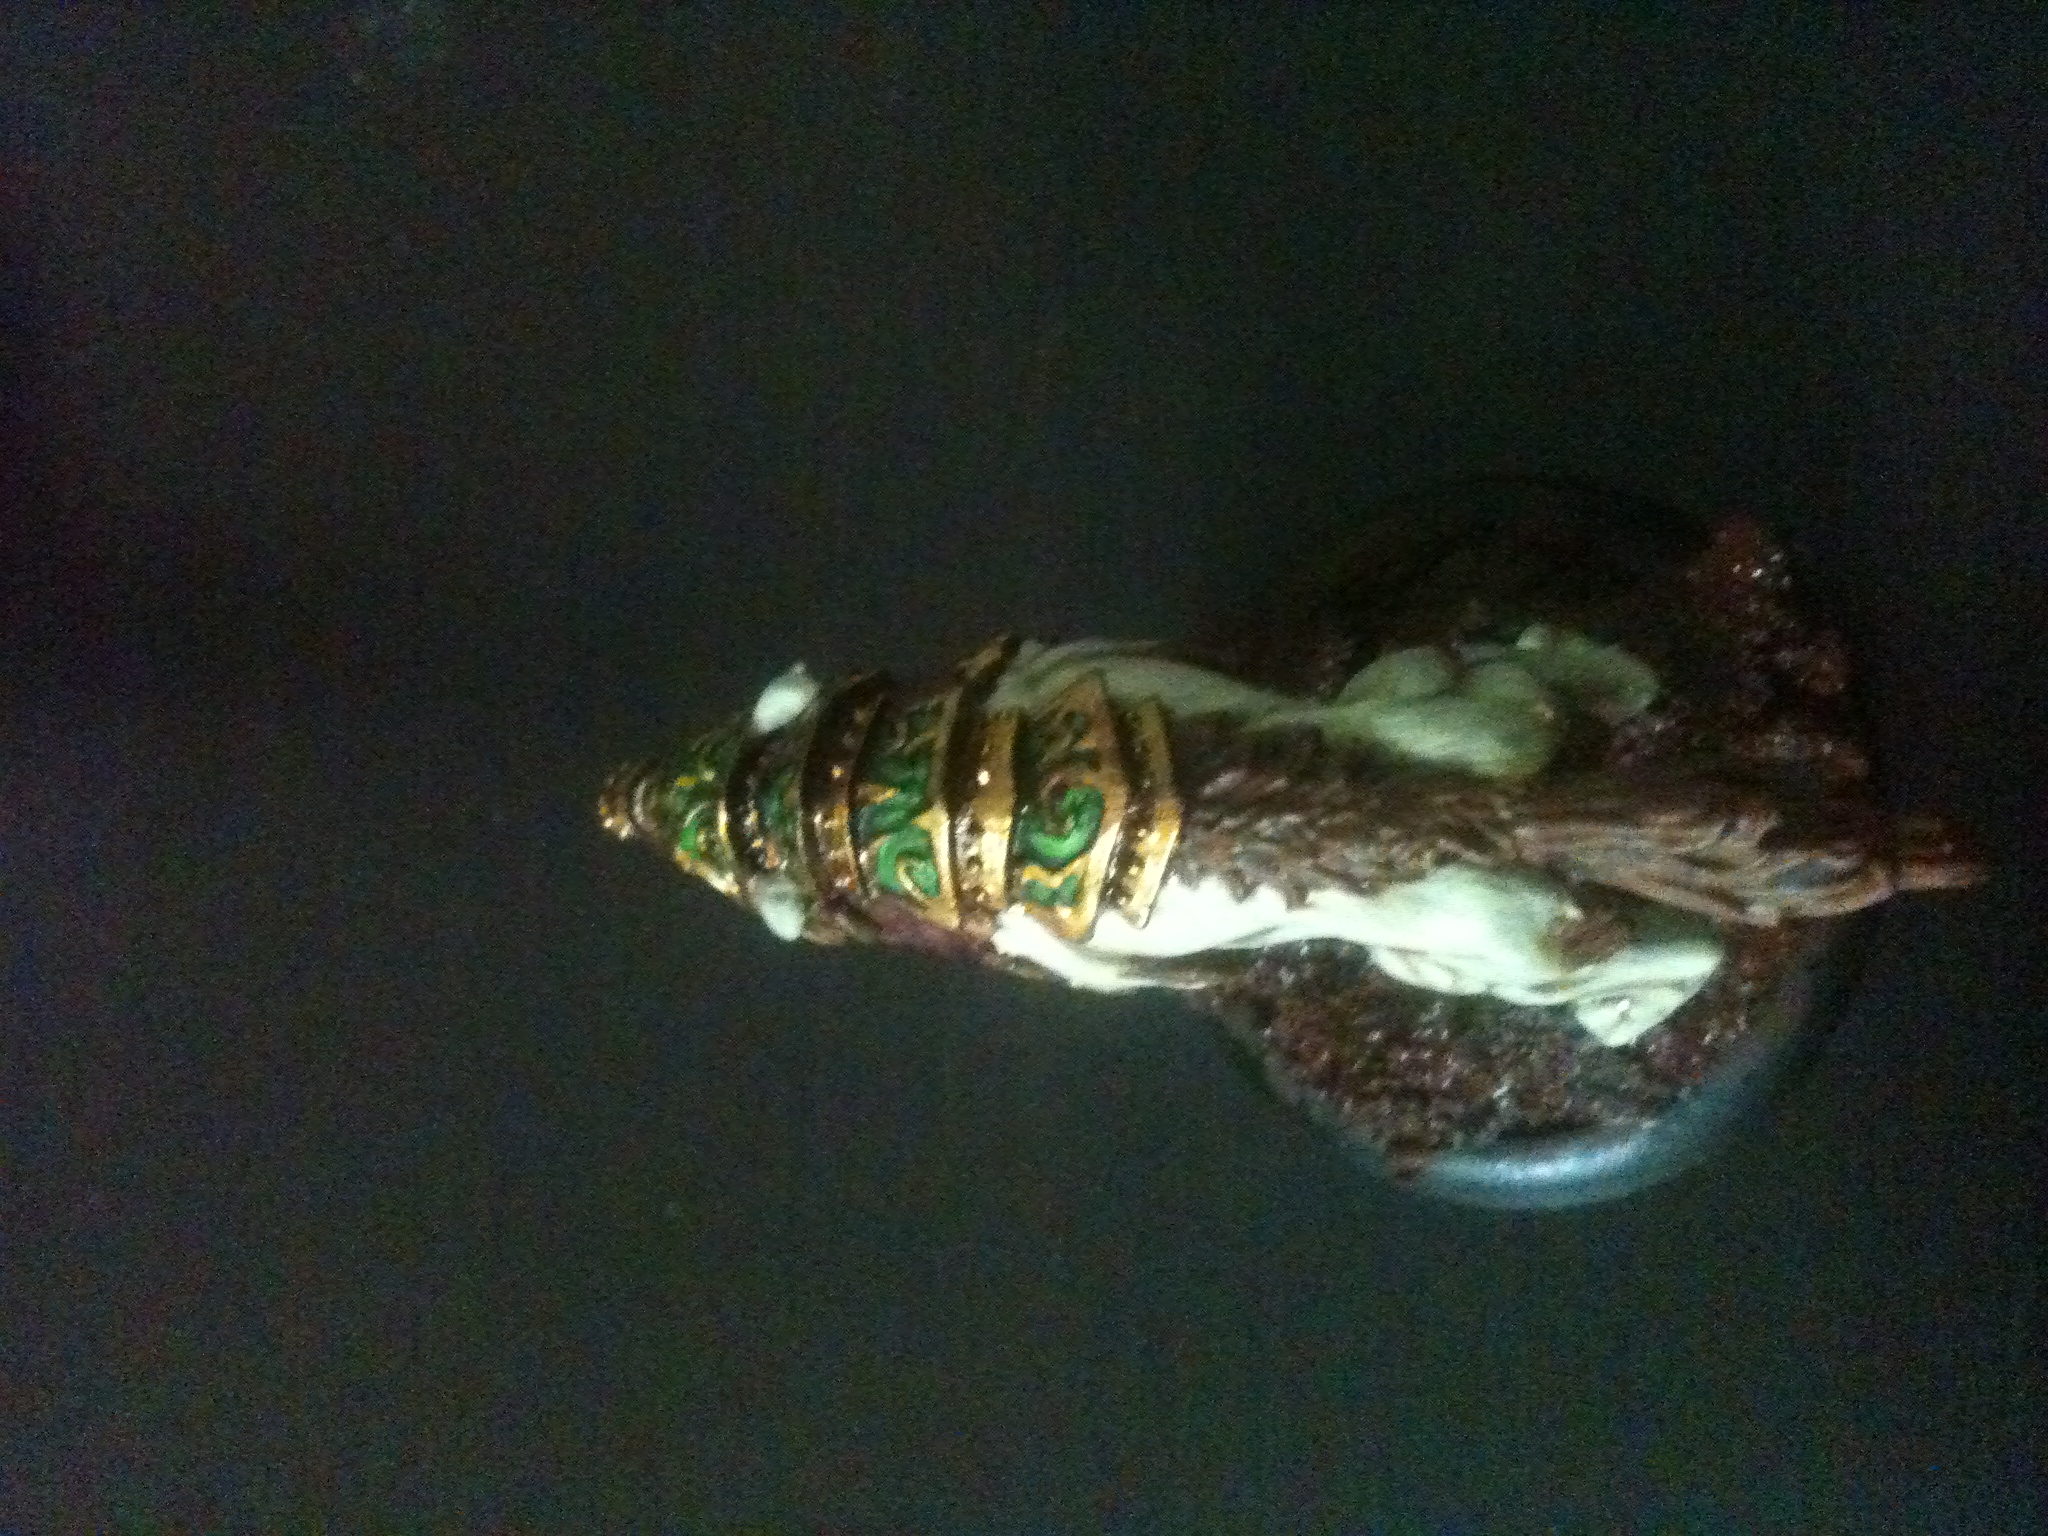
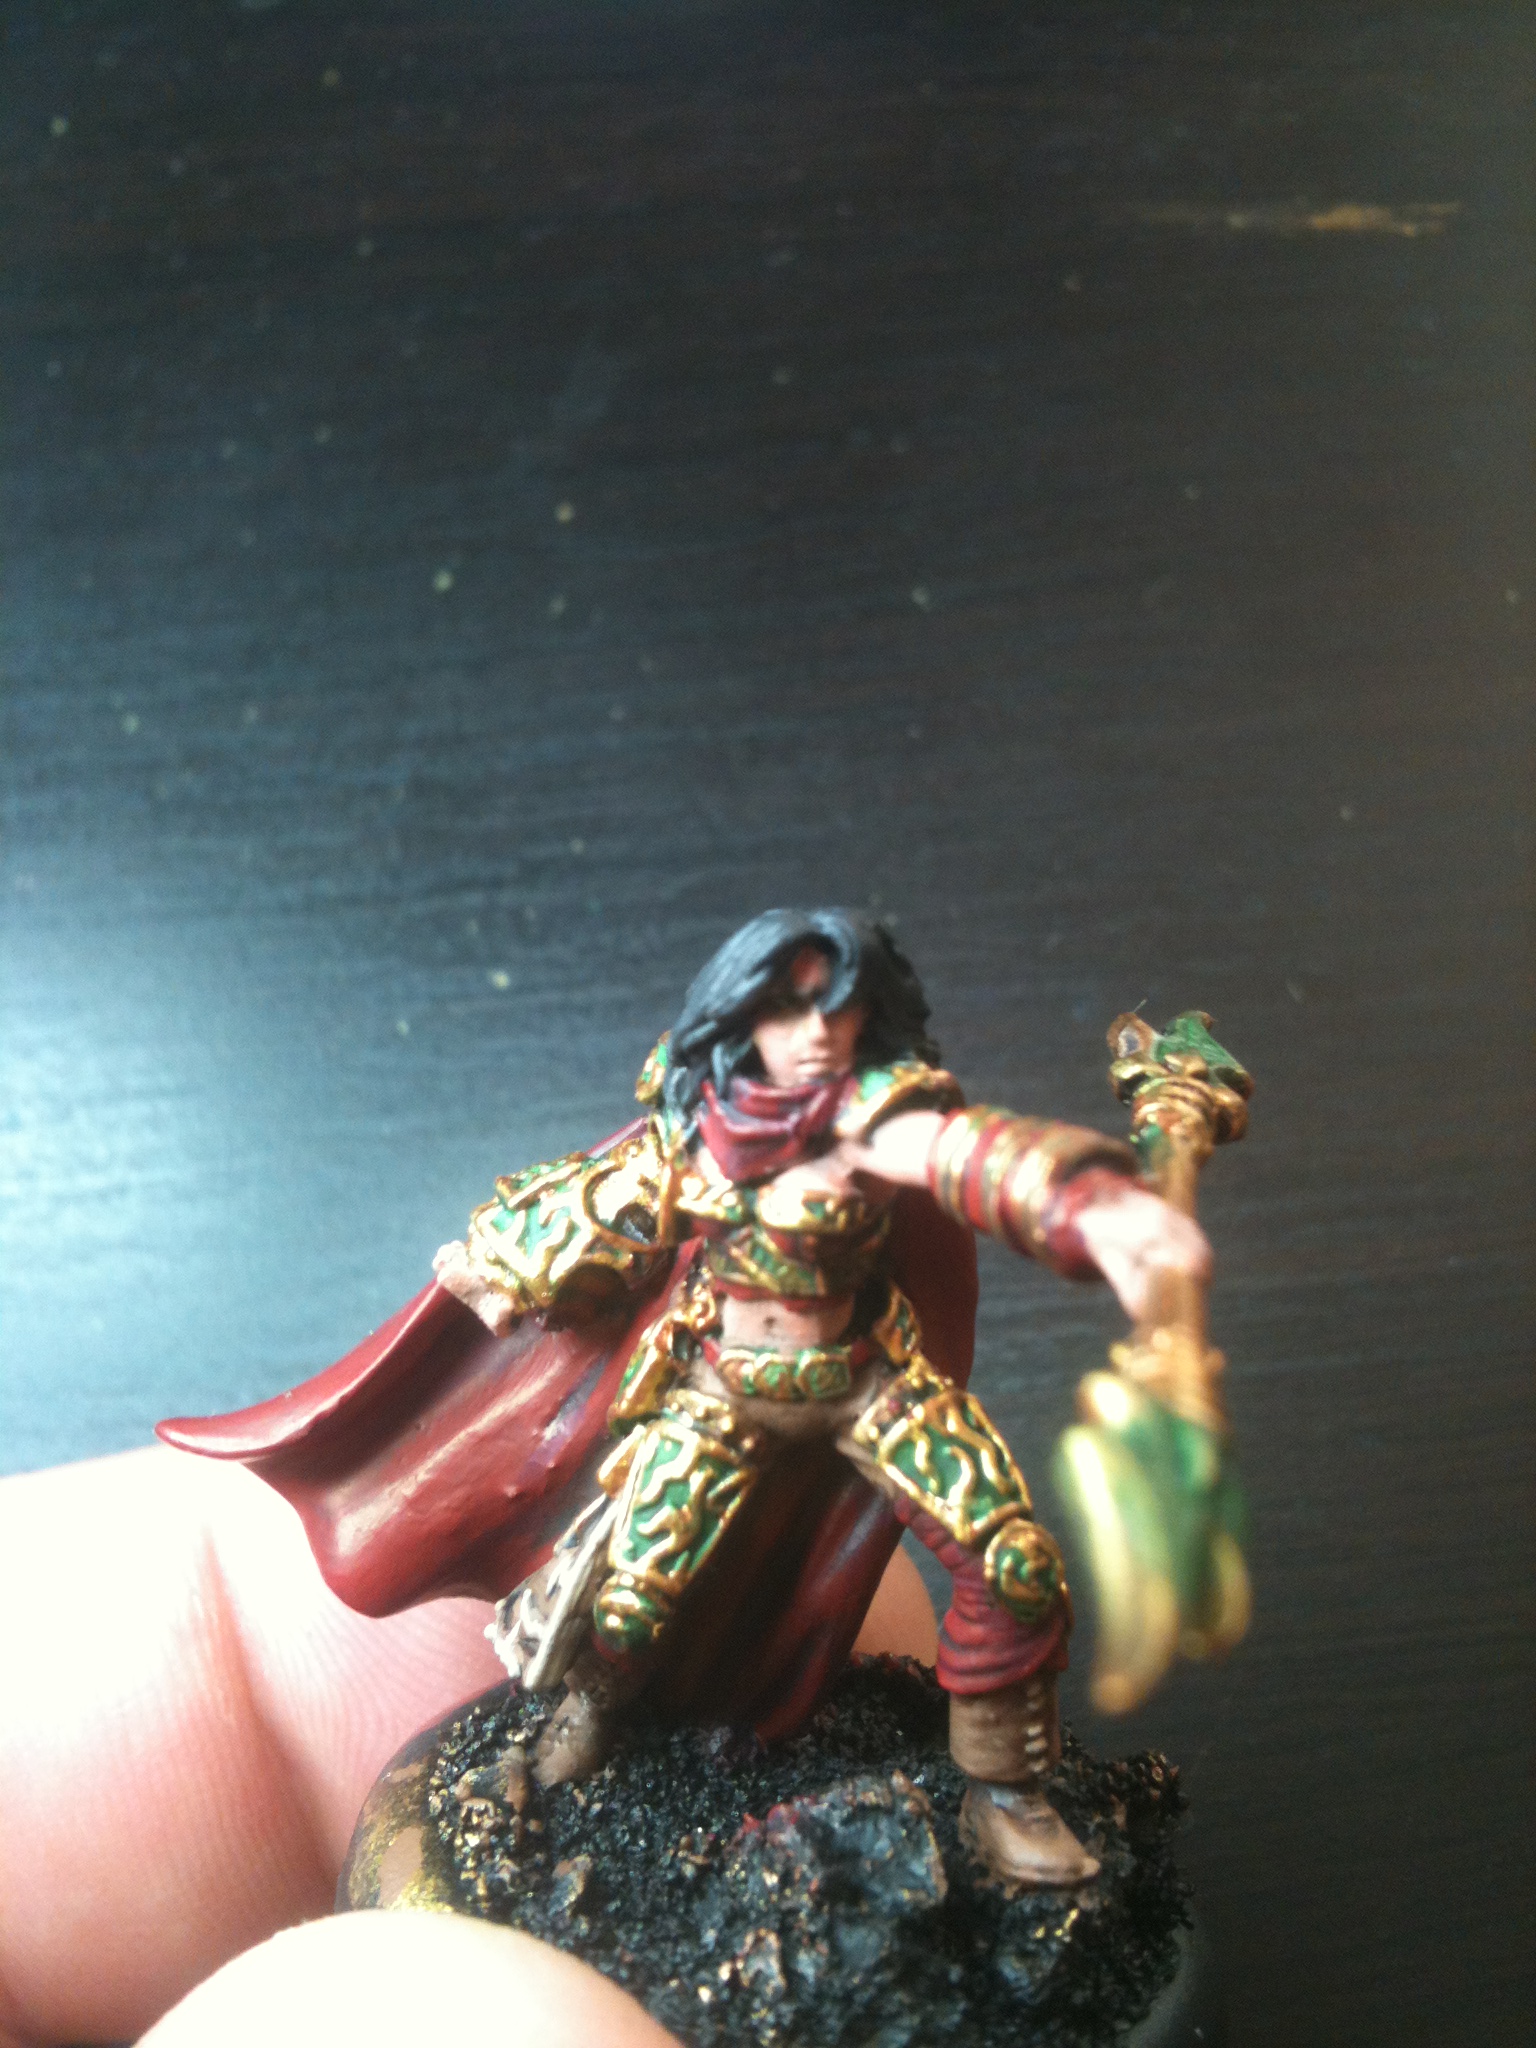
And now to finish strong with Kaya the Moonhunter’s weapon, Glimmer.
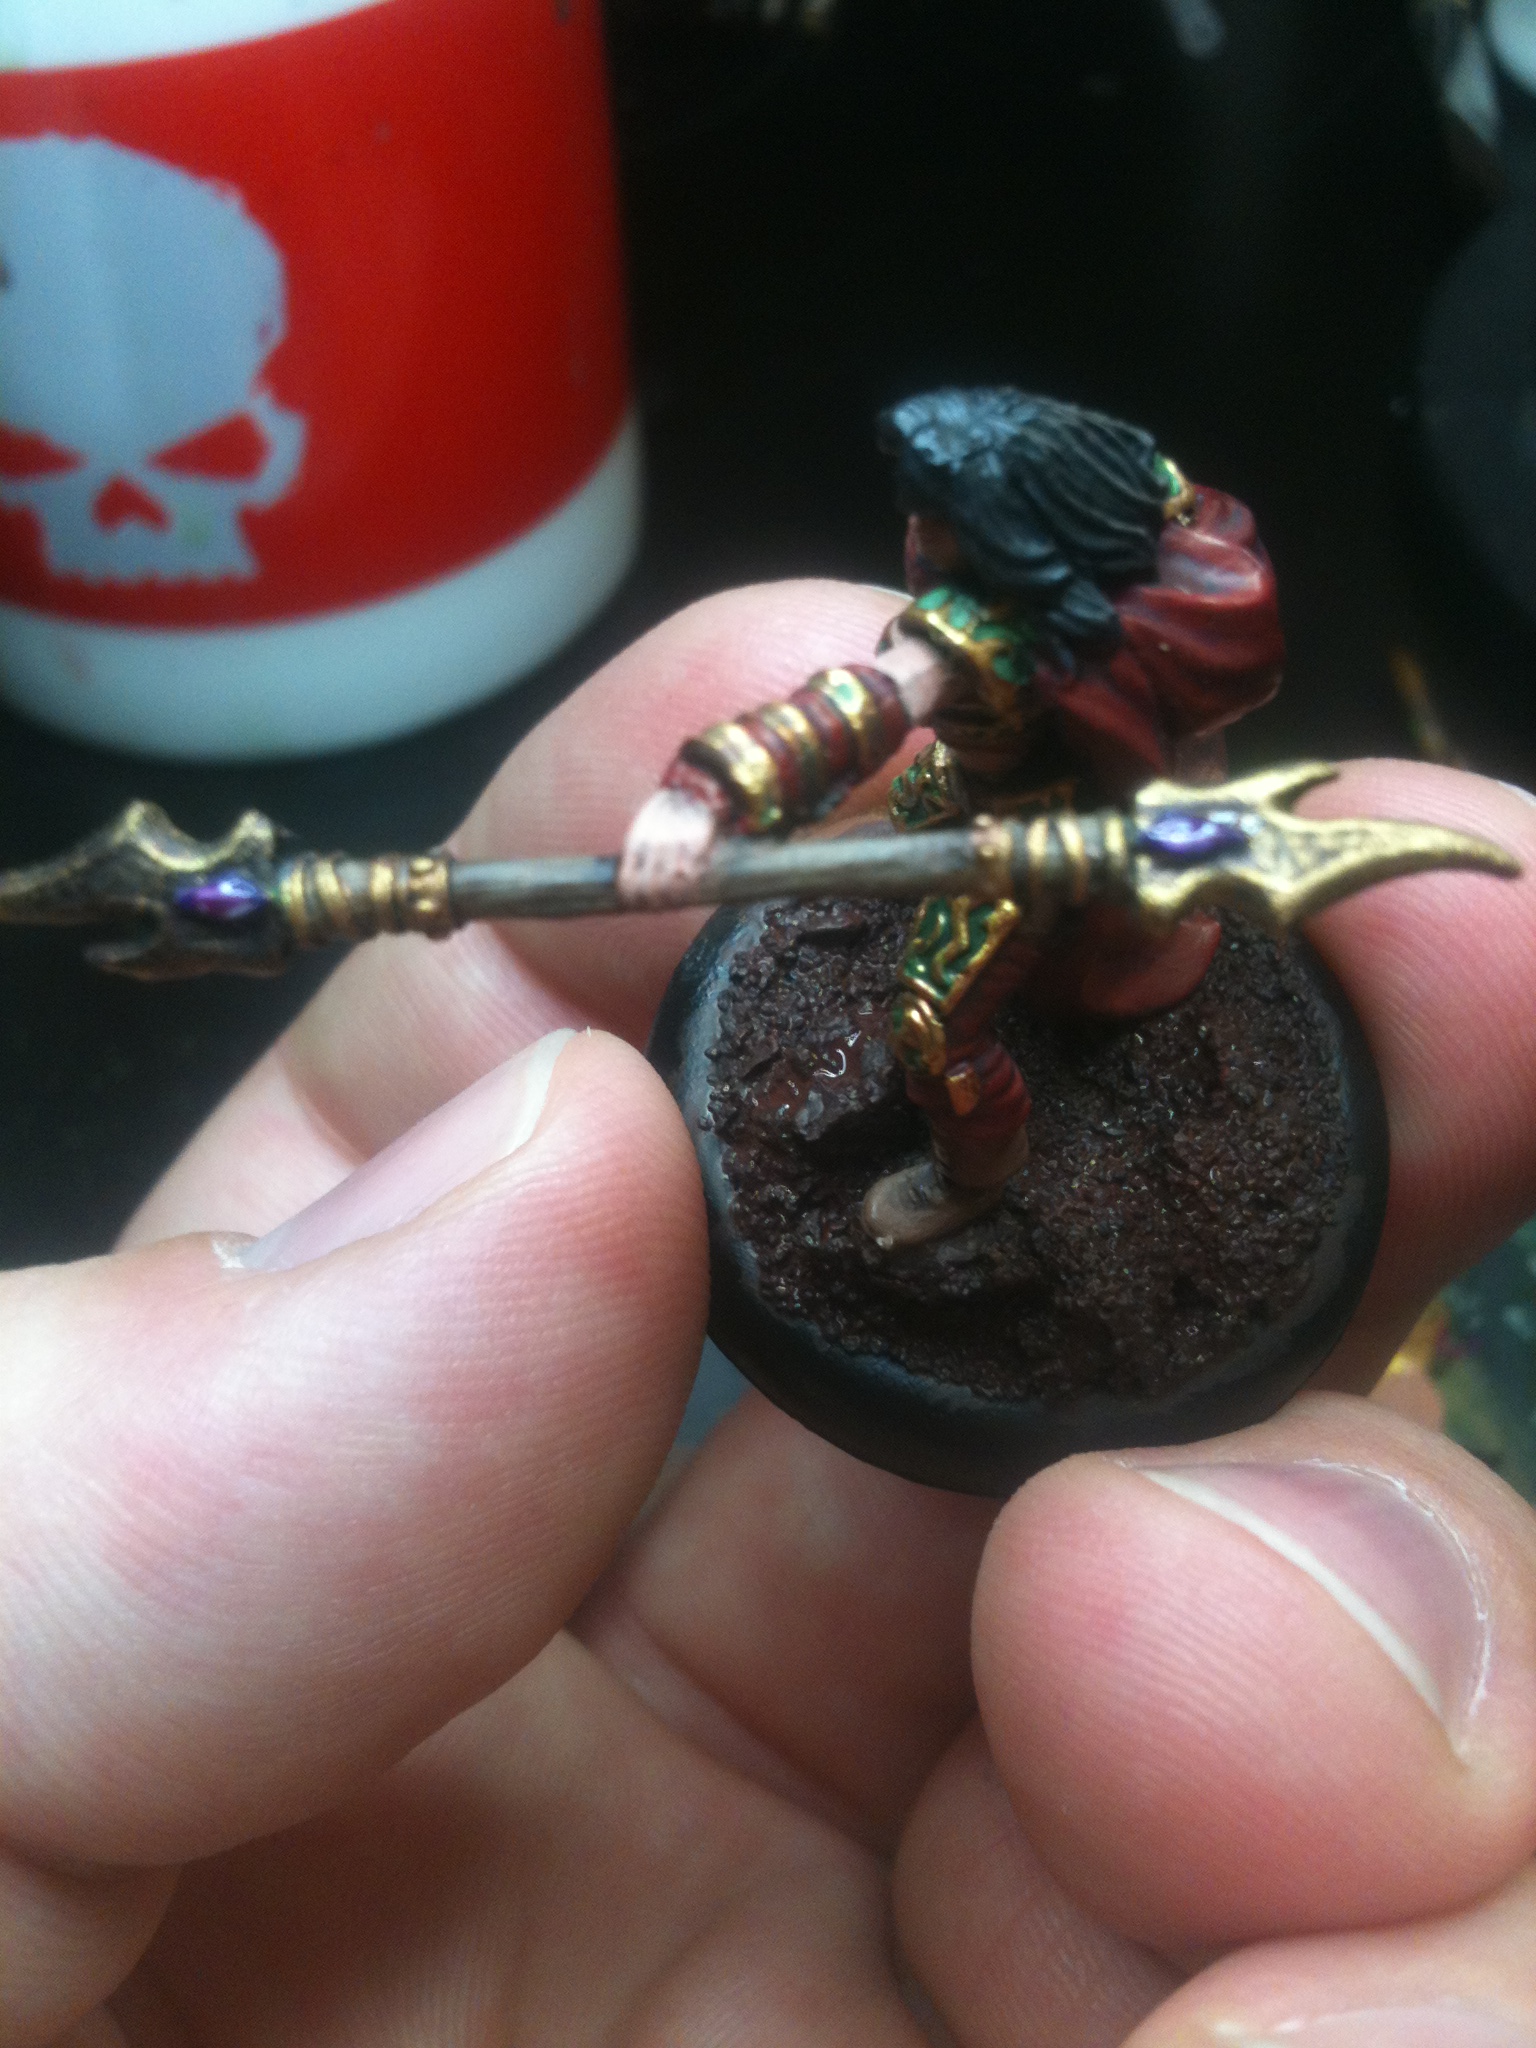
The wooden staff was base coated Khemri Brown, Washed with Devlan Mud and then highlighted with Khemri again. The gold was done in the exact same way as Kaya’s armour but skipping the steps for the Thrakka Green Wash. Then finally the gem stones. I base coated them Liche Purple, highlighted with Warlock Purple and then covered with Ard Coat Gloss to give it that shine of a polished gem stone.
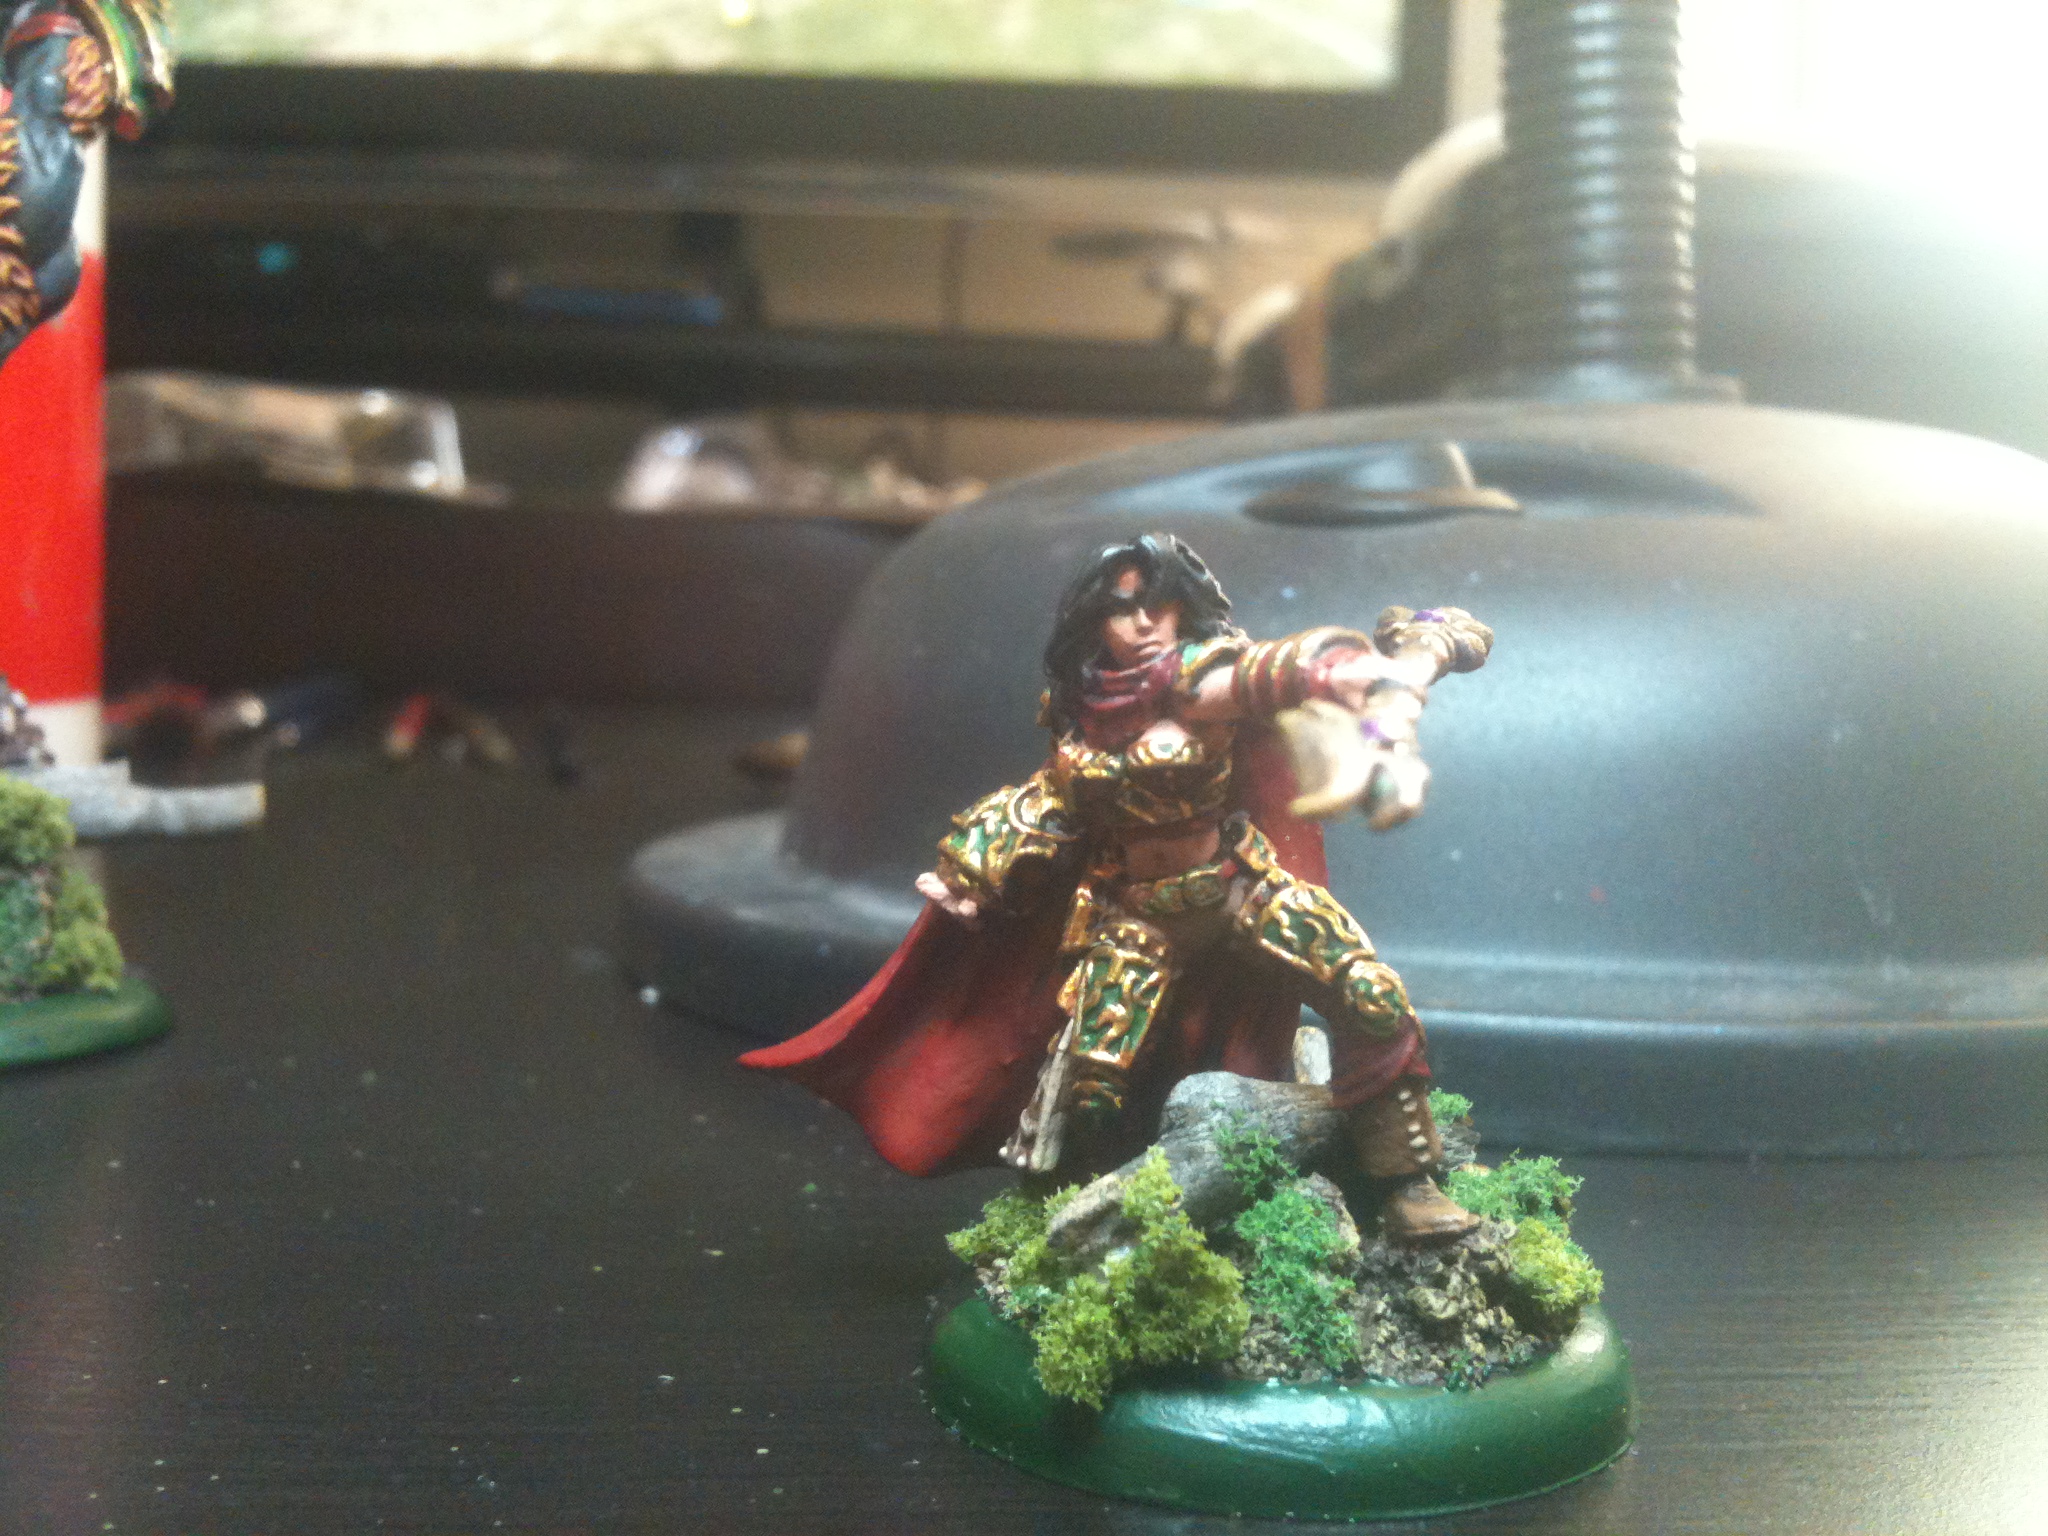
The Final Product based and all! Kaya is ready to do battle with her Warbeast at MEAC2013!
Please refer to my Basing Blog Ragnarok Brings The Base(ing) for how I do my bases.
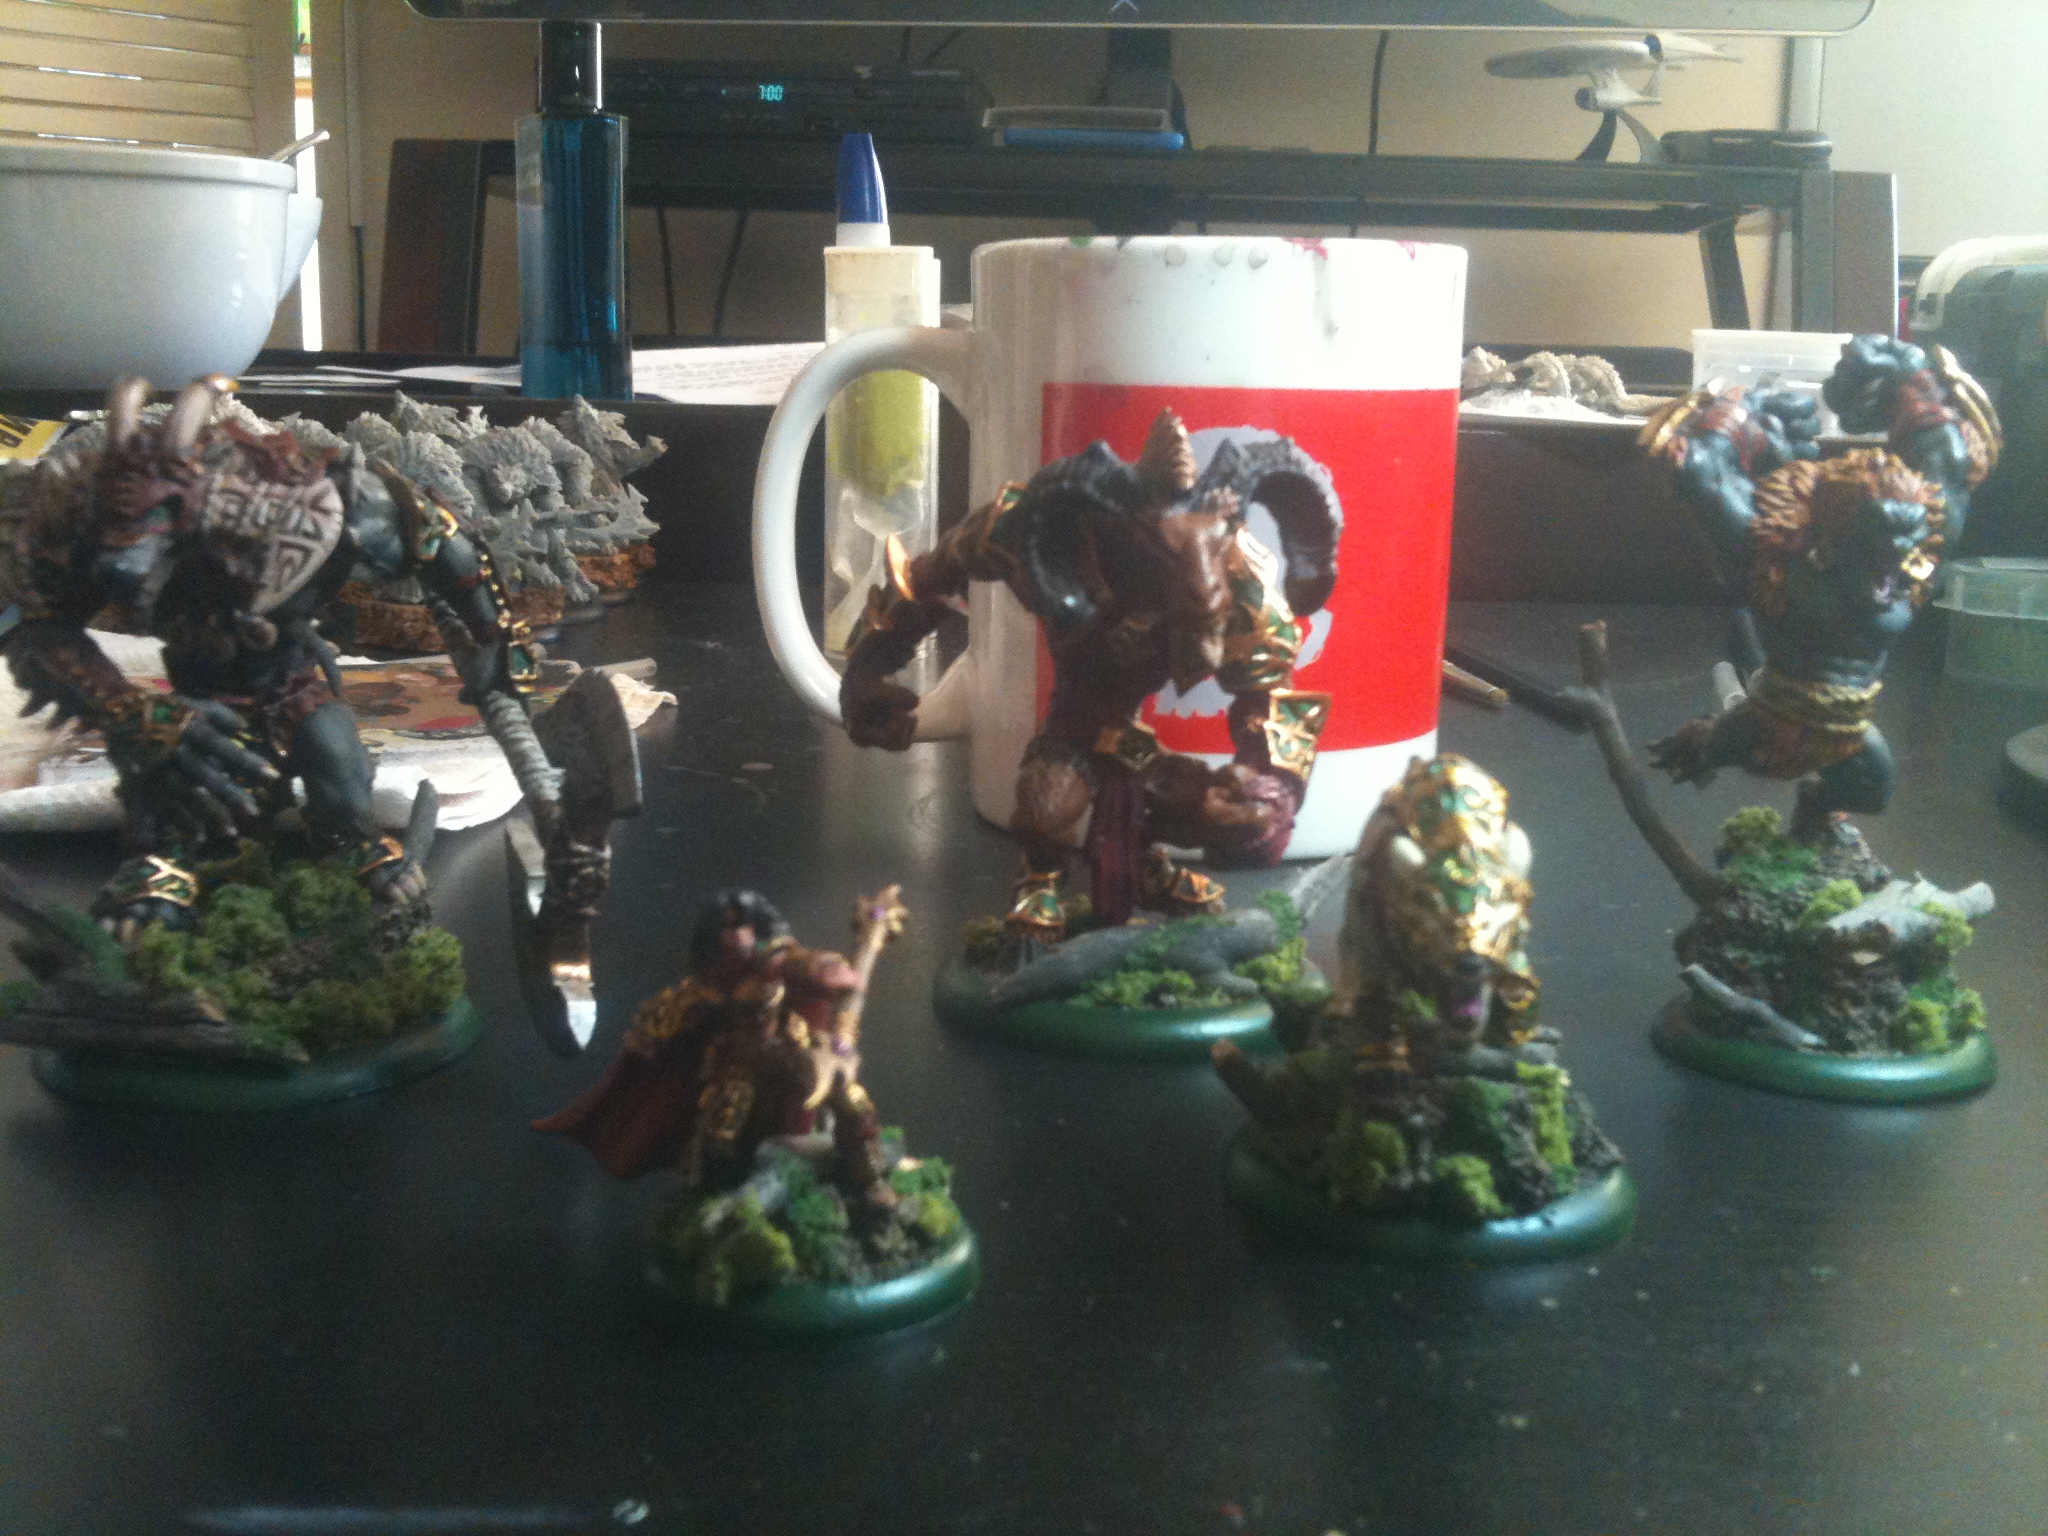
Hope you have all enjoyed this journey with me! I had loads of fun getting this duo done. Now on to my next project! Need to keep this paining high going for as long as I can and get as much as I can done!!! Wish me luck!
As always any feedback or tips are more than welcome! May your own painting journeys be as fun and productive!
Ragnarok signing off!
Looks good! I particularly like your gold armour. But good lord, what are taking photos with? Your iPhone3? Horrendous.
Yes it was with my iphone =/ my apologies for the low quality pictures. I will have to get a better camera for next time.
Loved how you did the teeth on the Mutt. /takes notes…