Have you ever heard the expression, “It’s a poor craftsman that blames his tools”? This may be true of many trades but it does not apply to miniature painting. In fact I believe that quality tools can make one’s miniatures better than what they could be with poorly maintained or mediocre brushes and other tools we work with. This article aims to provide you with the details and hopefully impart some knowledge on the more commonly used tools of our trade.
Cleaning and Model Preparation
Before you even touch primer or paint to your miniature you need to prepare it. This includes cleaning off mold lines and flash (excess metal/plastic on your model from the molding process). Many new hobbyists skip this step but I would advise against that. It’s an important step that prevents the model from looking unprofessional and goes a long way to making it look more “realistic” (well, as realistic as a toy soldier can look).
Files
Files actually make up the majority of my miniature cleaning arsenal. One in particular. It’s a rat tail or needle nose shape (thin and tapers at the point), flat on one side and rounded on the other side. You can buy these files in hobby or hardware stores. They’ll typically come in a pack of 5 with various types of files in it. They’ll all have different shapes and I really haven’t experimented to find good uses for the other ones but the pack is relatively inexpensive so you may as well get it if you can’t find the half rounded one selling by itself. To use the file to clean mold lines you just gently file the mold line away. You can apply more pressure if it’s a particularly nasty mold line but as the line smoothes away you should ease up pressure to prevent any deep gouging from the file as this could show through on the finished model. Some parts of your model may be very narrow and prevent you from being able to reach mold lines with the file. In these instances, you may want to use a hobby knife.
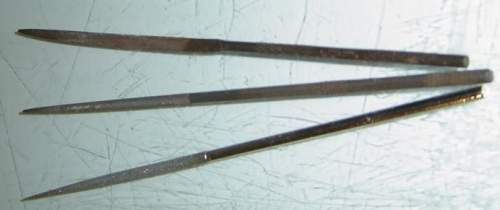
Needle nose files.
The Hobby Knife
A hobby knife will be one of your main tools for cleaning the model of some mold lines. The style of hobby knife you want is one with a pointy blade like in the picture below. You can buy these from any art store and they run about $10 or less. If you’re a younger hobbyist, you’ll need to have an adult or an experienced hobbyist use this tool for you as the blades are EXTREMELY SHARP! Almost any miniature painter that’s been doing this for some time can tell you their skin still crawls when they think of the accidents they’ve had with their hobby knives. Use the knife to carefully cut away mold lines and hold the miniature securely and always try to cut away from the hand that’s holding the miniature. When the blade starts to get dull and the metal/plastic that your cleaning gives some resistance to the blade, you should replace the blade. It will still be fairly sharp but when it can’t cut the metal properly, it means you’ll need to apply more pressure to cut and that’s when the metal suddenly gives and you end up with a bloody finger. It’s not as bad as it sounds. Just be sensible and cautious.
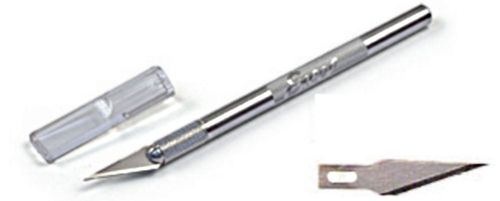
A hobby knife with #11 blade.
Clippers
Also important in model preparation is a pair of clippers. This is pretty standard fare for the hobbyist. You can use them to clip pieces off of plastic sprues, tabs off of models, and even clip off a head or an arm if you’re inclined to do conversions. The only thing here is you’ll want one that has a flat cutting edge and not a curved one. A flat cutting edge will naturally clip the part with a flat finish which is typically what we want. It’s just extra work to cut with a rounded edge and have a rounded finish that we’ll need to file flat 99% of the time. Again, these can be found in your local hardware store.

Flat edge clippers.
Glue and Cyanoacrylate Accelerator
Glue is up to you. Every miniature hobbyist has their own preference and if you ask around in your local gaming store, you’re likely to get a myriad of answers. Personally, I find that the best glue for most applications is a cyanoacrylate glue that has a consistency slightly less viscous than honey. The reason I like this viscosity in a glue is so that it doesn’t drip all over the model and only goes where I want it to go. It also provides some gap filling capabilities if you’re experienced with it and know how much to apply. Bottom line though: use what you’re comfortable with. Also, the amount of time it takes to glue your fingers together is not a good measure of a glue’s quality; they pretty much all do that instantly!
Cyanoacrylate accelerator is a liquid that instantly cures the glue. This can be a godsend that can save vast amounts of time normally spent holding your pieces together waiting for the glue to cure sufficiently. Some say that accelerator will cause the bond to be weakened or will have the glue deteriorate over the years. I’m not sure if any of that is true and have yet to see any proof of this. Fact is I have been using accelerator for at least 10 years and I still have models that haven’t fallen apart. The time it saves is enough for me to say using it is beneficial. When using accelerator you should be careful that you don’t have glue on your fingers before applying it. The accelerator interacts with the glue on a chemical level that seems to super heat the glue to have it cure very quickly. If it contacts your skin and you have glue on your hands it may burn. I haven’t had this happen to me but I’ve seen it. Nothing major but it’ll be very unpleasant.
You can find both cyanoacrylate glue and accelerator at your local hobby shop although the accelerator is sometimes harder to find.
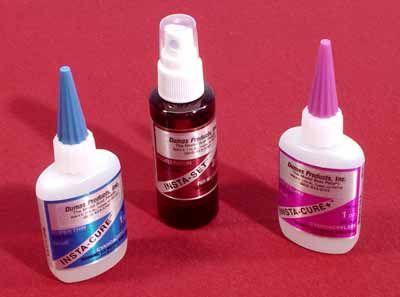
Cyanoacrylate glue and cyanoacrylate accelerator. I use the glue with the purple label.
Primer
Primer is important for miniature painting as it gives the paint something to stick to. Acrylic paint won’t adhere to bare pewter. Like the glue, this is all down to preference. Some people like the major miniature company brand primers, some (like me) prefer to use whatever they can find in the hardware store. Some like black primer while others prefer white or even gray. Whatever it is, use it mildly and don’t overdo it. Too much primer can cause your model to lose detail as a heavy coat of primer can simply fill in the fine details by pooling. Go light and do two coats. I still have nightmares of a kid that came to me for painting tips with a Space Marine that looked like the Blob.
Paint
Well, here’s a big topic to discuss. Which line of paint do you go with? There’s so many good lines of paint out there (Vallejo, Citadel, Formula P3, Reaper, Partha, Armory, etc.) which do you choose? Firstly I would recommend you choose an acrylic paint (all the aforementioned companies are acrylic based). Most acrylic paints are water soluble meaning they are thinned and cleaned using just water. If you venture into the realm of traditional scale model paints like Tamiya and Testors, make sure they are water soluble and not oil based or an acrylic base that requires a reducer (not all acrylics are thinned with just water).
Again, this comes down to preference. Some factors to take into account are the paint containers, colours in the range, paint consistency, opacity, and more advanced factors like chalkiness. Perhaps the more obvious limitation is price and more importantly, availability.
Also, keep in mind you’re not a slave to any one line of paint! You should feel free to mix and match as you see fit. For example, I frequently mix and match Vallejo’s Game Colour, Citadel and Formula P3 lines. If you get together with friends to paint regularly and one of your friends uses a paint line that you haven’t tried before, ask if you can use some and see what you think. Experience and experimentation is the key here. Don’t be a fanboy! Use what works for you!
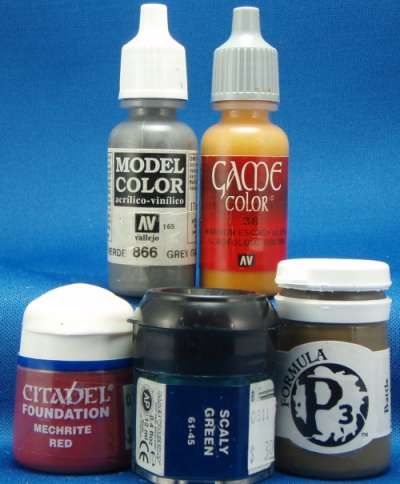
Some of the many different kinds of paint you can use.
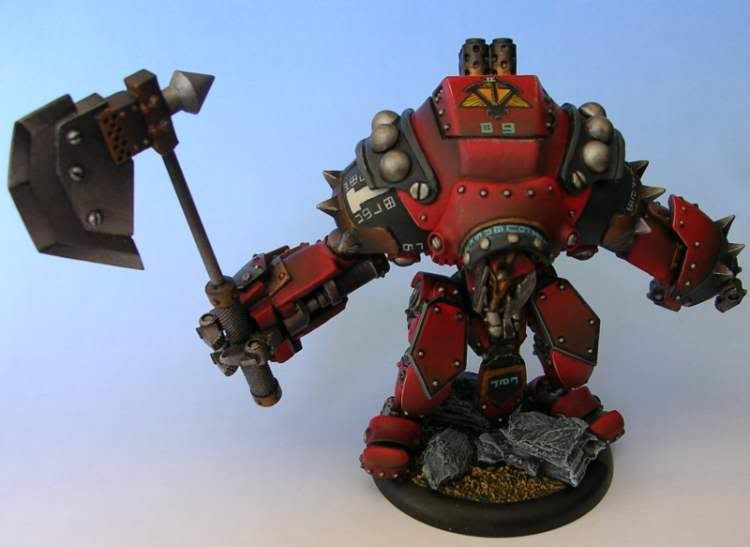
This Privateer Press Khador Extreme Juggernaut was painted using Formula P3, Citadel and Vallejo Game Color paints.
Brushes
At last we come to brushes. This is the single most important tool we have in our toolbox. Without a good brush, you’ll spend extra time basecoating or fixing the eyes on your Warcaster. It all comes back to my original point, “It’s a poor craftsman that blames his tools”. This couldn’t be further from the truth when it comes to brushes for a miniature painter. As a painter, you need a quality brush or the paint just won’t go where you want it to. Once a brush starts to fan out and loses its point, it should be demoted to a drybrush or something similar.
So what’s a good brush? Once again we come to a dizzying array of choices for miniature painters. There’s the staple wargame company brushes, Citadel, Formula P3, etc. These are decent brushes for the money. With proper care they’ll typically last in the area of 2 – 4 months of the average casual painter’s schedule. For the $8 to $12 investment, that’s not half bad. For the more serious painter, one may want to invest in a pure Kolinsky sable brush. These are the elite of the paint brush world. All other brushes wish they could be made with pure Kolinsky sable!
Windsor Newton Series 7 and Escoda are the only ones I have experience with but these brushes are sweet. They come at a premium though. Each cost me approximately $20 for a size 1.
If you do decide on a pure sable brush, do NOT use them for metallic paint or to drybrush. It’s much better to use a synthetic brush for those applications. Drybrushing requires a stiffer bristle which synthetic brushes are made from and will ruin the point on the brush. Metallic paint contains trace amounts of mica which will also ruin the bristles on a brush.
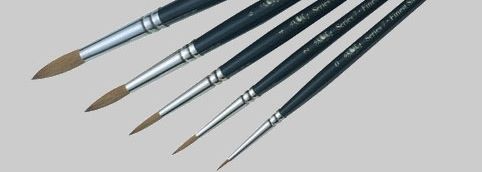
Windsor Newton Series 7 Brushes.
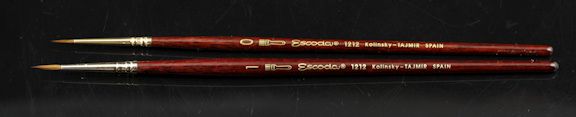
Escoda Tajmir Pure Kolinsky Sable Brushes.
While also on the topic of brushes a common question I get is “What size brush should I use?”. The answer to this is up to the individual. You know what you’re comfortable with and what works best for you. For the most part, I use a size 1 brush for everything from base coating to dotting the highlight on the pupil of my model’s eye. The reason for this is if you use a size 000 or something similar, the width of the bristles overall on the brush may be thinner than a size 1 but the point on a brush is still the point on a brush regardless of size. What I mean is, the point on my size 1 brush is the same as the point on your size 000 brush. The advantage comes in the fact that the size 1 brush picks up more paint and therefore is more reliable to apply paint (especially true when applying a tiny little dot) than a size 000.
To sum it all up, I’d say you need to invest in some quality tools. You don’t need to break the bank and get the official Citadel Paint Station, P3 Wet Palette, P3 Mixing Medium etc. These are extra bells and whistles that may add convenience to your painting but are definitely not necessary at the outset. Get yourself a good file, knife, glue, some kind of primer and some quality paint and decent brushes and you’re in a good position to succeed at your painting goals. Start simple. You’ll know when you’re ready to take the next step and upgrade your tools.
Thanks for reading. Until next time!
Remember: it’s just paint, it works for you.
Masterseck
Nicely done. A lot of really good information for the up and comer painter as well as a few tips for paint veterans.
I especially like how you stress that you don’t have to use just one company’s products. Mix and match as you feel appropriate.
Next I want to see some technique articles. What do you do with all these brushes and paints to get the effect your looking for?
Looking forward to the next one!
Great post Masterseck! loads of good info.
One thing I would add, first thing to do with a model is wash it. Warm soapy water, then rinse. Takes any resin/pewter release agent off the model. Great article!
You know it’s funny, b/c I never used to wash my models (resin) before and I’ve since tried it out a few times and I don’t notice a thing. Maybe the PP Primer actually cuts through the release chemicals? I don’t know but I find that now that it’s an un-nessasary step…at least for me. I’ve never noticed my paint chipping anymore or less b/c I didn’t wash my model.
Pewter is more important to wash than resin. It helps with glueing as we’ll as the surfaces are clean.
Nice article. Another sable brush is the Raphael 8404 series. I sued to use the WN 7 series all the time but picked up a few of the Raphael 8404s and love them. It has become by got to brush now.
I agree with mixing between paint lines. I use at least one paint form all the lines you listed and then some. Another paint people may be interested is the Vallejo Liquid Gold range. They have amazing coverage for a metallic paint. Please not if you use these paint don’t use a sable brush and don’t thin with water but with isopropyl alcohol.