I’ve been building a lot of lists lately and in the course of doing so I’ve been revisiting an old favourite of mine, Epic Warlock Baldur the Stonesoul. More specifically his theme force, the “Hour of Reckoning“.
I’ve previously used eBaldur with some success but one thing I’ve always wanted was some heavy ranged firepower to add to his “brick up” Theme Force play style. Sitting the heavy Constructs (or Warp Wolves should I choose to venture outside of his Theme Force) behind Rock Wall for a Defense bonus and protection from non-reach models is a solid Tortoise formation but lacks speed. In order to force the enemy to engage this near impenetrable wall of heavy warbeasts, I require a serious ranged threat.
Looking through the warbeasts available to Circle, there’s a definite lack of ranged attacks on the level of Ravagore Blight Blasts and Mammoth Siege Batteries. Then it dawned on me that for the same point cost as an average heavy warbeast I could get the Celestial Fulcrum Battle Engine. Circle Orboros’ Battle Engine is a construct that can fire off three magical shots which are boostable by the Fury it generates itself. It’s the perfect fit for what I wanted and it also conveniently fits into Baldur the Stonesoul’s theme force.
Making a quick trip to Heroes World the next day, I picked up the Celestial Fulcrum and the following article will describe the cleaning, assembly and painting of it in detail!
Components and Preparation
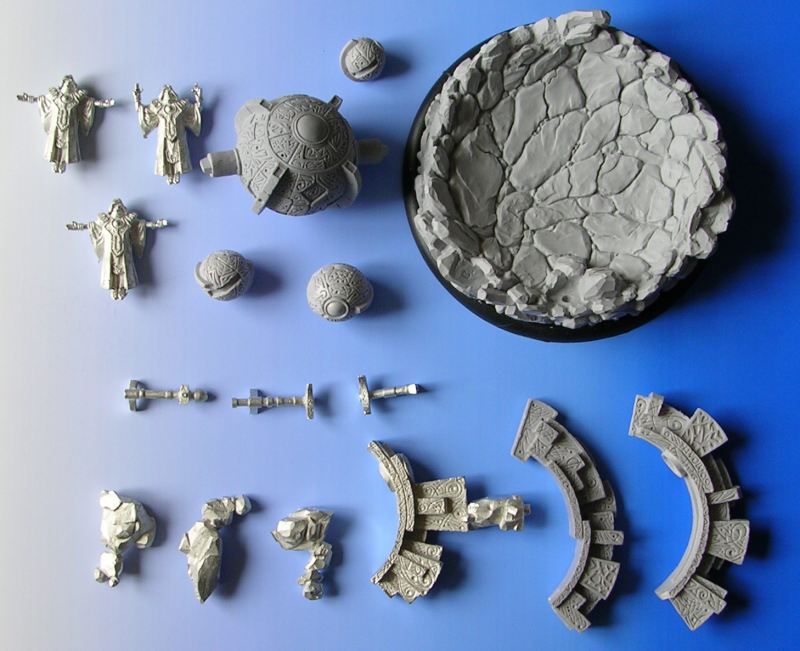
The model comes in a large box with both resin and pewter components. The stone base is a large piece of resin and requires the most cleaning. It’s mostly the bottom lip of the base piece that has a lot of flash around it. Fortunately, the resin is thin and very easily filed away. The remainder of the components only require the standard filing and cleaning. I actually found the components to be quite nice and the flash and mold lines were minimal. Oh, and this resin is the good stuff. It’s not too thin or that odd resin that can’t be filed away. Your results may vary though as resin can vary from batch to batch.
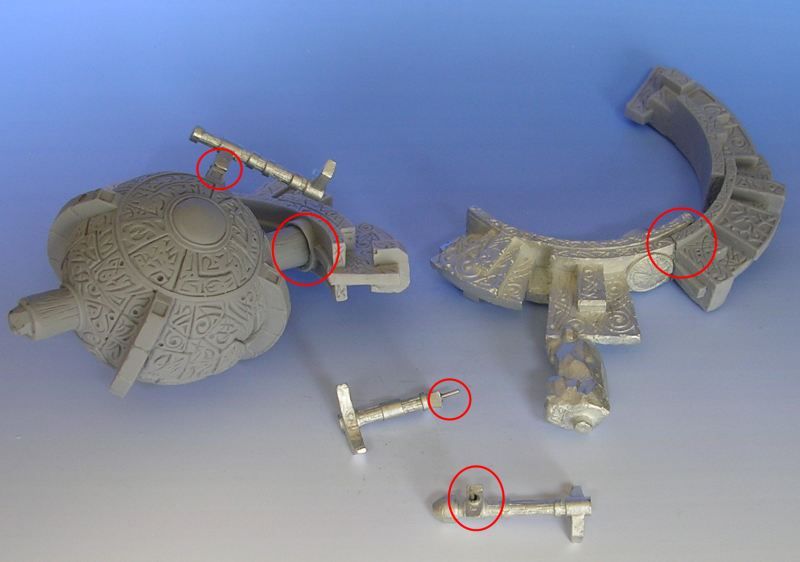
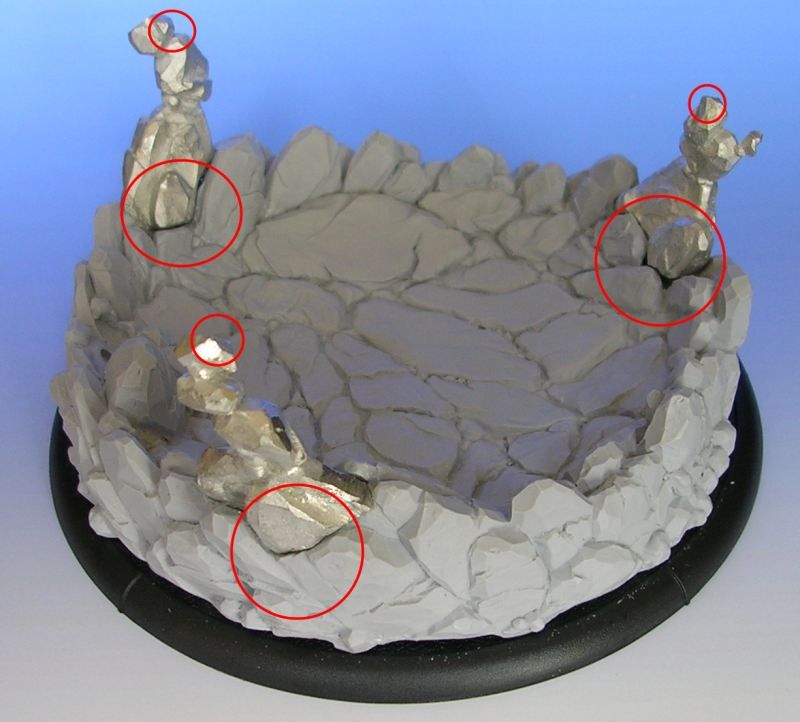
The construction of the Celestial Fulcrum is quite sturdy but there are a few parts that should be pinned in order to ensure that they don’t snap off during transport. Pinning entails drilling a hole in 2 pieces of a model and then inserting a pin, dowel, brass rod, paperclip or whatever into those holes and gluing the pieces together using the pin as an anchor to both pieces. It adds strength to the bond and is great for models with a thin joint or a large model for some added sturdiness. On the Celestial Fulcrum, these pieces are mainly the rods that attach the “planets” to the Fulcrum, the joints where the Druids levitate and the joints on the main Fulcrum ring itself. The pictures below show where I’ve placed pins or drilled holes for pins to be attached later.
At this stage, I’ve primed all the components with a black primer.
Painting the Fulcrum Base
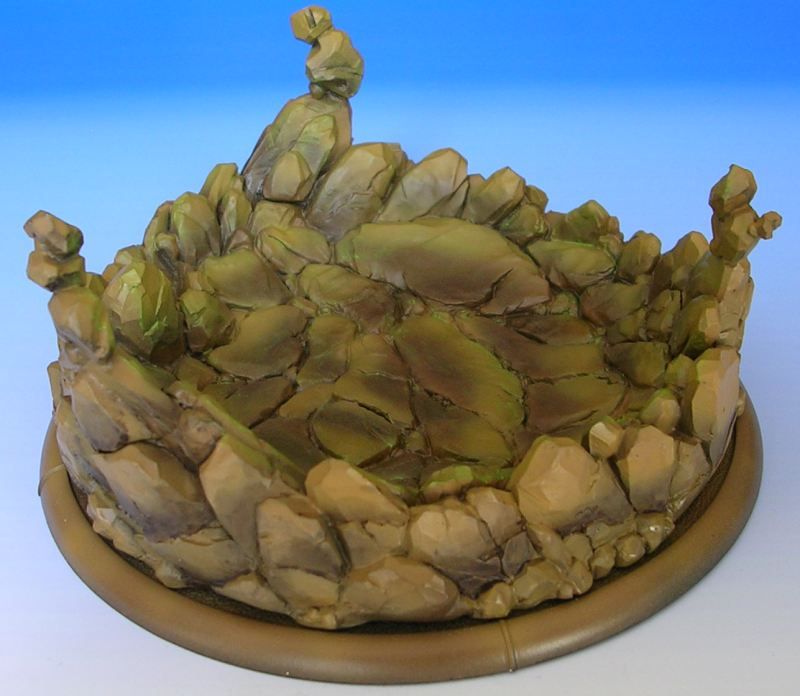
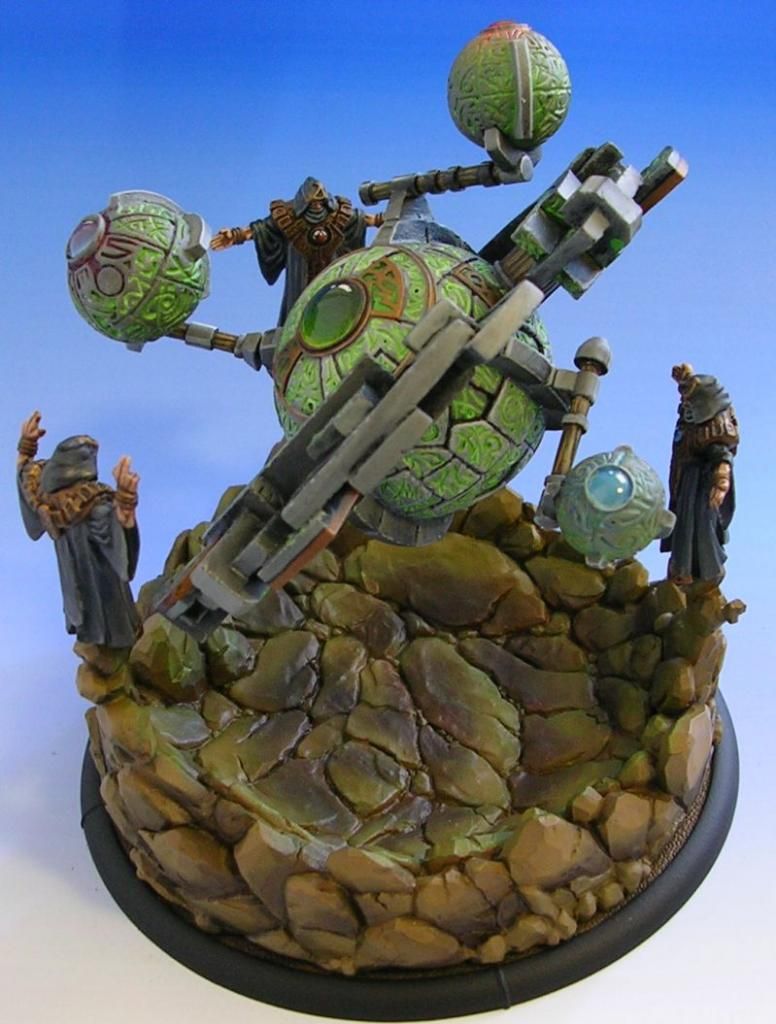
While looking at the Privateer Press Studio pictures of their Celestial Fulcrum, I noticed they went with a brown earth for the base instead of gray stone. I believe this was to break up the colour a bit between the base and the actual Fulcrum itself. It’s a good idea and so I also went with a brown for the base. The colours I’ve used are all from the Vallejo Game Color line of paints. They really make some great browns and I use these colours on almost every model I paint. Charred Brown mixed with Black (1:1) to Leather Brown mixed with Charred Brown (3:1) to Bonewhite mixed with Leather Brown mixed with Charred Brown (2:1:1). These colours were then airbrushed onto the base.
After the browns are applied, I applied a controlled wash of Citadel Putrid Green (Vallejo Scorpy Green) to produce a green glow effect to simulate the light source of the runes from the Fulcrum’s frame. See the video below on how to achieve this effect.
http://youtu.be/GhfDKOX-iz4
If it’s unclear what I’m doing in the video, I’m applying the watered down green to one edge on the base and then cleaning off the brush and gently pulling the colour to the opposite end of the section of earth on the base. This will gradually fade the pigment creating a smooth transition as they do in watercolour painting.
Painting the Fulcrum Frame
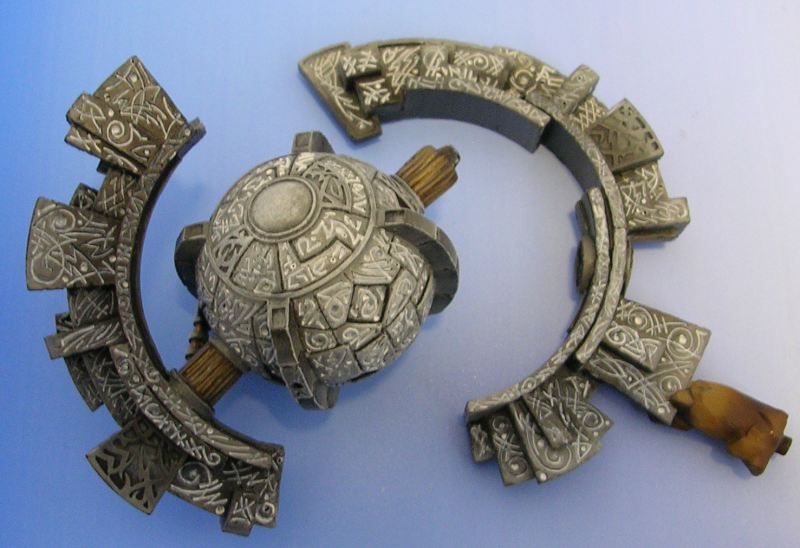
The frame of the Celestial Fulcrum and the centre sphere make up the majority of the Fulcrum and will likely take the most time to paint. Start with a quick drybrush of gray on the frame and the centre sphere. I used a Liquitex Neutral Gray Value 5 for this. After the paint is dry, I went back in and blended from the same gray mixed with black to white to offer some depth to the gray instead of having it be flat.
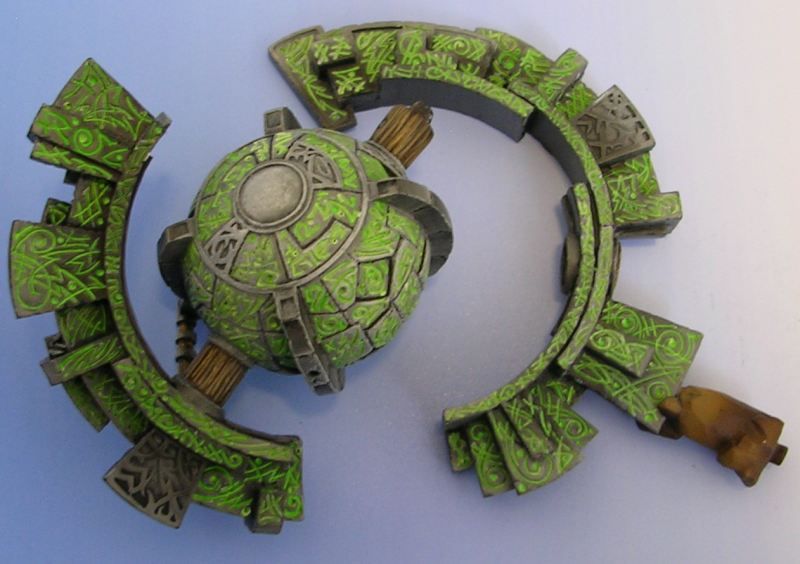
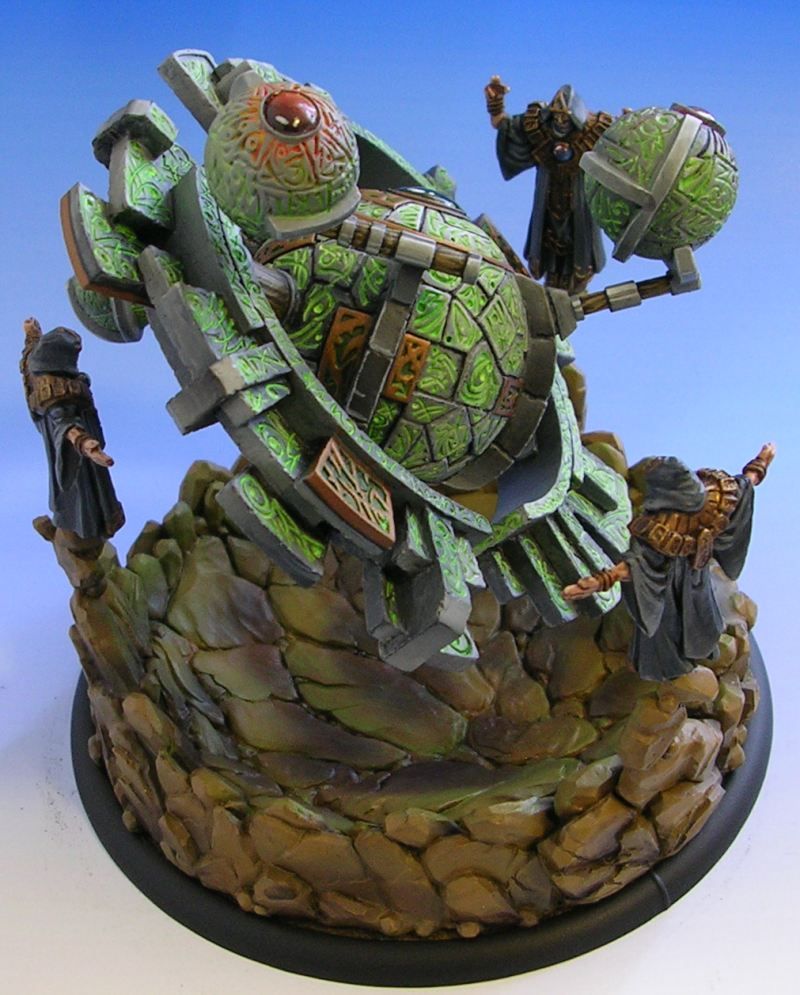
The runes on the Fulcrum are next and this is a very time consuming and frustrating experience. There’s a lot of them. I mean a lot. Take some white paint and water it down to the consistency of a wash. Apply the white to the runes. Repeat for 2 – 3 hours. You do not want to rush through this as they cover the model completely and some extra care at this stage can make a difference with the finished product. Take breaks if you want to retain your sanity.

This could be you after painting all the runes on the Celestial Fulcrum unless you take a few breaks!
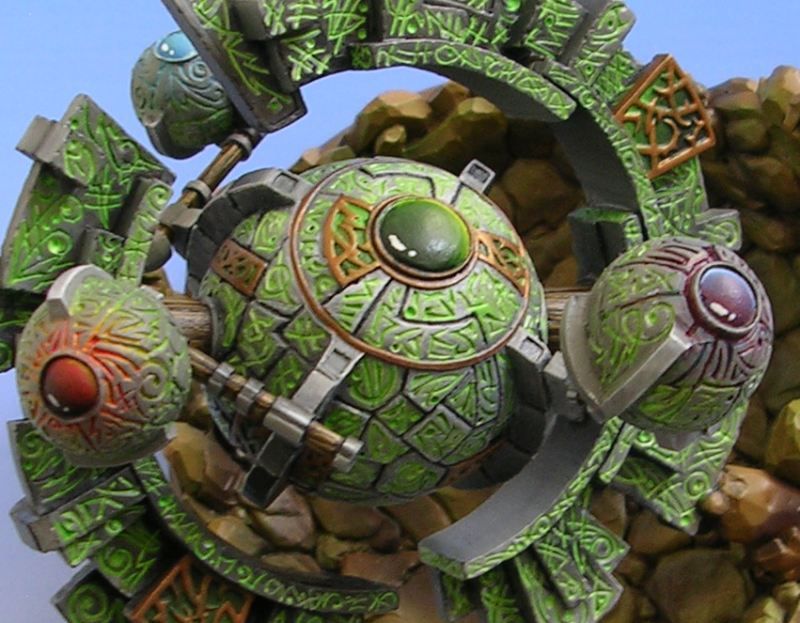
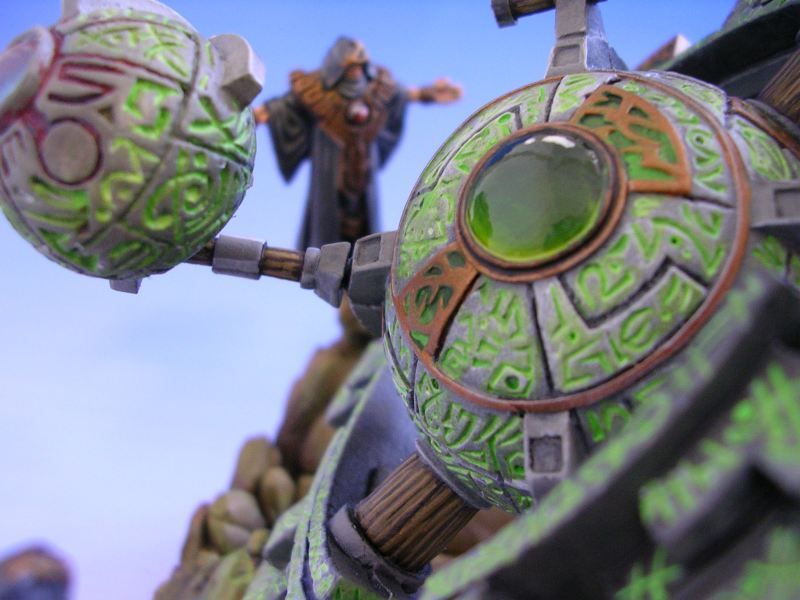
Next I took Vallejo Game Color Scorpy Green and watered that down to a wash consistency as well. This is also painstakingly painted into the rune sculpts.
At this point, you can assemble the Fulcrum frame to the base if you wish.
Painting the “Planetary Firing Spheres” (do you have a better name for them?)
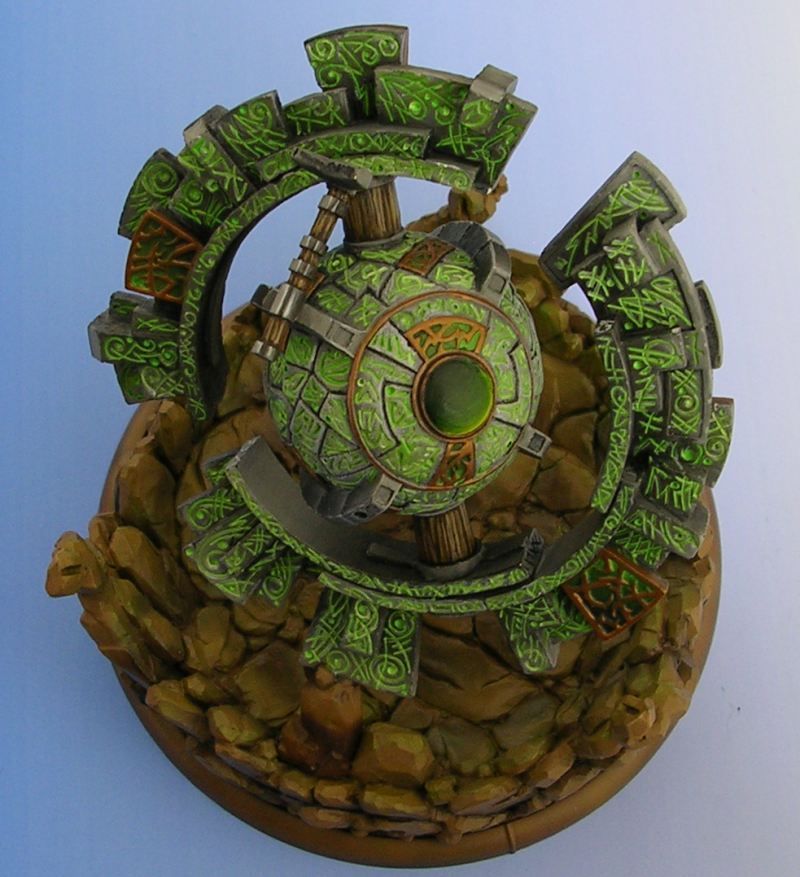
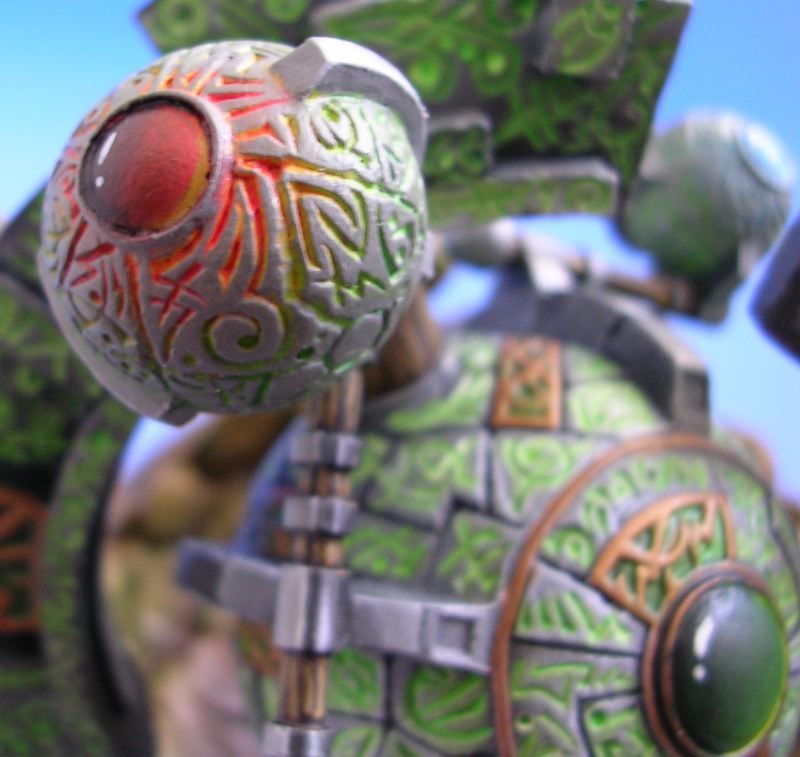
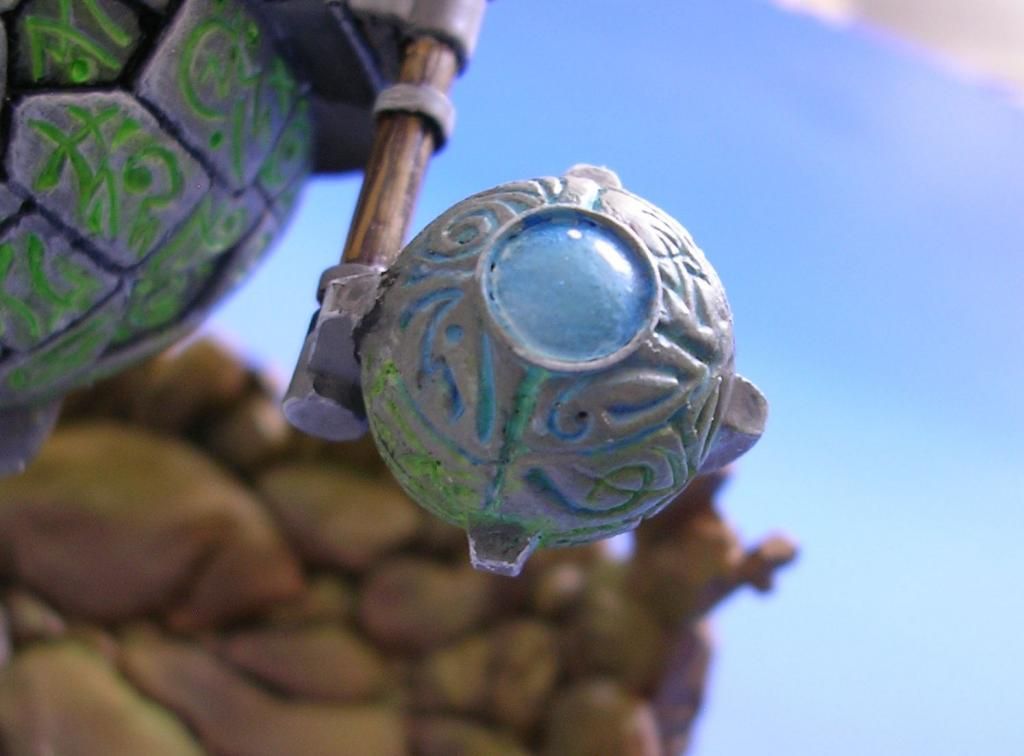
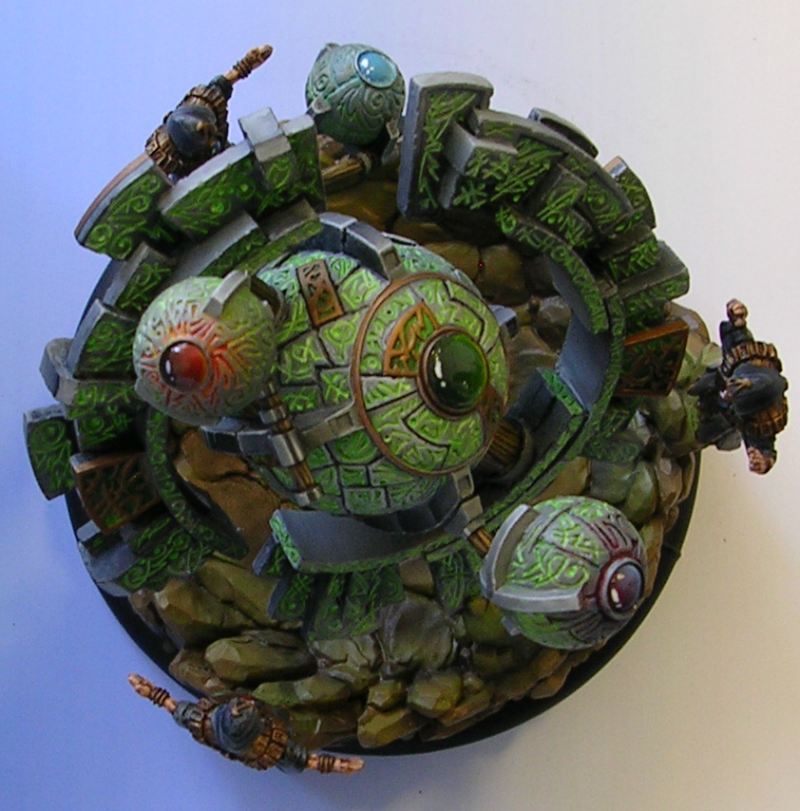
I had an idea for having a cool lighting effect on the firing spheres from the beginning. The crystal colour in each of the spheres would correspond to the colour they’re shooting, Fire (red), Lightning (blueish purple) and Ice (light blue). That’s nothing new. Everyone does that as well but I also wanted a residual powering up or cooling down lighting effect surrounding the crystal matching the colour in the runes surrounding the crystal. This is achieved the same way the green runes were done but I’ve obviously used the same colour as the crystal for the wash instead of green. Once again, drybrush the spheres gray, wash the runes white then wash the runes green except the ones closest to the firing crystal. The runes closest to the firing crystal will be washed the same colour as the crystal itself.
Painting the Druids
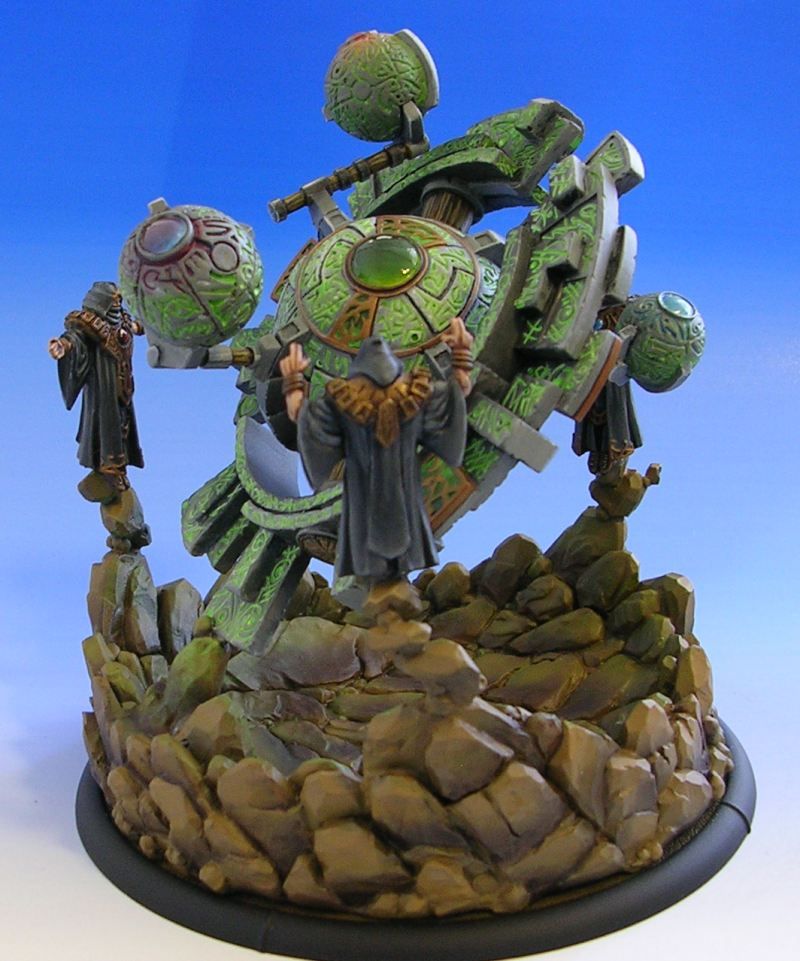
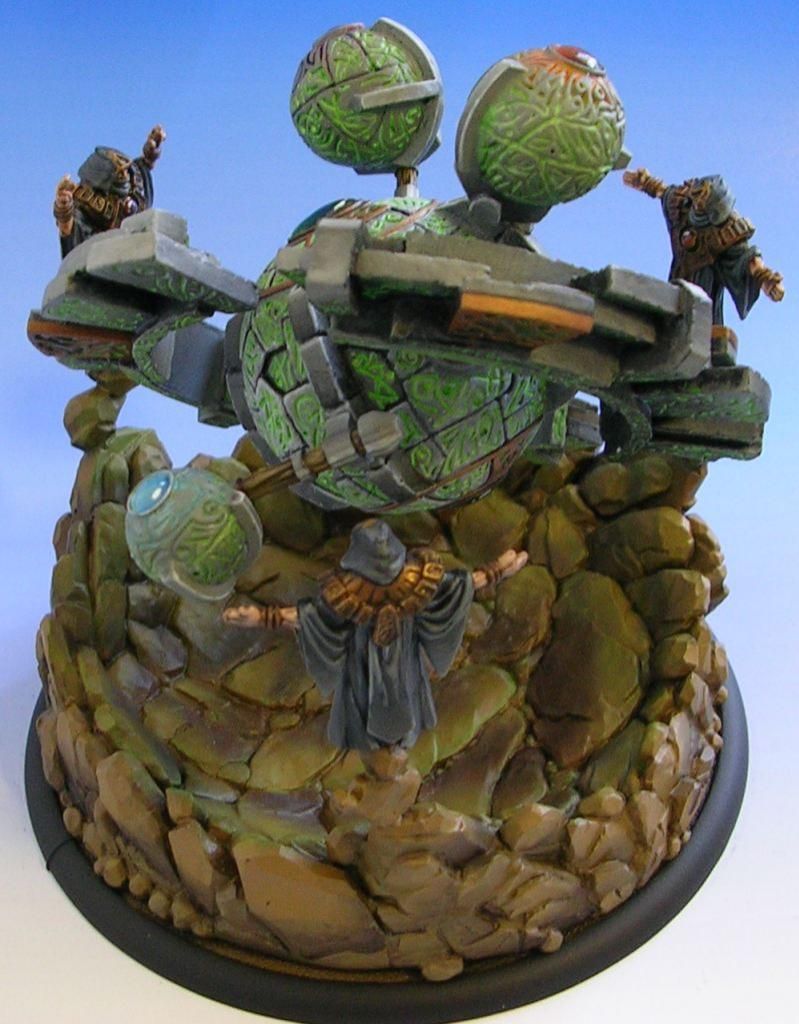
The druid cloaks are blended from Liquitex Neutral Gray #5 mixed with a bit of white up to black. Their shoulder pauldrons/vests were painted with Citadel Gold (not sure which one as my label has scratched off but it’s the darker one) mixed with Vallejo Charred Brown. The gold was then washed with a mix of Charred Brown and black. The gemstones on their chests were painted using the same colours as the planet crystals to create a bit of cosmic symmetry/balance on the model. They were then glued on the very near completed Celestial Fulcrum!
Finishing Touches
Finally, the Celestial Fulcrum receives a couple of light coats of Rustoleum Gloss Varnish. When that’s dry, I hit it again with a couple of light coats of Testors Dull Cote spray. For anyone that has not worked with Testors Dull Cote, this stuff will eliminate any shine or glossiness you have on your model. It’s not a great protection coat by any means but that’s what the Rustoleum is for. After the Dull Cote dries, I apply a brush on gloss varnish to the crystals on all the planetary firing spheres as well as the druid chest gems.
Here’s the Celestial Fulcrum finished, ready to blast the opposition and predict that you are a good match with Aquarians. I’m looking forward to fielding it in battle and can’t wait to fry Northblade’s Cygnar, freeze Awk’s Skorne and electrify Tim’s Trollkin.
Until the next time! Remember, it’s just paint. It works for you.
– Masterseck


Wow! Your stuff never ceases to amaze me. I really like the glow effects you’ve got going on all over. That’s some real patience you have there doing all those runes. They came out great but wow…that would have killed me. Your work with the airbrush is very nice too and I like how you washed it to simulate the glow effect. Now we’ll just have to see if it is capable of freezing Nihalotrs….I’m going to say NO b/c those guys are just that tough, but we’ll wee. Look forward to your next project and seeing this think up close.
Love your work, Masterseck. Those Gems are really over the top!
Thank you, gents.